5 Creative Uses For Your Old Raspberry Pi
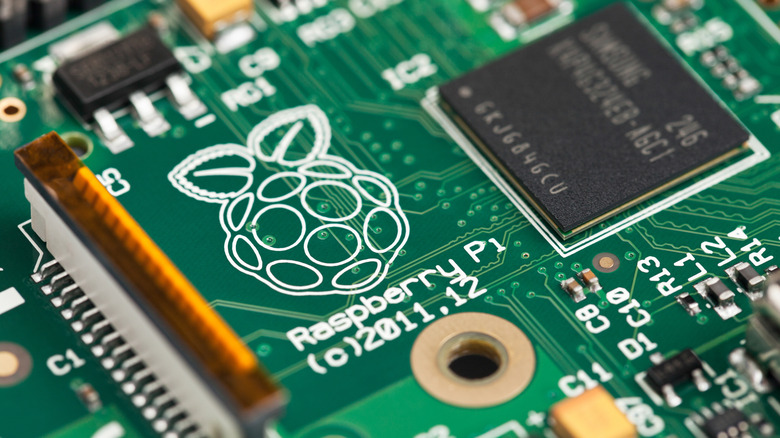
Every current Raspberry Pi model is capable of incredible things if you just put your mind to it. You can start with 10 easy Raspberry Pi projects that only require basic gear, then level up to the big ones that take a whole weekend, some programming, and specialized extra hardware. If you're reading this, you probably already know that your Raspberry Pi can be made into a deceptively powerful desktop PC, a retro game console, or even a replacement for your Google Chromecast or TV Streamer. Suppose you have an old one that you bought secondhand, or that's collecting dust, unused, in a drawer. What sorts of things can you do with it?
Raspberry Pis keep getting more powerful every year, to the point where one of the most underrated features of the Raspberry Pi 5 is a fan to keep the board cool under heavier workloads. However, even the more "dated" Raspberry Pis are plenty capable of complex projects. These five project examples are just a few of the unique ones we think you should try.
A portable router
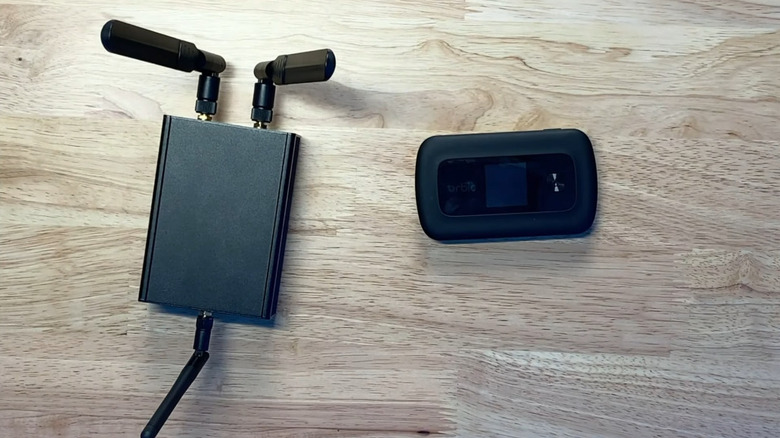
Wireless travel routers that keep you connected on the go are a game changer for travel, but they aren't cheap — and that's before you even factor in the mobile plan. Luckily, a Raspberry Pi has the potential to be its own mobile hotspot/router. YouTuber Dev Odyssey provides an in-depth tutorial on how to create one. For this build, Dev Odyssey uses a Raspberry Pi CM4-4G Plus Board, Sierra Wireless AirPrime modem, CM4 carrier board, 4G LTE antennas, pigtail connectors, and a case — but you might be able to get away with different alternatives for your Pi model or modem. Building the hotspot couldn't be easier. Slot in the CM4 and modem, attach the pigtails to the modem and antennas, pop it inside the case, and it's ready to go, hardware-wise.
On the software front, you'll be using OpenWrt, a popular distribution of Linux designed specifically for routers. Dev Odyssey notes that it was a mostly painless experience getting the drivers up and running, but your mileage may vary depending on the hardware you choose for the build; he had to enable USB manually since the CM4 doesn't have it enabled by default.
Once complete, Dev Odyssey says that his router performed as well as a dedicated Verizon hotspot. He admits that while the hotspot can't compete with a dedicated portable hotspot in terms of portability, aesthetics, and user-friendliness, it's a million times more customizable and can work as a travel router or just a plain ol' router at home. Using OpenWrt ensures your router is more stable and secure than whatever outdated router your ISP provides. You should replace your Wi-Fi router on a regular basis anyway, so a Raspberry Pi can be a decent replacement.
A weather station
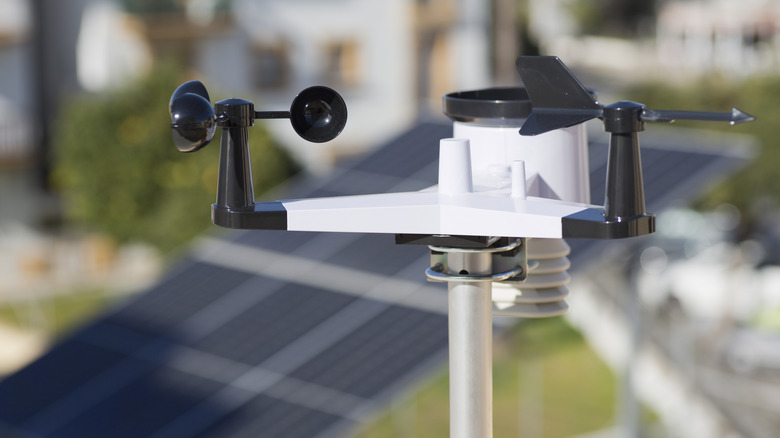
There are a ton of great weather apps for iPhone, but you could get a greater appreciation for meteorology — and a much more personalized read on the weather — with your own weather station. This one comes courtesy of Raspberry Pi's HackSpace. Ben Everard shows us a build using Pimoroni's Weather HAT; note, this was out of stock when we checked, and Pimoroni has stopped supplying the sensor kit. You'll either need to find different sensors, or buy a used Pimoroni sensor kit. Other builds exist that don't require the Weather HAT, but as project creator Ben Everard says, the Weather HAT is an easy, all-in-one solution.
In this instance, Everard used a Raspberry Pi Zero W loaded with Pi OS. You'll then install Pimoroni's Weather HAT software; Everard recommends setting up SSH beforehand, both to install this software and manage the Pi remotely in the future. Beyond that, it's basically plug-and-play. After that, you only have to run a simple Python script to get basic readings from the HAT on its built-in screen. You can test that it's working by manipulating the sensors with your hands. Perhaps the most difficult part will be figuring out where to place it, and ensuring the Raspberry Pi is protected from moisture. Everard also provides a guide on how to create a web dashboard and have your Raspberry Pi serve all the weather data it gathers over time.
It bears repeating, but you don't need the Pimoroni Weather HAT to build a decent weather station. This guide by SpacemanLabs at Instructables goes in-depth on a more DIY variety. Sensors for wind direction and speed, humidity, rain, and pressure can be purchased individually.
A game server

It's a sad reality that once your Xbox game servers shut down, the online multiplayer aspect of that game effectively dies forever. PC gamers have the upper hand here since it's common for people to create community servers to play unsupported games or run modded servers — but running a server ain't free. If you'd rather not pay to host it or buy dedicated hardware, your old Raspberry Pi may do the job quite nicely. Christian Cawley shows us how to make a simple Minecraft server with a Raspberry Pi 3 or 4.
Either connect a monitor, keyboard, and mouse to the Pi to set up the server, or remote in with SSH. Install Raspberry Pi OS. Once it's up and running, the Raspberry Pi configuration tool can configure it to be a server. With SSH, it only takes a few tweaks to the settings in the config menu. Next, you'll be installing Cloudburst's Nukkit server. Cawley recommends limiting certain parameters for better performance, such as setting the cap for max players to 10. Provided you've done everything correctly, your Raspberry Pi will now appear on the local network, ready to be connected to. Add a new server with the correct name, IP address, and port number, and voila, you can start playing.
Cawley adds the caveat that while you can make a Raspberry Pi into a game server, it's going to be fairly limited in what sorts of games it can host and how many people can play together at the same time. Minecraft is a natural choice because of its low system requirements. You might be able to get your Raspberry Pi to run older games and indie titles, but not newer, more demanding ones.
A cloud-streaming gaming device
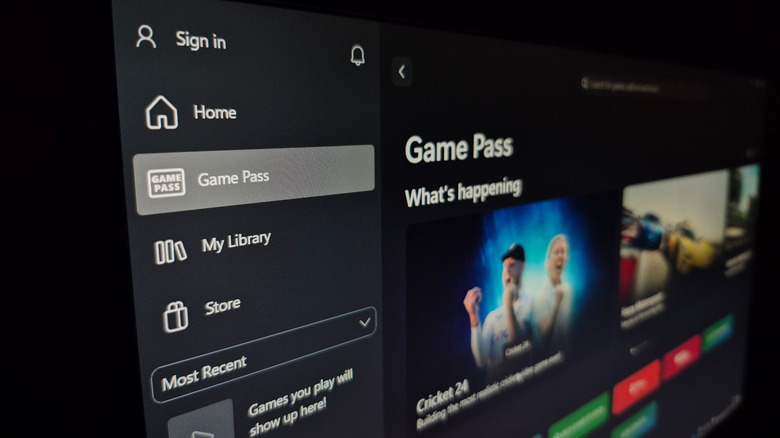
The Raspberry Pi is an excellent choice for retro gaming projects, but aside from indie titles, it couldn't hope to run modern AAA games. So instead, you could make your Raspberry Pi a device for streaming games to a monitor or television — just as you might on other devices with services like Amazon Luna, NVIDIA GeForce Now, and Xbox Cloud Gaming. Emmet from Pi My Life Up shows us how to make it an Xbox Cloud Gaming device. If you have a capable gaming PC on your home network, then this device could stream from it over Steam Link or an open-source alternative like Moonlight.
For this build, Emmet used a Raspberry Pi 400. Ideally, you should be connected over Ethernet to limit latency. Basically, all you'll be doing is installing Chromium in order to visit the website for your streaming service of choice. Since the Raspberry Pi comes with an HDMI port, you can plug it into your TV, monitor, or whatever else to make that display a game-streaming-ready device. There's a bit more setup involved if you're using Raspberry Pi OS Lite, but it does create a streamlined experience that boots right into the streaming service's interface. Plus, you won't need a huge microSD card because you'll only be installing Chromium — no big game files.
Consider this an excuse to buy yourself one of the best gaming controllers compatible with PC. We highly recommend a wired controller or a controller that supports wired mode since this would produce the least possible amount of latency. Running a controller with Bluetooth or 2.4Ghz adds more latency on top of the latency between your device and the game server, resulting in noticeable input lag that may make some games unplayable.
A network-wide ad blocker

The internet is such an ad-ridden mess these days that an ad blocker isn't just a cool Chrome extension worth trying with your browser, it's practically a necessity. It protects you from malware in addition to making everything load faster and look cleaner. As luck would have it, your Raspberry Pi could prevent ads from reaching any device on your home network. You'll do so with the help of a project known as Pi-hole.
Unlike an ad blocker, which hides ads, Pi-hole stops them earlier down the pipeline. Basically, Pi-hole filters all incoming traffic, stripping out any known ad domains — including those known for other problematic content, like malware and spam — so they never reach your device in the first place. This means that ads get blocked even on devices that have no means to do so. Installing Pi-hole has been made as simple as possible. Here's a Micro Center tutorial showing you exactly how. We're not kidding — this is something you could do in an afternoon. Once you've got a supported distro like Raspberry Pi OS, you can run through the automated installation of Pi-hole and let it configure everything for you. Then you'll head into your router or device settings and force traffic through the DNS server address your Pi-hole is using. That's basically it.
In addition to blocking all those unwanted domains, Pi-hole gives you granular control over every aspect of the blocking process. You can see statistics on blocked websites, specifically blacklist certain domains and whitelist others, and more. The benefits? Every device on your network will no longer see ads, even if it doesn't have (or support) an ad blocker.