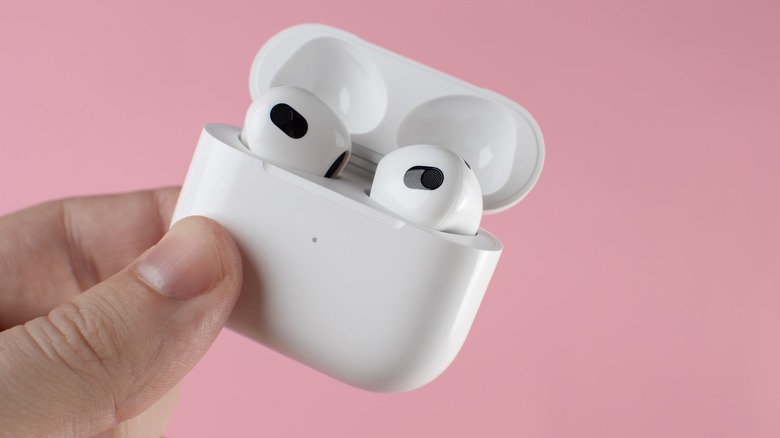
11 Apple AirPods Tips And Tricks That Will Change How You Use Your Headphones
We may receive a commission on purchases made from links.
In an era where wireless audio has become increasingly popular, Apple AirPods have emerged as one of the leading accessories around the world. Its innovative features and seamless integration have revolutionized how we listen to music and interact with Apple devices. While there have been many attempts by other manufacturers to create an earbud competitor, none have found that perfect balance of prestige, exceptional build quality, and continuous support.
If you have owned a pair of AirPods for years, or upgraded from generation to generation, you might assume you know everything these little guys can do. However, there are some Apple AirPods tips and tricks that will change how you use your headphones. From turning your AirPods into makeshift hearing aids to pairing them with your PS5, these pointers prove AirPods are the most innovative earbud on the market. Here's how to take your listening experience to the next level.
Transform AirPods into hearing aids

Did you know your AirPods can be used for more than just listening to music? "Live Listen" is a unique feature that amplifies sound and allows users to transform their AirPods into basic hearing aids. By using your iPhone or iPad microphone, "Live Listen" acts as a megaphone that sends sound directly to your AirPods.
Of course, this feature can be used for much more than increasing audio during a conversation. Ideally, users who are hard of hearing can place their iPhone or iPad near someone's mouth to amplify the conversation. However, if your hearing is satisfactory, you can still use "Live Listen" in noisy areas or as some type of spyware. For example, leave your iPhone on the table, walk around the room, and you'll be able to continue listening to your friends!
To transform AirPods into hearing aids on your iPhone or iPad, open Settings and select Control Center. Then, scroll down until you find the Hearing button and tap the (+) Add button. Tap Settings again to save these changes. Now, open the Control Center, tap the Hearing button, and select Live Listen. Place your iPhone or iPad near the person you want to listen to. Adjust the volume where necessary. Keep in mind that for "Live Listen" to work, a Bluetooth connection will need to be maintained. You can't go wandering too far.
Pair AirPods with non-Apple devices

Since their initial debut in 2016, AirPods have quickly become one of the most popular earbuds around. Contrary to popular belief, AirPods can actually work with any device that has Bluetooth connectivity, including Android phones, Windows laptops, and even certain smart TVs.
However, there is a catch. While you can listen to music and talk, you will lose out on some exclusive Apple features. Examples include Siri not being available on non-apple devices, ear detection not working, the inability to view battery life for each individual earbud or the charging case, and reduced double-tap functionality. But, as far as listening to audio and taking calls, AirPods can still function as a normal headset, allowing users to enjoy the crisp and clear sound signature of one of Apple's best products. So, if AirPods have been the only thing holding you back from trying out the Android platform, fear not.
To pair AirPods with non-apple devices, turn on Bluetooth on your non-Apple device. Put your non-apple device into pairing mode. With your AirPods in their case, open the lid, and press and hold the setup button. Wait a few seconds until the case lights start to flash white. Go back to your non-apple device and wait for your AirPods to appear on the available Bluetooth device list. You can now connect your AirPods to your non-Apple device.
Announce notifications

Whether you're on the road, or you prefer a hands-free experience, Siri and your AirPods can announce notifications from various apps as well as incoming calls. Supported apps such as "Messages" will have their content read out loud by Siri, and you'll be able to dictate a reply. No prompt is needed, you simply need to speak and Siri will do the rest.
AirPod announcements can also be useful for setting reminders. For example, let's say you've created a location-based shopping list reminder. When you're in the store, Siri will activate and will read out your shopping list. Furthermore, if someone is calling, Siri can announce their name. You can then decide whether to answer or not, without wasting time by taking out your iPhone. To announce app notifications on your AirPods, make sure your AirPods are connected to your iPhone/iPad. Then, open the Settings app and tap Notifications. Select Announce Notifications and choose an app of your choice. Toggle Announce Notifications.
If you'd like to announce caller names on your AirPods, make sure your AirPods are connected to your iPhone. On your iPhone, open the Settings app and tap Siri & Search. Select Announce Calls and choose Headphones only. When a call comes in, Siri will ask if you want to answer it. Reply "Yes" to accept or "No" to decline. Note that Siri will not announce notifications if you're currently using your iPhone or iPad. The Apple device must be locked for the feature to activate.
Customize double-tap

If you own a 1st or 2nd generation pair of AirPods, you should be familiar with the double-tap feature. When you double-tap your AirPod, it should either activate Siri, play/pause your music, or skip/rewind a track. You may be surprised to find that you've only had access to one of these functions and didn't realize the rest existed. But, in fact, the double-tap feature is fully customizable, down to each individual AirPod.
This allows you to play/pause music on your right AirPod and skip/rewind tracks on your left AirPod. From a functionality perspective, it's always a good idea to keep Siri on at least one AirPod, as you can issue all commands through voice prompts. For example, "Hey Siri, skip this song," or "Hey Siri, Pause" includes all double-tap actions.
To customize the double-tap feature on AirPods, make sure your AirPods are connected to your iPhone or iPad. On your iPhone or iPad, go into the Settings app and select Bluetooth. Tap the Information (i) icon next to your AirPods and find the Double-Tap AirPod heading. Choose what the left or right Airpod double-tap function does. Tap the back arrow and your preferences will be saved. While the double-tap feature is useful, there may be circumstances where you'd prefer to turn it off entirely. You can therefore disable double-tap and turn it back on when you're ready. Following the same instructions above, tap the information (i) icon, and select "Off" for each AirPod.
Remove earwax from your AirPods
As you continue to use your AirPods, you may experience a buildup of earwax over time. Not only is this an unpleasant sight, but it can also affect the sound quality and the overall longevity of your device. The more earwax that accumulates on your AirPods, the lower your output volume will become. This may force you to turn up the volume, putting additional strain on the driver, and reducing the AirPods lifespan at a faster rate.
Cleaning your AirPods should be a delicate process. Too much force or the wrong cleaning substances can lead to irreparable damage. Apple has therefore created a specific guide to keep your AirPods functioning at their best.
To clean and remove earwax from your AirPods, clean the case of your AirPods with a damp lint-free cloth, followed by a separate dry lint-free cloth. Do the same for the actual AirPods. Use a soft brush to remove any debris on the external charging port on your AirPod case. For any additional stains, you can swap out the lint-free cloths for isopropyl alcohol wipes. When cleaning the speaker area, use a dry Q-Tip to remove earwax by lightly brushing the area. If the earwax is particularly stubborn, use a small toothpick around the edges of the speaker port. Do not stick the toothpick into the speaker mesh.
Get a detailed battery reading
One of the biggest drawbacks of using wireless AirPods is the limited battery life. If not monitored correctly, users will have to stop whatever they're doing and wait for them to charge again. Apple has therefore created three easy ways for Apple users to check their AirPods and charging case battery life. To check your AirPods battery life using the casePlace your AirPods inside the case, bring the case close to your iPhone or iPad. After a few seconds, your Apple device will display the battery level of both the AirPods and the case itself. If your AirPods are charging, the current level will also be displayed.
You can also check your AirPods battery life using the Batteries widget. Tap and hold any empty spot on your Home screen until your app icons begin to shake. Select the (+) plus icon at the top of your Apple device. Scroll through the available widgets and tap Batteries. Tap Add Widget and drag the Batteries widget to your preferred location. Now open the Batteries widget to check your AirPods battery life. Note that you don't need to put your AirPods in their case to check the battery life.
FInally, you can check your AirPods battery life using Siri. With your AirPods in their case, simply ask "Hey Siri, how much battery do my AirPods have?" If you are wearing your AirPods, you will have to ask about the battery life of your AirPods or charging case individually.
Share audio with two pairs of AirPods

We've all been in a situation where our friend or sibling wants to know what we're listening to. Reluctantly, we will then have to hand over an earbud and hope their hygiene is on par with ours. Apple users can now connect up to two pairs of AirPods on their iPhones and iPads. Once both pairs of AirPods have been connected, the iPhone or iPad holder will be able to share music, podcasts, films, or any other audio source for both users to listen to. Additionally, they will also be able to control the audio on both AirPods, adjusting the volume to each user's preference or turning it off entirely when they're finished.
To connect two pairs of AirPods to a single iPhone or iPad, connect your AirPods to your iPhone or iPad. In the Control Center, select the AirPlay button. You can also select the AirPlay button in the app you're currently listening to audio in. With AirPlay now enabled, take the second pair of AirPods and hold them close to your iPhone or iPad. Tap Share Audio.
To control audio and stop sharing on two pairs of AirPods, open the Control Center and look for the two AirPod volume sliders. Drag them to adjust the volume for each user's preference. To stop sharing audio, select the AirPlay button in the Control Center or current app. Alternatively, tap the checkmark next to the second pair of AirPods in the control center.
Amplify audio using Headphone Accommodations

Available on iOS and iPadOS 14 and later Headphone Accommodations lets Apple users amplify soft sounds and adjust certain frequencies for a more tailored listening experience. Whether you want a warmer sound signature or you'd like to clear up audio, Headphone Accommodations can unlock your AirPod's true potential.
To set up Headphone Accommodations, go to your Settings app and search for Headphone Accommodations. toggle Headphone Accommodations. Once enabled, choose a Custom Audio Setup or a Preset. You can also set up a Custom Audio Setup on your iPhone or iPad. Make sure Headphone Accommodations have been enabled. Go to your Settings app and select Music. Turn off any EQ settings and go to the Settings app and select Accessibility. Tap Audio/Visual and set the Balance slider to the center or 0.00. Connect your AirPods to your Apple device and sit in a quiet place. Open the Settings app again, and select Accessibility, Audio/Visual, and Headphone Accommodations. Under Headphone Accommodations, tap Custom Audio Setup, and follow the on-screen instructions. Finally, select Use Custom Settings to save your custom settings.
To enable Headphone Accommodation Presets on your iPhone or iPad, make sure Headphone Accommodations have been enabled. Under Headphone Accommodations you will find a range of manual options. Scroll through the "Tune Audio For" presets to enhance, refine, or boost certain frequencies. Alternatively, you can change the "Level" presets to amplify soft sounds. Finally, choose whether to apply these settings to phone calls or media playback.
Find lost AirPods

AirPods are relatively small and can easily go missing. Fortunately, Apple offers several ways to locate your AirPods using their "Find My" feature. This feature must be activated on a paired device (such as an iPad, iPhone, or Mac) before your AirPods go missing. It then automatically links to your AirPods for future use. To find lost AirPods on your iPhone or iPad, open the Find My app and tap Devices. Select your AirPods to see their current location or last known location. Tap Directions if necessary. If your AirPods are in different locations, the map will show one at a time. Once you locate the first one, put it back in the case, refresh the map, and your other AirPod should appear.
On your Mac, open the Find My app and select Devices. Select your AirPods to see their current location or last known location. You can then input the coordinates into your iPhone for directions.
Using iCloud, sign in to iCloud using your Apple ID. Select Find iPhone followed by All Devices. Choose your AirPods from the list. The current or last known location will then be displayed. To make AirPods play a sound, open the Find My app and select Devices. Tap the name of your AirPods, and then toggle Play Sound. On iCloud, log in and select All Devices. Choose your AirPods and then toggle Play Sound.
Connect your AirPods to a PS5

It's no surprise that many users want to try them on their PS5. However, Sony only allows specific Bluetooth accessories to work on their console, so although AirPods may be discoverable, no audio will be transmitted.
However, there is now a solution to this hiccup, which comes in the form of a third-party adapter. With a Bluetooth 5.0 wireless audio adapter (such as the Skull & Co. AudioStick) users will be able to connect their AirPods to their PS5, enjoying both in-game sounds and voice chat support. Plug the Bluetooth adapter into your PS5's USB-C port. Place your AirPods inside the case, and enter Pairing Mode. Press the pairing button on the Bluetooth adapter and wait for the LEDs to stop flashing. When the LEDs are static, a connection should now be established.
If you don't want to buy a Bluetooth adapter for your PS5, you can try connecting your AirPods to your Smart TV for PS5 audio. Note that depending on your Smart TV Bluetooth version, the sound quality may suffer, in addition to added latency when compared to a Bluetooth 5.0 adapter. Look for a Devices or Accessories tab in the menu to connect your AirPods to a PS5 using a Smart TV. Put your AirPods into pairing mode. Select Scan For Devices on your Smart TV, and wait for your AirPods to sync. Now, change your audio output to your AirPods.
Activate spatial audio for surround sound

Apple spatial audio with dynamic head tracking, is a virtualized surround sound format that adds height and rear audio effects to audiovisual content. By utilizing your AirPods and compatible Apple device, spatial audio will place you right in the action while watching movies and add enhanced detail when listening to music. Note that spatial audio only works on selected iPhones, iPads, and Apple TVs running on iOS, tvOS, or iPadOS 15 or later.
First, connect your AirPods to your iPhone or iPad. Open the Control Center, and then tap and hold the Volume Control. Enable Spatial Audio while you're listening to multichannel content, or Spatialize Stereo if you're listening to two-channel stereo content. Tap the Head Tracked option if you would like to add dynamic head tracking to your spatial audio. If you would like to turn off head tracking and have spatial audio only, tap Fixed.
To activate spatial audio on your Apple TV, first connect your AirPods. Then, go to Settings, Remote Devices, Bluetooth, and select your AirPods. Enable Spatial Audio while you're listening to multichannel content, or Spatialize Stereo if you're listening to two-channel stereo content. To do the same on a Mac, after connecting, select the AirPods icon in the menu bar. Turn on Spatial Audio if you're listening to multichannel content, or Spatialize Stereo if you're listening to two-channel stereo content. Click Head Track to add dynamic head tracking, or Fixed to maintain Spatial Audio only.