15 Tips & Tricks To Get The Most Out Of Your Android Phone

Android may be the most popular mobile operating system on the planet, but most people probably aren't taking advantage of everything it can do. Google has packed Android full of features and functionalities over the years, but most people set up the basics and never dig any deeper once they get their phone out of the box.
For those who want to take full advantage of their Android phone, we've rounded up 15 of the most effective tips and tricks to maximize your productivity, enhance your phone's ease of use, and more. We wanted these tips to be things anyone with a phone running a recent version of Android can take advantage of, so there won't be any Galaxy or Pixel-exclusive features here.
We also wanted this list to be useful for the widest number of people, so we tried to ensure that none of these goodies were particularly niche. From hidden Google Assistant features to backup methods and even one feature that could save your life, there's a lot to cover, so let's dive in.
Google Assistant App Shortcuts
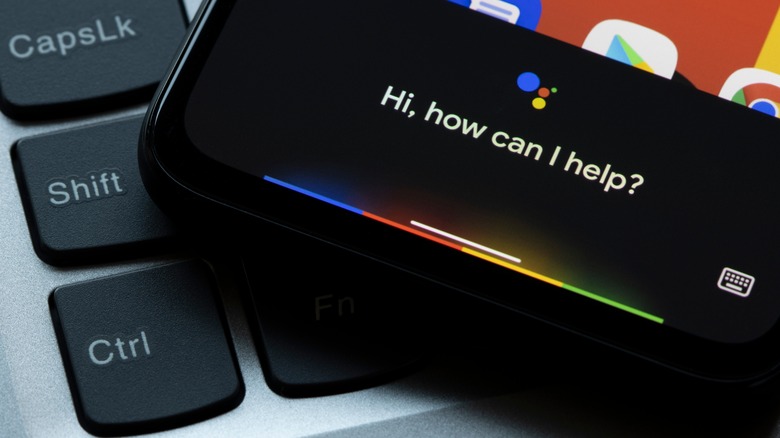
Most Android users know how convenient Google Assistant can be. The voice assistant can send text messages, launch music playlists, and even remember your parking spot. But what you probably didn't know is that lots of popular apps have enabled special voice shortcuts in Google Assistant for specific functions.
Buried in Google Assistant settings is the option to turn on app-specific voice shortcuts. For example, you can say, "Hey Google, chats," and it will open your Instagram DMs. Popular apps that support these shortcuts include Instagram, YouTube, Reddit, DoorDash, and Tinder, to name a few.
To enable these convenient shortcuts, open your Google Assistant settings. One quick way to do so is by telling Google Assistant, "Assistant settings." From the settings page, navigate down and tap "Shortcuts." You'll see a few suggestions based on your most used apps, with all supported apps listed underneath. Tap on the app you want to enable shortcuts for, then tap the plus button next to any that seem useful. An Assistant dialogue will pop up confirming your choice, with the option to undo it if you tapped by mistake.
Google Assistant Routines
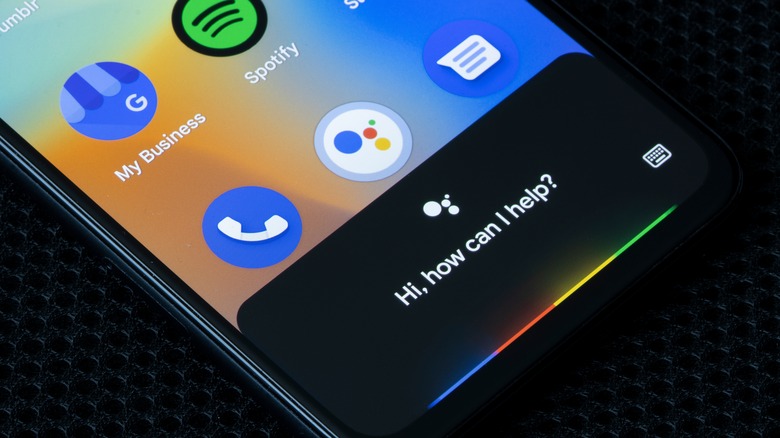
Assistant Routines are powerful, voice-triggered automation tools that allow you to assign a series of actions to a single command. The most basic example would be something like, "Hey Google, good morning," to take your phone off of Do Not Disturb, turn on the lights, and read out a news summary. You can get as complex or shallow with the routines as you like, but if you haven't explored them, you could be leaving a lot of your Android phone's functionality on the table.
To set up a routine, open Google Assistant settings. One quick way to do so is by telling Google Assistant, "Assistant settings." From the settings page, navigate down and tap "Routines." You'll see a big button up top to create a new routine, with some suggested routines right below. If you tap the button to create a new routine, you'll first be prompted to decide whether it can only be edited by you or by your Google Home household.
You'll then be able to name the routine, select the trigger phrase, and add the actions you want. Nearly everything the Assistant can normally do can also be added to a routine, and you can set custom phrasing for any nonstandard actions. You can even set a delay between actions for any use cases that might benefit from that functionality.
Google Lens
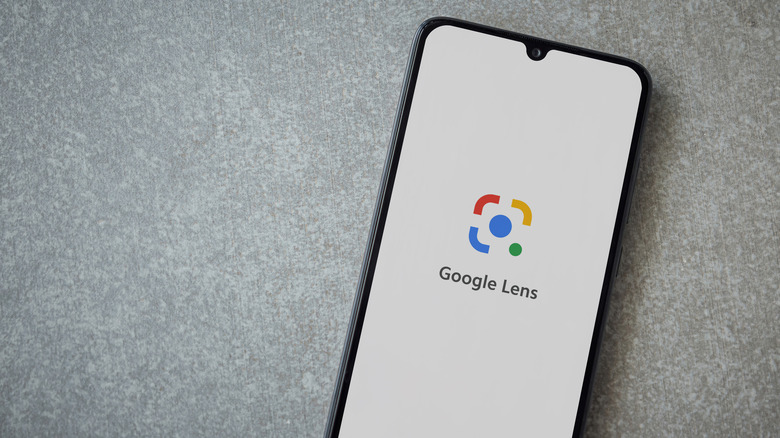
Google Lens is kind of like reverse Google Image search in real life. You snap a photo of something with your camera or select a photo from your gallery, and Google scans the image to identify objects and text. For example, you can snap a picture of a landmark and find out its history or take a picture of a product to find sales listings.
Among the many capabilities of Google Lens is the ability to identify text in an image, which can then be copied, searched, or even shared as plain text to your computer if you're using Google's Chrome browser. Lens is also great at identifying products, though it works best with clearly labeled items such as packaged food. And if someone hands you a business card, you can use Lens to scan it and quickly use that information to create a new contact. You can even take advantage of Lens to identify plants, animals, or bugs you come across.
Google Sound Search

How often do you find yourself scrambling to open Shazam in time to identify a song playing at your favorite coffee shop, only for it to end by the time you've opened it? Well, if you're an Android user, you can say goodbye to Shazam by using Google Sound Search instead.
Sound Search has identical core functionality to Shazam, listening for music in your environment and identifying it onscreen. You can trigger this functionality by asking, "Hey Google, what song is this?" "Hey Google, what's this song?" or other similar constructions. You can also add a shortcut to your home screen so you don't have to try using your voice in a crowded bar.
Where Sound Search really becomes appealing, though, is when you realize that you don't have to play a song at all. You can sing, hum, or whistle the song's melody instead, and Google will still attempt to identify it. If you've ever had a song stuck in your head but can't remember what it is, you can just sing the part you remember.
In our experience, singing or humming the song works less often than playing the real thing, but that's probably more to do with our vocal talent and musical memory than with Google, and the feature does indeed seem to work most of the time. We tried halfhearted renditions of popular songs, even mixing up the lyrics, and Sound Search still matched our terrible singing to the correct song.
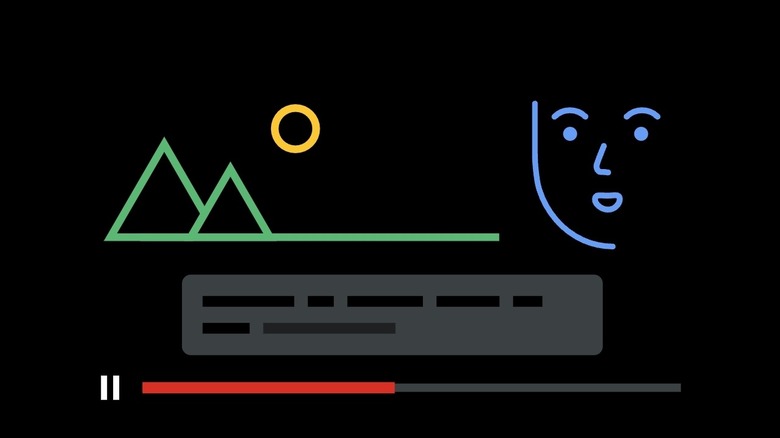
Live Caption
It's a well-documented phenomenon that accessibility features designed to assist certain groups of people can prove useful for other people as well and see mass adoption. For example, weighted blankets were invented to aid people with autism, PTSD, and similar conditions, but are now used by many people for other reasons.
Captioned content is a necessity for people with hearing disabilities, but plenty of people can benefit from Android's Live Caption feature, which listens for speech and captions it onscreen. Live Caption works across the entire phone and even works with the volume turned off, so you can watch video content in a waiting room without disturbing people around you or "read" a podcast while you're on the train if you forgot your earbuds.
To enable Live Caption, head into Android's accessibility settings and tap on Live Caption. Along with the option to turn it on, you'll also see settings to replace profanity with asterisks and to include captions for sounds like laughter or applause. There's also an option to enable Live Caption in calls, a massive win for people with hearing disabilities who still need to make phone calls.
App timers

Are you tired at work because you stayed up all night watching TikTok? As the apps we use each day design new and better ways to keep us addicted to our phones, Android has tried to keep pace with a suite of wellness features, among which are app timers that lock you out of apps of your choosing after an allotted amount of time spent on them. You can choose a hard time limit or allow yourself to add more time in five-minute increments when the timer runs out, kind of like the snooze button on an alarm.
To set up app timers, head to Settings, then to Digital Wellbeing. You'll see a chart where you can see how much time you've spent in each app and select apps to add timers to them. For those with Samsung phones, you'll find this setting in a separate menu on the main page of Digital Wellbeing.
Once you've run out of time in an app that has a timer set, the app will automatically close and the icon will dim on your screen. App timers reset every day at midnight. You can always delete a timer to restore access to the app.
Notification history
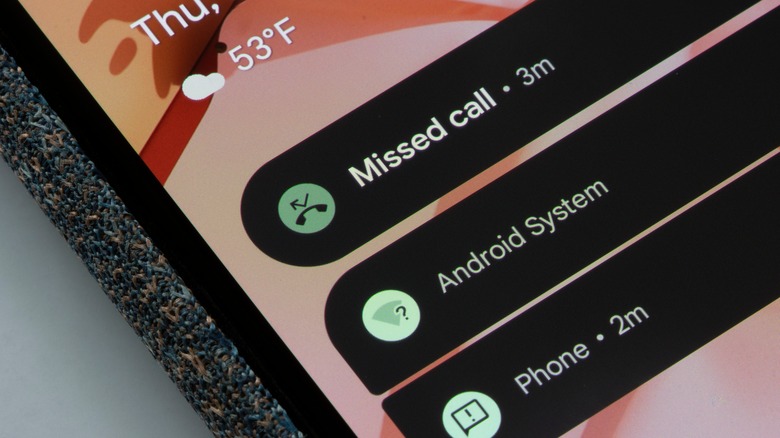
Have you ever accidentally swiped away an important notification on your Android phone and felt a sinking moment of panic as you realized that information is gone forever? Have you heard your phone ding and found yourself scrolling through what feels like infinite notifications trying to find the culprit? Simply turn on notification history in settings, and you'll have a chronological, scrollable, interactable list of every notification you've received.
To see notification history, head into the Notifications section of your Settings app and tap on Notification history. You'll see a toggle to enable notification history. After that, you can head back to that page anytime you want to see a chronological list of all your previous notifications. On Samsung phones running One UI, you'll need to tap on Advanced settings from the Notifications page of Settings and select Notification history from there. Samsung phones also have enhanced notification histories that can be activated through the NiceCatch module in the Good Lock application.
Sideloading apps
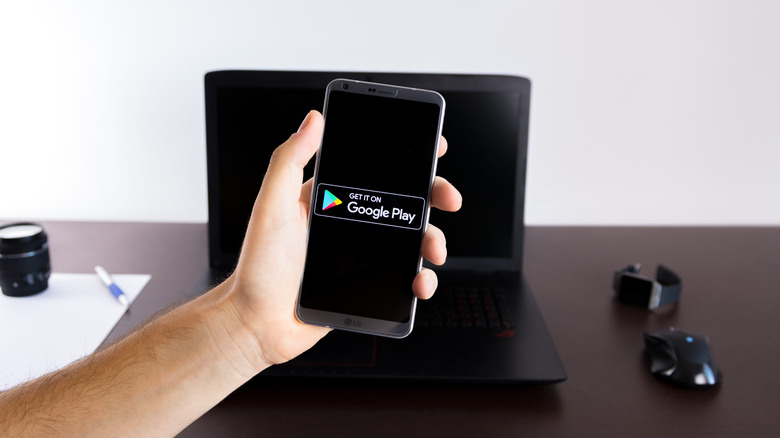
One of the biggest controversies in tech over the past decade has been the ironclad control Apple and Google have over their respective app stores. Any app you buy through App Store or Google Play is subject to strict regulations from those companies before they can be listed for download. Apple is particularly vociferous when it comes to controlling its marketplace, and both companies have been brought to court by Epic Games for those practices.
However, one crucial difference between Android and iOS is that the former does not restrict users from installing apps from the platform's proprietary storefront. Android users can install apps downloaded from any source, and third-party app marketplaces for Android abound. Amazon even has its own app store, which can be used on any Android phone.
We urge caution when installing APKs for any app not vetted through the Play Store. Even those sold in the Play Store can contain malware, but you're far more likely to encounter malware in an unverified app. However, a plethora of apps are available across the web, so if, for example, there's an old app that no longer exists in the Play Store, you can likely find an APK file hosted in places such as enthusiast forums.
You'll need to allow third-party apps to be installed before you can install one, which must be enabled in developer settings on some devices. You should be prompted to take those steps when you tap on an APK to install it.
Disable bloatware apps
If you bought your phone from a carrier, or if you bought a budget Android device, chances are it came with a bevy of preinstalled bloatware apps, from microtransaction-laden games you'll never play to carrier apps that want to be the middleman between you and your data. Even more frustrating, many of these apps stubbornly cannot be uninstalled. For those apps, there is at least the option to disable them, making sure they cannot run and won't show up in your app drawer.
To disable an app that cannot be uninstalled, go to Settings, then Apps, then find the app you want to disable from the resulting list. Tap on it to go to its info page, and you should see the option to Disable at the bottom of the screen in the place where the Uninstall option would usually appear. You may be prompted with a pop-up telling you that disabling the app can cause errors and asking you to confirm your choice. Confirm your choice, and the app will become a ghost on your phone, still installed but taking up minimal space and unable to function.
Smart Lock
Security is one of the most important aspects of smartphone ownership. A password, or even a PIN, can be the barrier to your most closely kept secrets and personal data. But it does get tiring to constantly unlock your phone. Even with biometric security to make the process quicker. What many people don't know is that, for those with Android phones, there's a middle ground in the form of a feature called Smart Lock.
Among the many ways to unlock your Android phone without a password, Smart Lock keeps your phone unlocked when it's on your person, connected to trusted devices, or in trusted locations. Importantly, it only kicks in once you've already unlocked your phone with a password, PIN, or biometrics to prevent malicious actors from connecting to your earbuds and getting a free pass into your device.
To activate Smart Lock, head into Settings, then tap Smart Lock. You'll be asked to confirm your password or PIN. Enter it, and you'll have the option to enable On-body detection, Trusted places, and Trusted devices. On-body detection uses your phone's sensors to determine whether you've kept your phone on you after last unlocking it and won't require you to unlock it again until you put it down. Trusted places let you create a geofenced area in which you do not need to unlock your phone until you leave the perimeter. Finally, trusted devices allow you to add your Bluetooth devices, so you won't need to put in your password again after the first time you unlock your Android phone while connected to them.
Emergency SOS

While this isn't available on older Android devices, it can be a lifesaver for those who have it. Once you've turned on Emergency SOS, pressing your power button five times in a row will contact emergency services (911) and share your location with them, share your location and send an emergency text to your ICE contacts, and record a video. You can pick which of those things you'd like to happen when you trigger the feature.
On most devices, you'll have the option to start a countdown before Emergency SOS activates once you've pressed the side key five times. You can also have a warning sound play. Both of these can be turned off if you're worried about being in situations where using it might alert someone dangerous to your presence or actions.
To activate Emergency SOS, head to the Safety and emergency section of your Settings app, then tap Emergency SOS. There, you'll find all the settings mentioned above.
Back up your device with Google
Digital life is, above all else, precarious. Data gets lost, erased, or corrupted. Devices are, unfortunately, a target for thieves, and they're often not durable enough to survive drops and other accidents. But one thing you can do to make your life easier is back your data to the cloud. Using your Google account, you can back up messages, apps, and files to make things easier when you switch phones or if your phone is lost/stolen.
To back your Android phone up with Google, head to the Google section of your Settings app, then tap on Backup. From there, you can enable Backup by Google One and choose which stuff you want to be backed up. You can back up your apps, photos and videos, text messages, call history, device settings, and Google account data. You can also select whether to allow the backup to happen over mobile data, an important setting for those with limited data plans.
When you get a new Android device, or if you perform a factory reset on your current phone, you can restore that data from the cloud after signing into the associated Google account on the device.
Free up space with Google Photos
Android phones are notorious for filling up their onboard storage rather quickly, which is doubly frustrating because not only do you run out of space for new photos and videos, but Android phones get slower when they're full. To save space on your phone —which could be a ton of space if you're a shutterbug — you can use a Google Photos feature that deletes media from your phone after it's been backed up to Google's cloud.
Before you do so, make sure your Google Photos backup quality is set to your liking. If you want to preserve all your photos and videos in their native quality without compression, ensure that you have Original quality selected in the Backup section of Google Photos settings. Important to note is that Google only offers 15GB of storage for free across all of its services, including Gmail. You may need to purchase a Google One subscription with more storage to back everything up before cleaning it off your phone.
Once you've taken care of all that, go back to the landing page of Google Photos, tap your Google profile picture icon in the top right corner, then select "Free up space." You'll see a button at the bottom of the next page telling you how much space you'll free up by deleting your onboard media. Tap it, follow any further prompts, and then enjoy all the extra space on your phone. So much room for activities!
Nearby Share
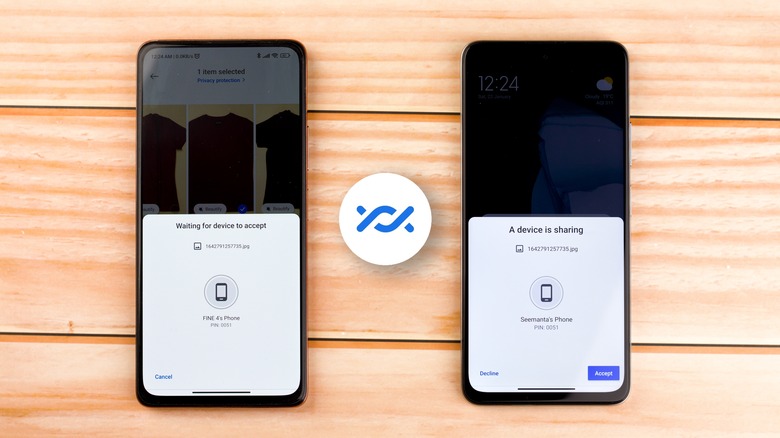
Tired of iOS users bragging about their AirDrop? Android has the same functionality in a feature called Nearby Share to quickly share files between your own devices or with friends. When you tap the Share button in most apps, you'll see the option for Nearby Share. Tap it, and you'll see all nearby Android phones that have their visibility settings expanded. Simply tap the device you want to share files to from the list. The recipient will be prompted to accept the transfer, and once they do, the files will be sent.
Before trying to receive files, make sure that your visibility settings are correct. Otherwise, you won't appear on someone's Nearby Share list. In Nearby Share settings, tap Device visibility. If you want to receive a Nearby Share from someone in your contacts, you can select Contacts. If you're receiving files from someone who's not in your contacts, or if you want anyone to be able to share things with you for some reason, select Everyone.
Recently, Google even launched a Nearby Share app for Windows. It doesn't appear to be as fast as sharing between Android phones in our experience, probably because it relies solely on Bluetooth for file transfers, but it's still useful if you have small files to send to your computer.
Change your Google Search widget
Many Android users keep the Google Search widget on their home screen for quick access to voice and text searches. It's there by default on many Android phones and provides an instant way to access Google, but it can be an eyesore on an otherwise pristine home screen setup with its default stark white appearance. However, if you're the kind of user who spends time customizing your home screen, Google hasn't condemned you to choose between functionality and aesthetics. You can fully customize the appearance of the Google Search widget.
In the Google app, tap your profile picture, then tap Settings. Tap the Search Widget option, then tap Customize widget. You'll see a preview of the Search widget overlayed on your current wallpaper. Below that, you'll see a row of tools allowing you to choose which version of the Google logo you want, the shape of the widget, its color, and its transparency level. Once you're done customizing, hit save in the top right corner. If at any point you want the widget to go back to default, head to the same page, and you'll see a button at the very bottom to reset the widget.