5 Easy Raspberry Pi Projects – No Soldering Required
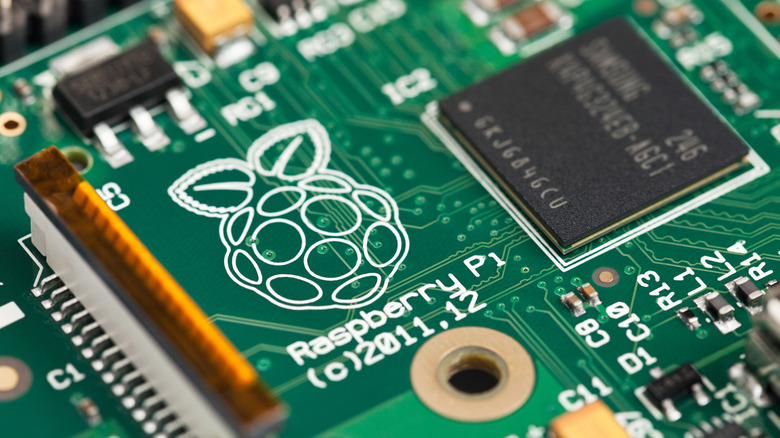
From automated cat shelters to unique video game controllers, a quick look online reveals a treasure trove of Raspberry Pi projects that sit somewhere between mad science and marvels of engineering. Sure, they are of dubious utility at best, but that only makes them look cooler. They also look extremely intimidating. The idea of building your own micro PC with an integrated Blackberry-style keyboard is exciting, but the reality of picking up the individual components, soldering them together, and writing the code necessary to make it all work? Honestly, it still sounds cool, but that doesn't change the fact that it's hard work.
But it doesn't have to be like that, at least not for your first Pi project. Not only do the Raspberry Pi projects in this article require zero soldering, they need basically no tools beyond the Pi itself, a micro SD card for storage, and (in some cases) a computer to prepare the software before installing it. You may also need HDMI cables, a mouse and keyboard, game controllers, and other common supplies. That's not nothing, but shopping for the right USB-C cable is not quite comparable to soldering, so you'll probably be fine.
Before getting started, we should acknowledge that, at the end of the day, a Raspberry Pi is just a small computer. All these projects are about installing custom software on a custom PC, which is why they can all be replicated with an old spare laptop, often for cheaper. The advantage of the Pi is that it takes less space and consumes less energy, which could be worth the extra cost. Plus, taking on a project like these can be a fun challenge for a technically minded person who wants to learn the basics of programming on a cute little computer.
Take care of ads with a Pi-Hole DNS sinkhole
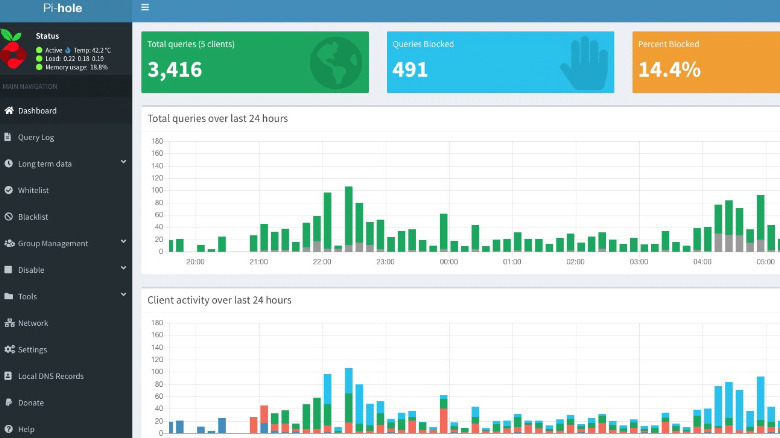
For this project, you'll need a Raspberry Pi with at least 512 MB of RAM and a micro SD card of at least 2 GB, ideally more. Installing a DNS sinkhole like Pi-hole sounds like a complicated tech project, but in its simplest form, it's something anyone can do and understand. In basic terms, a DNS request is the first step a server takes when it wants to connect to your computer. Sinkholes like Pi-hole just filter DNS requests based on a preexisting (and configurable) list of websites, denying certain services the ability to interact with your network. This can be used to increase internet safety, but let's be honest, it's mostly a convenient way to reduce ads online.
Blocking ads is a thorny topic. Most of the web is virtually free, but someone has to pay to host the servers, maintain the websites, and create content. The industry relies on ads to survive. On the other hand, online advertisement as it exists now is extremely distracting and invasive. Plus, there are lots of reasons to use an ad-blocker beyond removing ads. So, why would you use a Pi-Hole instead of an app or a browser extension?
The simple reason is that Pi-Hole works on an entire home network, since it interacts with the router and not individual devices. One installation can benefit computers, phones, and even smart TVs. You could also increase your network performance, although just slightly, because blocking ads before they're downloaded lets the network focus on more important functions. Plus, the installation is quite simple, as the hardest part is installing and updating the OS on your Raspberry Pi.
Host a private media center
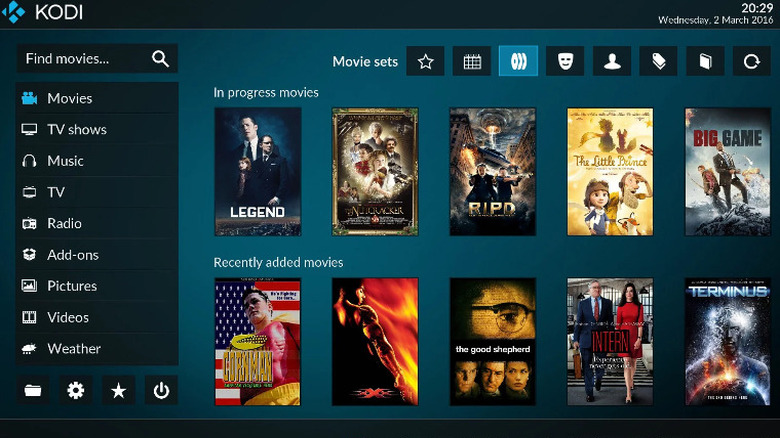
Streaming services have gotten a bad rap lately, with Netflix raising prices over and over again and the content becoming more and more fragmented in a million different subscriptions. Some found a streaming service that works for them, while others retired into physical media, but there is a third option: running a private media center. And as you'd expect, our friendly Raspberry Pi can help us here, too, thanks to the lightweight LibreELEC OS and the open source entertainment center Kodi.
For this project, you'll need a Raspberry Pi (users recommend the Pi 3 or above) and a decent amount of storage in the form of a large micro SD card. You'll also need an internet connection, cabled or otherwise. The first step will be to install LibreELEC on your machine. This shouldn't be too challenging, as long as you follow the steps on the project's official website. LibreELEC includes both the OS and Kodi, so there's no need to install the second separately.
Once LibreELEC and Kodi are installed and set up, you only need to load content on the device and connect it to your TV or monitor. The software will then ask you to connect to the local network and perform some procedures the first time it boots up, but it's all quite intuitive. Once you're done, you can install some plugins to add support for streaming services, simple retro-gaming capabilities, and more. With a bit of effort, you can even upload files to the Pi wirelessly through the local network.
Run a friends and family Minecraft server

You don't need us to explain what Minecraft is. If you step into a toy store or the kid's area in a clothing shop, you'll also know that the brand is still relevant today. It even has its own branded breakfast cereal. That's because Minecraft is fun, and it's even better with friends.
What's not fun is paying $7.99 a month to rent a Java Edition server (on top of the price of the game) and then jumping through a million hoops to install simple mods, just to have a private multiplayer Minecraft world. If you want to mess around with just two friends, with no mod support, and you all happen to have the newer Bedrock edition, it's $3.99/month instead. Or, you could dedicate a machine to running a server with nearly unlimited functionality — minus the cost and effort of setting up a Raspberry Pi, of course.
For this project, you'll need a Raspberry Pi 2 or above, a micro SD card, and an internet connection (ideally a cabled connection). The specifics of this project vary a lot. You may need more than 4 GB of RAM and a large micro SD card, depending on what Minecraft version you want to use, if you want to install mods, and how many concurrent players you're expecting. There are also a lot of ways to install and run a server, so we won't explain how to do so here. Scott Hanselman's blog has one of the easiest guides on the topic you could find, so if you want to minimize coding, you may want to start there.
Make a retro gaming console with RetroPie

Sure, these portable retro handhelds like the Miyoo Mini Flip look nifty, they're cheap, and they come already set up and ready to go (and are often loaded with games which they probably didn't license). But receiving a game console in the mail scarcely counts as a project. RetroPie, on the other hand, manages to feel like a bona fide expedition into the world of DIY, while having clean and clear documentation that guides you through the installation process in just a few paragraphs.
This project requires a minimum 8GB micro SD card, a video out connection (HDMI or RCA), a way to connect to the internet, and a controller (plus a way to connect it to the Pi). Most users suggest a Pi 4 or above with at least 2 GB of ram, but more is definitely better, in this case. While not explicitly stated by the project's documentation, we also suggest you come equipped with humble expectations. This is an affordable (read: underpowered), DIY retro console, and you'll be lucky if you manage to play half the games on the original PlayStation or Nintendo 64. Don't expect it to load PS3 or Xbox 360 games, even if these are now considered retro. Anything from the Atari 7800 to the Sega CD and some more should work just fine. Just make sure you know how to play these games on emulators legally.
If you have a capable PC or a (now way too expensive) Steam Deck in your home, you can upgrade your retro console by streaming any game from your main game machine to the Raspberry Pi with the Steam Link app, which is compatible with Raspberry Pi 3 or newer.
Keep home automation local with Home Assistant
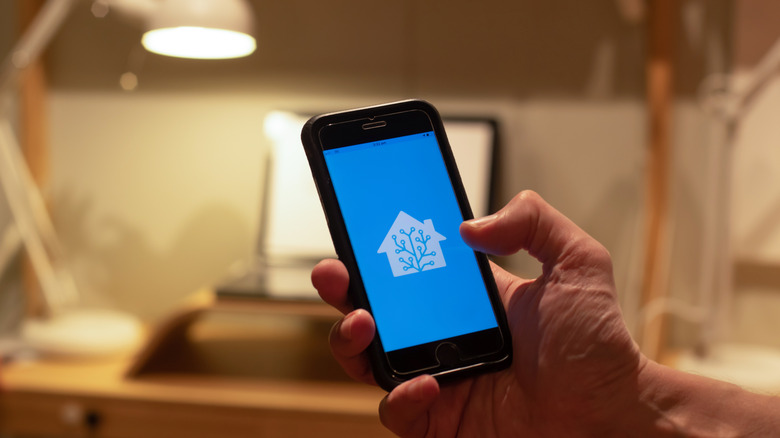
If you care about your privacy, a smart hub might not sound like a great idea. Smart home hacking is very real, and while it's possible to minimize the risks, a smart home hubs connected to the internet can always become a liability. And that's ignoring the data collection that happens directly on the smart hub. Recent changes to the Amazon Echo smart hub privacy policy even made sending voice recordings to Amazon's servers pretty much mandatory, as opting out disables quite a few of the voice assistant's functions.
Enter Home Assistant, an open source smart home solution with no internet connection required. To install Home Assistant on your Raspberry Pi (one of many ways to implement this software), you'll need a Raspberry Pi 4 or above with at least 2 GB of RAM, a good power supply, and at least a 32GB micro SD card. You'll also need an Ethernet connection during setup.
The easiest way to install Home Assistant on a Raspberry Pi is to use the official guide found on the smart home solution's website. The steps are all quite simple and require no coding experience, while setting up smart home automation might be more complex, depending on your situation. Using Home Assistant locally comes with some limitations. Many smart devices require an internet connection even if the smart hub is run locally, and ease of use is not comparable to other smart home hubs. If you're willing to put in the work, however, running your own hub can be both helpful and satisfying.