Google Chrome Features That You're Missing Out On
Google Chrome is the world's most popular web-browsing platform with an estimated user base of approximately 2.65 billion people as of 2022. Reasons for its popularity range from its easy user interface to its never-ending patches and features. It's no wonder that Chrome, consequently, has a browser market share of 65.7% worldwide, which means you're likely using it at this very moment.
As with anything we grow accustomed to, we develop certain habits and routines. This includes using the same search patterns, settings, and tools. With major updates rolling out every 4 weeks, you might not realize everything Google Chrome has to offer. This excludes the list of Chrome extensions currently available!
We've therefore accumulated the very best stock features you're missing out on that may further optimize your browser, increase productivity, and boost system performance. Whether you're a Chrome veteran or a fresh installer, you're bound to learn a few tips and tricks! Before we drop in, note that we're primarily talking about the desktop PC Chrome app, though similar functionality can often be found on the mobile web browser and/or the web browser in Chrome OS.
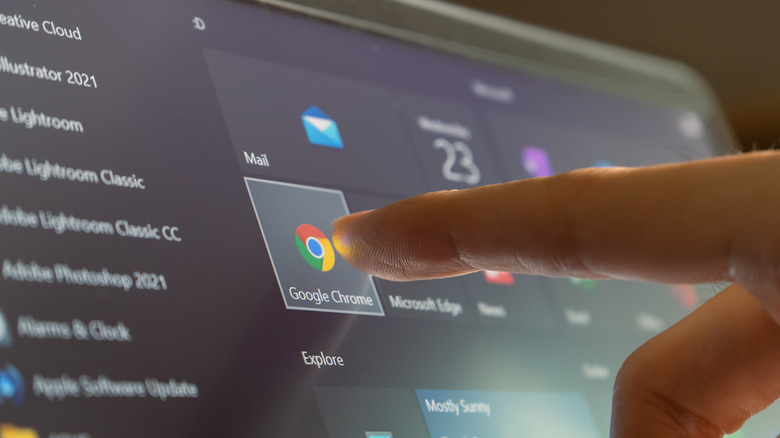
Pin tabs
We all have our favorite tabs we keep open on a daily basis. This could be social media, a messaging service, or a streaming platform. Whatever the case may be, there should be an easier alternative than bookmarking these sites. As we all know, bookmarks tend to add up, and sooner or later you'll have a list of websites that aren't necessarily your main priorities.
Pinning tabs is therefore an excellent option for those looking to save time and keep their most important apps open and ready for the next time they open Chrome. To use this feature, right-click on the tab of your choice, and select pin. You'll notice that the tab immediately shrinks down to icon size and moves to the top left of your Chrome browser. Once the tab is pinned, you can close your browser, or turn off your PC, and the tab will auto-resume the next time you open Chrome.
If you'd like to unpin a tab, you can follow the same process as above. Right-click the pinned tab, and select unpin. The tab will then return to its default position and will close entirely when you exit the Chrome Browser. You can have a combination of pinned tabs and regular tabs open. Pinned tabs will follow from left to right, while regular tabs will fall beside them in the same bar.
Tab groups
If you have the tendency to keep dozens of tabs open at a single time, there's an easy way to keep your Chrome browser organized. Tab groups is a built-in feature that can be accessed by right-clicking an open tab and selecting Add tab to new group. A pop-up window will appear, and you can name the group and select a color coding for it. Once you're finished, hit Enter on your keyboard, and your tab group will be created.
You can now start organizing your tab group by right-clicking another tab. Move your cursor to the Add to group option, and you'll see the name of your group followed by its designated color coding. Alternatively, you can also left-click the chosen tab, and drag it over to the group. You'll know that the tabs have been grouped when they have been underlined in the same color coding.
If you'd like to create a second group, right-click another tab, move your cursor to the Add tab to group option, and select New group. You can then name your second group and add a different color coding so you can differentiate them later on. If you'd like to collapse the group and minimize all the tabs within you can click on the title. Do the same to expand the tabs in the group again. You can also right-click the group title and choose Ungroup, Close Group, or Move Group To New Window.
Live caption for any audio or video file

Live caption is one of the best accessibility features offered by Google Chrome. It allows users to receive automatic closed captioning from any audio or video file, including those on the web or on a local hard drive. You can enable this feature by opening your Google Chrome Settings, selecting Accessibility on the left side of the window, and toggling Live Caption.
If you have any issues seeing the captions, for example, wanting to see them larger, you can click on Caption preferences under Live Caption. You'll then be given options to change the caption color, transparency, style, or size. You can then close your Settings tab, and the feature will be enabled.
To ensure everything is in order, head over to YouTube and play a video. You should see automatic live captions show up at the bottom of your screen. If you'd like to further expand the text, you can click the live caption text box. The same applies to any audio file on the web.
As mentioned above, live caption also works on any audio or video file saved on your local hard drive. To get live captions on your audio or video file, open the designated folder, and drop the file into an open Google Chrome tab. The file should automatically play in Chrome with live captions added. You can also click the music staff icon next to the Extensions icon to turn Live Captions on/off quickly.
Cast content with Chromecast
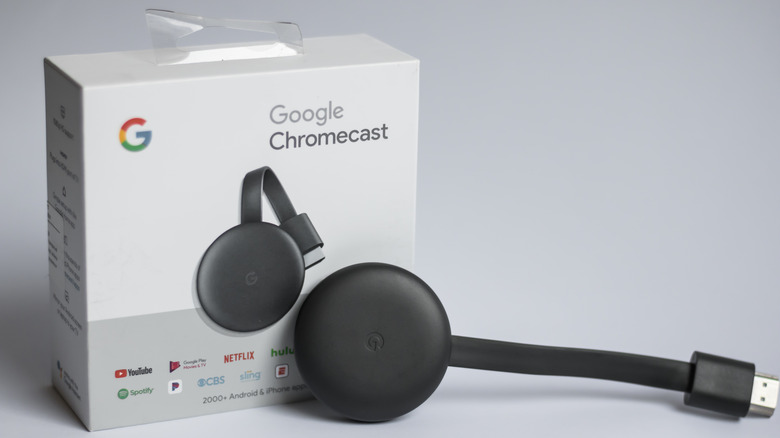
Chromecast lets you share any website or YouTube video with your smart TV or Chromecast-capable device. If you'd like to share a specific website with your smart TV, you can do so by clicking the 3-dot menu icon in the top right of the Google Chrome browser and then selecting Cast. Google Chrome will look for Chromecast-compatible devices, and they should pop up under the Cast tab. The name of your smart TV should appear along with the Available description. Left-click the smart TV icon, and the web page will be shared directly with your screen. You can left-click the same smart TV icon to stop casting.
If you're planning to share your screen often, you can create a shortcut by right-clicking the Cast icon. Select Always show icon, and you won't have to go through the 3-dot menu icon process again. YouTube also has the Chromecast feature built-in. If you're watching a video, you'll find the Chromecast symbol within the red and gray play bar. When you hover over the Chromecast symbol, it will give you the option to Play on TV. Left-click the icon, and you'll then be directed to the same Cast pop-up with a list of available devices. Once selected, the YouTube video will automatically play on the smart TV.
If you're having trouble connecting, make sure both your PC (with the Chrome web browser) and your Chromecast-capable device (likely your TV) are connected to the same Wi-Fi network.
Incognito Mode

It can be quite a scary feeling if you forget to delete your search history. Even more so, if you forget to log out of your social media account on your friend's computer or phone. Incognito mode is a Google Chrome window that won't save your browsing history, site data, or cookies. This makes it ideal for protecting your search history or preventing others from snooping.
You can think of Incognito mode as a fresh default browser too. If you're using a friend's computer or phone, Incognito mode will not detect any previous account information in the browser. For example, if you want to check your Gmail, it's not going to log into your friend's saved account.
As soon as you're finished with your Incognito session, you will be automatically logged out. Almost as if you were never there in the first place. Now, before you get any strange ideas, there are some limitations to Incognito mode. The websites you visit will still be able to monitor your behavior, and log your IP address. Additionally, if you're using a work computer, your employer or Internet Service provider can still find out what you've done.
Incognito mode is therefore an easy way to protect your account information and search history from other users on the same device, but it isn't an unrestricted invisibility cloak. You can try it out by opening the 3-dot menu icon and selecting New Incognito window on PC or mobile.
Task Manager

Did you know, Chrome has its own Task Manager? Usually, when our computers begin to slow down, we will open our operating system's Task Manager and close the apps that are using the most resources. The operating system's Task Manager can be a bit overwhelming though and isn't necessarily tailored to fix your slow tabbing Chrome issues. In the past, you basically had one option, end Chrome entirely, and restart whatever you were doing. But, not anymore!
You can access your Google Chrome Task Manager by clicking on the 3-dot menu icon, scrolling down to More tools, and selecting Task manager. You'll be presented with your current tabs that are active, extensions, and how many resources they are using. This includes the memory footprint (RAM usage), network status, and CPU utilization. You'll then be able to close specific tasks without closing Google Chrome entirely by clicking on the Task you'd like to stop and selecting End process.
Task Manager is therefore an extremely useful tool for those who have somewhat memory-limited computers. If your PC decides to slow down when you open Chrome, you'll be able to pinpoint the exact tab or extension and prevent it from happening again in the future. Although we would have liked to see an indication of GPU usage too, we can only hope this follows in future updates. You'll therefore have to rely on your operating system for those stats if needed.
Bypass compulsory logins, sign-ups, and paywalls

Have you ever experienced a website that won't allow you to view its content without logging in, signing up, or paying? These websites can be extremely annoying if you want to quickly browse for information and skip the registration process. Nothing is worse than being added to a spam mailing list after viewing a website for 5 minutes. Luckily for you, Chrome has a way to disable and bypass these kinds of pop-ups.
Start by heading into your Chrome Settings and clicking the 3-dot icon at the top right of your browser. Select Settings, Privacy and security, and Site settings. Scroll down, and you'll find JavaScript below Content. Under Default behavior, tick the Don't allow sites to use Javascript option. Once JavaScript has been disabled, the website you were previously using will now be unlocked. You'll be able to view its content without any compulsory prompts or registrations.
Note that this setting applies to pop-ups only. It does not get rid of the basic sign-in or registration feature when logging into personalized accounts. Therefore, your YouTube, Gmail, or banking accounts will not be affected or dismissed. This feature works best for sites that intentionally blur their information to force the user to share their personal details.
Find harmful software on PC

Has your computer been acting weird lately? Perhaps it's responding slower than usual, or applications are opening on their own. If this is the case, you may have been infected with malware or some form of malicious software. This may have come from a website you visited, a link you have clicked, or a program you have installed. Either way, you'll want to get rid of the malware as soon as possible.
When you realize your computer is infected with harmful software, most people download some form of antivirus software. Although this can be useful, they often come with additional install files and tend to add bloatware to your computer. Additionally, the paid versions are usually a monthly subscription, so if this is a once-off thing, it's more convenient to go with a free alternative first right?
Google Chrome has a built-in malware scanner that can search your computer for harmful software, and remove it from your system entirely. To use the scanner, click the 3-dot menu icon at the top right of your Chrome browser and select Settings. On the left side of the screen, click Reset and clean up, followed by Clean your computer. Select Find, and then Chrome will begin searching and removing any possible threats on your computer.
You'll also have the option to report the details that Google finds during the cleanup process, but this isn't compulsory. You can tick or untick this option before your click the Find button.
Custom profiles

If you share your computer with another person, or, you'd like to keep your work and personal browsing separate, you should try out custom profiles. Note that this is a more personalized option when compared to Incognito mode. Incognito mode gives you a fresh browsing window and deletes all your history and log-in details when you close Chrome. Custom profiles let you resume what you were doing when you log back in. Your search history and account information will be saved onto the signed-in custom profile.
In the top right corner of your Chrome browser, click the profile icon. You should see your custom avatar if you're already logged into a Google account. Under Other profiles, select + Add to log into an additional profile of your choosing. You'll then be prompted with the option to Sign in, and you'll be able to enter your Google Account information.
The next time you relaunch Chrome, you'll be asked which profile you'd like to use. You'll also be given the option to + Add another profile or continue in Guest mode. Once you select a profile of your choosing, the session will resume as if you had never left. This also means that if you were in a rush, and closed Chrome entirely, your previously opened tabs will be saved and will relaunch when you sign into your custom profile again.
Link to highlighted text and timestamped videos

Chrome now has the ability to generate a link to highlighted text. If you've ever wanted to direct someone to a specific quote or section on a website, this is a great feature to save time. It's much easier than explaining where to find the text and, lets them know exactly what you are talking about.
To use this feature, start by left-clicking and dragging your mouse over the text you would like to send. With the text now highlighted, right-click and select Copy link to highlight. You can now paste and forward the link to a friend, who can put it into their address bar. Once they hit Enter, they will be directed to the exact text you have highlighted.
The same method can also be applied to YouTube videos within Chrome. Pause the YouTube video where you'd like it to play from, right-click the play bar, and select Copy video URL at current time. A link will be generated, which your friend can then paste into their address bar. Once they hit Enter, the YouTube video will play from the timestamp you had paused from. This is the most accurate method to send timestamps and lets the receiver know exactly what you're referring to.
Block third-party cookies

A cookie is a file that is saved onto your computer by a website you have visited. The next time you visit that website, the file will be accessed and it will remember what you were doing. In most cases, cookies will store your login details and personal settings. The benefit of this is that the website can easily remember users, and keep track of them without needing a big database or server.
Having said that, we should place emphasis on the word track. Cookies can also track any kind of data about users. This goes beyond login details and preferences and moves toward sensitive information such as your IP address, browsing history, or on-site behavior. If you've hovered over a specific item for a while or clicked on a certain product a few times, these are all retained by cookies.
Problems will therefore arise if the website is compromised by hackers, or if your information is sold to third parties. You may have noticed this if you are on social media, and you suddenly have an ad pop up for the same product you were looking at earlier. Chances are, you haven't been hacked, but your information is now being advertised back to you.
Chrome lets you block third-party cookies by opening up the 3-dot icon, clicking Settings, and then Privacy and security. You can then scroll down to Cookies and other site data, and choose to Block third-party cookies or Block all cookies altogether.
Snap a screenshot

Chrome has been working on a screenshot tool for years. The most common options we have right now are either your keyboards Print Screen function or, third-party software that can capture your desktop. The Print Screen function can take a bit of time, as you'll need to first copy and paste the image inside your Paint app. Alternatively, third-party software has introduced easier capture tools, but you'll still need to go out of your way to find software that is safe and trusted.
Therefore, you can try out Chrome's future screenshot feature using Chrome Flags. Chrome Flags are experimental tools that have not been fully released yet. These experimental features are usually stable, but you may run into a few hiccups for newer releases. To put it differently, don't sign up for every Chrome Flags feature without doing your research. Having said that, we tested the screenshot tool and it worked perfectly for us.
To activate the screenshot tool, type chrome://flags into your Chrome web browser's address bar, and hit enter. In the Chrome Flags search bar, type screenshot, and enable both Desktop Screenshots and Desktop Screenshots Edit Mode. Finally, click Relaunch, and you're ready to go! On any website within Chrome, you can now click the Share icon on the top right and select Screenshot. Left-click and drag your cursor around the area you'd like to capture. You'll then receive a Download prompt to save the screenshot to your computer. Note that the built-in Screenshot Edit function is currently unavailable.