Why Is My PC So Slow?

We've all had those days where doing any tasks on our PC felt like it was running on molasses. This is especially noticeable with modern computer hardware, that's generally expected to move like lightning.
All computer hardware slows down over time. A freshly-installed operating system isn't full of junk files, many running apps, or anything else that might slow it down — but it's not always as simple as that.
As we use our computers daily, the amount of data we store ramps up, slowing them down. Some changes in our daily habits can alleviate this. Hardware can also fail, although this usually shows drastic failures and not gradual slowdowns.
If you're running into issues regularly, it's important to have a list of options to troubleshoot the source of your slow PC. The methods we have here use inbuilt Windows tools or free-to-use third-party apps that are community favorites. If you get through the list below — or even get to a point where you no longer need to try other options, you'll either have a faster PC or know what you need to upgrade to get there.
Beginning to pinpoint the issue
In the past, the most likely cause of the slowing of a PC was the aging of the hardware. Nowadays, hardware is fast, so computers slow down because we load them up with software or documents without removing anything.
The majority of slow computer issues are from inefficient use of resources. This could be multiple background programs running unnecessarily, never rebooting your computer, accidentally clicking on malware while browsing, or not doing basic computer maintenance.
You could be having issues because of a slower, physical hard drive instead of having your PC installed on a faster solid-state drive.
Malware is everywhere these days, as are other types of computer viruses. Even if your anti-virus solution manages to protect your PC, it still has to continually monitor things, which takes up system resources that could otherwise be used for work and play.
It might not even be your PC. Many slowdowns come from internet issues, whether that's inside your home network or from your internet provider. That leads to longer loading times, making you think your PC hardware is at fault.
Check the type of storage you have

One of the biggest factors over how fast your PC feels is the type of storage drive your operating system is installed on.
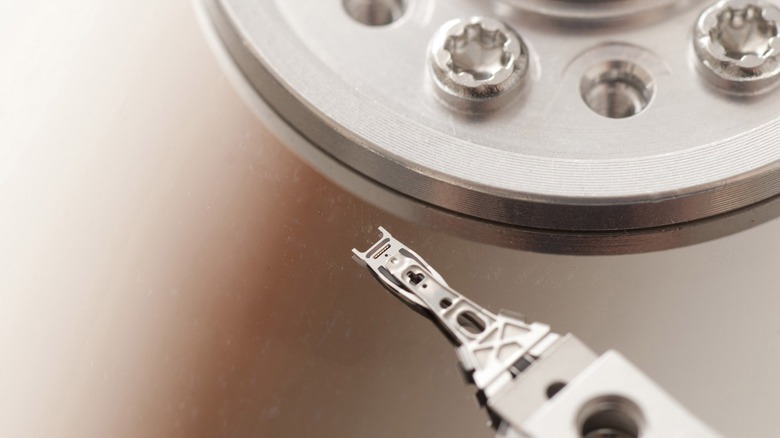
Older PCs often used Hard disk drives (HDDs) as their primary drive. These drives use physical spinning discs to store data — and are relatively slow. They are still a viable option for storage, as they are cost-effective per MB stored.
Most modern PCs use Solid state drives (SSDs) as their primary drive. An SDD uses no moving parts and is multiple times faster than your average HDD. SSDs using the SATA connector can reach speeds of up to 560 MB/sec sequential read. NVMe SSDs like the Corsair MP600 PRO can reach up to 7,000 MB/sec sequential read speeds — and some can work or even faster.
The quickest way to determine if your Windows PC has an HDD or SSD is by opening Disk Defragmenter. Hit the Windows and S keys on your keyboard and search for "defrag." Then click on "Defragment & Optimize Drives" and see what it says under Media Type. It'll either say Solid state drive (SSD) or Hard disk drive (HDD).
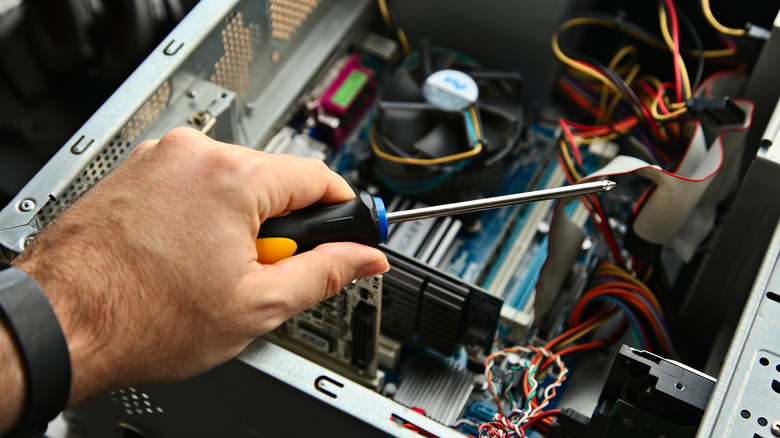
If you find out you are using an HDD for your Windows drive, you may be able to swap it for an SSD. Buy any SATA SSD, like the Samsung 870 EVO, of sufficient size, and plug it into your computer. Then use cloning software like Macrium Reflect to clone your existing Windows onto the new SSD, unplug the HDD, and reboot.
Once you know that Windows is working properly, you can plug the HDD back in and wipe it for storage. It's a short process that will have your PC feeling fresh again.
Is your storage full?
Are you running out of storage space on your main drive? HDDs and SSDs can slow down as they get closer to full, with SSDs especially affected.
Hard drives get sluggish as they fill up due to how they write data. On a fresh drive, data gets written to the outside tracks first, filling up the drive by moving towards the center of the disc. When going back to read the data on the shorter tracks, it will be slower than the data on the outside of the disc.
Solid-state drives also slow down when filling up, starting around 70% full, depending on the drive. Some manufacturers guard against this by reducing the writable storage in the drive's firmware, so you might see a lower capacity than expected.
The reason for the faster SSD slowing down when nearly full is how it stores data. Data is organized into blocks. When writing to the drive, the controller dumps data into the empty available blocks first because that's the fastest way.
When it has to add more data to an existing block, the drive has to read the data stored and then combine that with the incoming new data. Otherwise, the drive will overwrite the existing data, causing data loss. This is slower and makes your PC feel sluggish. To fix that, you'll do well to buy more storage or delete files to the point at which you're below 70% capacity.
Check running programs
Regardless of the power available to your computer, if it has too many things running, everything will slow down. This could be apps you don't often use that run at boot, or maybe something that you uninstalled but didn't fully remove.
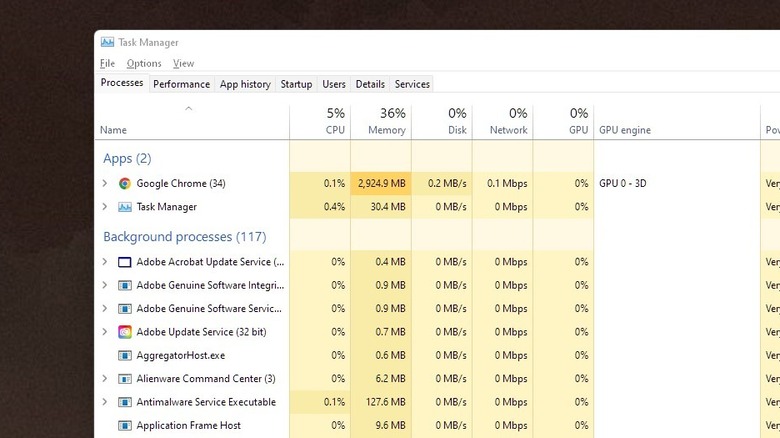
The first thing to check is what's running in the background. Press CTRL, ALT, and delete on your keyboard, click Task Manager, and see what the Processes tab says. Anything using lots of memory, CPU, Disk, or Network that you aren't actively using can be closed down. Do a quick internet search for any entries you don't recognize so you don't accidentally close something Windows needs.
Then it's time to stop those programs starting in the first place. On Windows 10 and 11, you can do this from the Task Manager you opened a minute ago. Click on the Startup tab, and set any programs you don't want starting at boot to Disabled. This also shows you an indicator of Startup Impact, so you can see which things are slowing your boot times.
Windows 11 also has another way. Open the Settings app and click on the Apps option on the left. Click Startup, then set the toggle switch for any app you don't need at startup to Off.
For a way that works on any earlier version of Windows, open the Start menu and search for MSConfig. This might come up as System Configuration App. Run it, click the Startup tab, and disable any apps you don't need. This pathway might also lead you right back to Task Manager's Startup tab as outlined above.
Check for updates
Windows computers get regular updates for security-related issues, bug fixes, and new features. If your PC is feeling sluggish, it might mean that you haven't received any updates for a while.
Windows Update usually automatically downloads updates, but sometimes it doesn't.
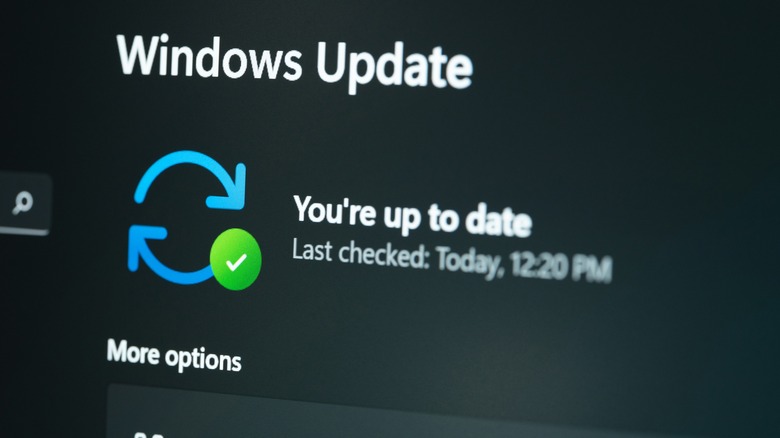
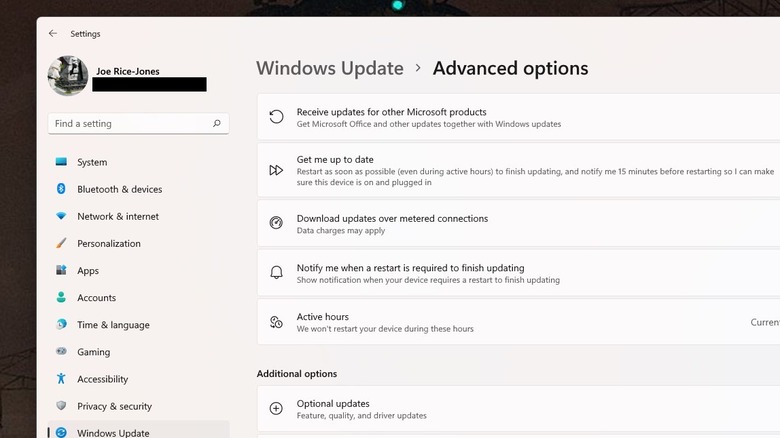
To check this, open Start, Settings, then Windows Update, and press the big Check for updates button. That'll query Microsoft's servers and download any pending updates.
While on that page, it's worth taking a minute to click on the Advanced options menu. The main thing to check here is the "Receive updates for other Microsoft products" toggle. When it's on, things like Microsoft Office will also get updates automatically.
The Advanced options menu also has a section for Optional updates. Those could be driver updates or updates specific to your hardware. Check it frequently, and then you'll always be up to date.
If you're still using Windows 10, you might want to consider an upgrade to Windows 11. Microsoft's latest operating system will be supported for much longer than whatever version you're on. It will also have the latest program compatibility and hardware drivers, so it pays to update.
Check for viruses and malware

Malicious software — viruses and the like — use up system resources invisibly, often giving you no clue why your computer's grinding to a halt. They also generate heat, which is another cause of slowdowns.
It used to be that anti-virus programs slowed down your PC as well. That's not the case anymore, as modern hardware is fast enough to scan for issues and run your other programs.
The best of these for most Windows users is the inbuilt Windows Defender, part of the Windows Security suite. It's lightweight, can scan anything on your PC, and has advanced modes to clean out any infections it finds.
To run a scan:
-
Open the Start menu and search for Settings.
-
Click on Update & Security if on Windows 10 and Privacy & security if on Windows 11.
-
Then click on Windows Security.
-
Click on Virus & threat protection.
-
Select Scan options, and choose one of the four options.
Is it overheating?
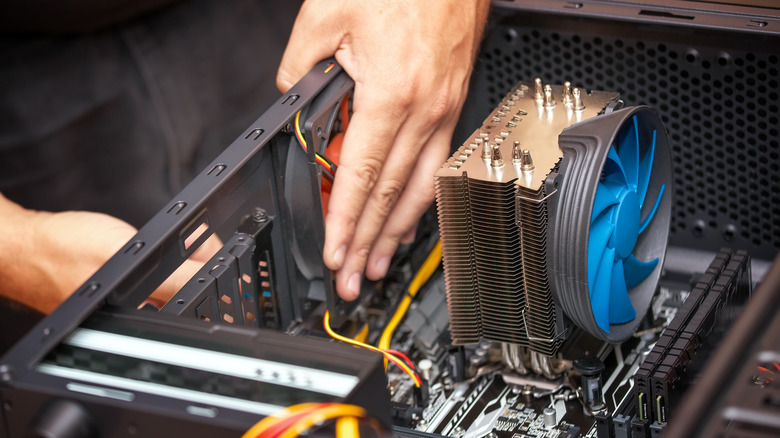
Sudden increases or decreases in fan operation point toward heating issues. To double-check, install HWiNFO64. Run it and select "Sensors Only" from the pop-up and find items marked in red.
The main sections to check are CPU [x], GPU [x], and any S.M.A.R.T. sections for your storage drives. When you keep the program open for a while, you'll see Current, Minimum, Maximum, and Average values for temperatures.
Storage drives aren't supposed to get too warm, with normal temperatures between 30 degrees Celsius and 40 degrees Celsius. If they're getting warmer, it could mean you don't have enough airflow through your case, so increase your case fan speeds or install more fans.
CPUs can get toasty, but you'll want to keep most Intel units below 95 degrees Celsius and AMD Ryzen units below 90 degrees Celsius for newer models. Consistently-high temperatures above 80 degrees Celsius can indicate insufficient cooling, bad thermal paste application, or a failing AIO cooler. Either buy better cooling or replace your thermal paste.
GPU temperatures are usually lower than CPU temperatures, with optimal GPU gaming temperatures ranging between 65 degrees Celsius and 85 degrees Celsius. This wide range is simply because of the wide range of cooling hardware and power usage across GPUs from AMD, Nvidia, and Intel.
High temperatures during gaming or rendering are normal. If you see them at other times, it could be dust, broken fans, your room temperature could be too high, or possibly that your GPU is failing. Check the first three, then contact support for your GPU manufacturer.
Temperatures can also be higher with dust build-up inside your PC. We suggest using a DataVac or other powered air compressor to blow off the cooling fins of your CPU cooler, GPU cooler, or radiator if you have water-cooling.
Check for driver updates
Outdated device drivers could be slowing things down. Windows uses device drivers to let the operating system talk to your installed hardware. If these get out of date or buggy, your computer may slow down.
Microsoft suggests you try to update any device drivers through Windows Update.
-
Open Settings, and click on the Windows Update tab.
-
Click on Advanced options.
-
Look for the Additional options section, and click on Optional updates.
-
Click on Driver updates, which only shows if Windows found missing drivers.
-
Check the boxes next to the missing drivers.
-
Click on Download and install.
That will download all the driver packages and install them.
Sometimes you can't find the new drivers through Windows Update. Microsoft has a manual process as well, so you can reinstall individual drivers.
Some devices need you to search for new drivers on the manufacturer's website.
-
Open your web browser.
-
Search for "your computer manufacturer" and "driver support" or "your component manufacturer" and "driver support."
-
Navigate to the manufacturer's support page from the search results.
-
Enter your computer's model, device model, or other relevant information in the search field.
-
Download the individual packages you need, and install them according to the on-screen instructions.
Check Event Viewer

Windows' Event Viewer logs warnings about potential issues. This is a useful tool for troubleshooting and can often help you find things every other tool missed. One section in particular logs diagnostic performance, which is what we need to look at to see what our PC could be slowing down from.
-
Click on the Start menu.
-
Type Eventvwr.msc and press enter.
-
Double-click on the Application and Service Logs section.
-
Navigate to Microsoft, Windows, Diagnostics Performance, then Operational.
You'll see a list of potential issues, with either a yellow triangle Warning or a red circle Error. Read through these, and scan for any potential fixes.
For example, Event Viewer might say "EAConnect_microsoft.exe took longer than usual to start up." That program connects Xbox Game Pass for PC to the Electronic Arts launcher, part of the partnership between the two companies. Even if you have no idea why it took an unusual amount of time to open, you can disable the Xbox app from startup and not have to worry about it again.
You might look through your logs and see a pattern of slow loading at boot. You could potentially speed the whole process up by removing programs from your boot sequence. Event Viewer can also scan for viruses and other threats by checking whether your daily programs are taxing your PC more than they should.
On the wrong power plan?
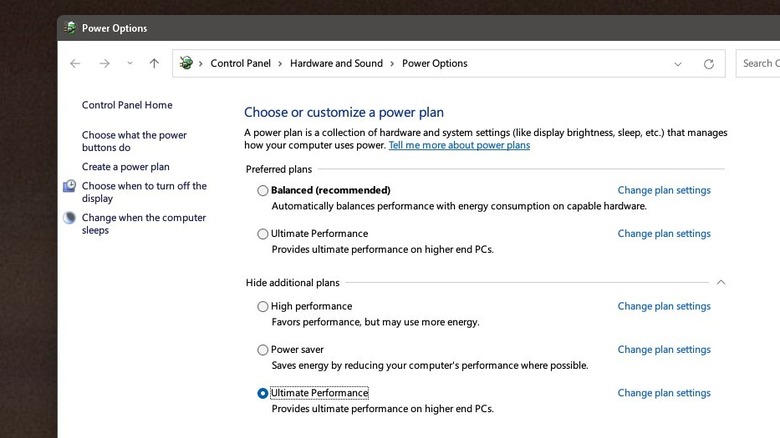
Did you know that incorrectly set power plans in Windows can affect performance? Windows has multiple power plans installed by default and should have the most effective for your computer set automatically. Sometimes, that auto-selection goes awry. To get to the settings menu you need, open Start and search for Choose a power plan. Click on that, and you'll get to a list of options.
Most PCs are set to Balanced by default. This balances power usage and performance and is great for battery-powered computers and up to midrange desktops. Ironically, Balanced may not be the best power plan for everyone, especially those users that have a higher-end gaming PC or workstation. If that's you, change it to either High Performance or the Ultimate Performance option if available.
If you can't see the Ultimate Performance option, here's what to do to make it visible:
-
Open Start, and search for Command Prompt.
-
Right-click on this to Run As Administrator.
-
Type "powercfg -duplicatescheme e9a42b02-d5df-448d-aa00-03f14749eb61" without the quotes into the Command Prompt window, and hit Enter.
-
Reboot your computer.
-
Open the Choose a power plan menu again, and select the Ultimate Performance option.
You'll use more power on this option as it does things like never turning your hard drives off, but if you want the most performance out of your PC, this is it.
Is your internet having issues?
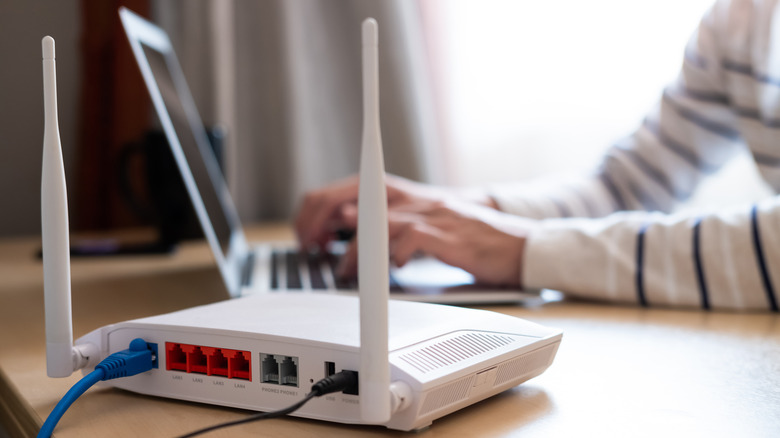
Things not loading quickly on browsers or other internet-needing programs? It might not be your PC at fault. Instead, your local network could be the problem.
The most common things to check are your router, which controls your whole network, and the network adapter inside your PC.
Start by doing a speed test, which will give you an idea of if you're getting the internet speed you pay for or having issues. Head to Ookla, and click the big Start button. Let the test run, and compare the result against the service speed you pay for.
You might want to do this several times, as your internet service provider might throttle only at certain times of the day.
Then it's time to reboot your router. Most tech can benefit from regular reboots, and your internet router is no exception. While inside your router's configuration pages, if you haven't changed the default password, it's time to do that now. Then reboot the router.
Windows has a handy Network Diagnostics troubleshooter that can clear up issues with your computer's network adapter. To use it, search for "Troubleshoot settings," click on Other troubleshooters, then on Run next to Network Adapter.
Windows Search running slowly?
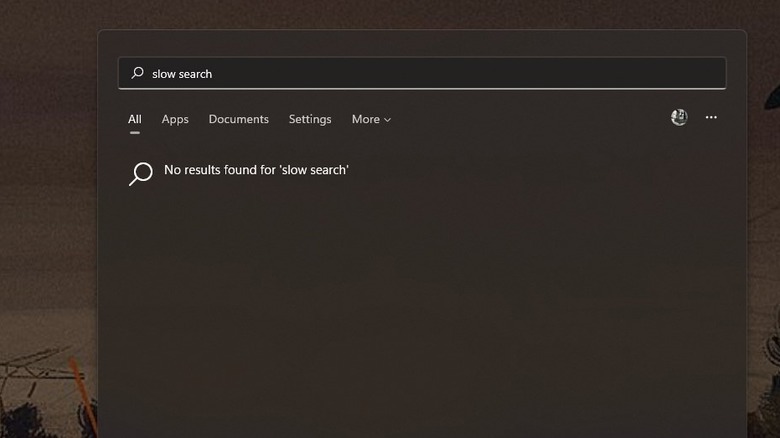
Sometimes it's not the whole computer, but Search that's slow. This is a real issue on Windows 10 or 11, as Search is integral to getting work done.
Multiple things could go wrong with Search. Thankfully, there are fixes for all of these.
Sometimes the taskbar search shows a blank box instead of results. This is down to Bing integration issues, and you'll want to disable this.
-
Tap Windows Key and R to get the run program dialog.
-
Enter "regedit" without the quotes and hit Enter.
-
Find HKEY_CURRENT_USER and double-click.
-
Double-click on SOFTWARE.
-
Find MICROSOFT and double-click.
-
Then double-click on WINDOWS.
-
Double-click CurrentVersion.
-
Then double-click on Search.
-
Move the mouse cursor to the right pane, and right-click.
-
Click on New from the menu that appears.
-
Select D-WORD (32-bit) Value.
-
Name this BingSearchEnabled.
-
Double-click on the BingSearchEnabled entry you just created.
-
Enter 0 (zero, not O) into the Value data field.
-
Click on OK.
-
Then find CortanaConsent in the same list and double-click on it.
-
Set the Data field to 0, as before, and click OK.
-
Restart your computer.
That's the most annoying Search bug dealt with. You can also use the Search and Indexing troubleshooter to find and fix most other issues.
To do so in Windows 10, click on the Start menu, then on Settings. Navigate to Update & Security, then Troubleshoot. Under Find and fix other problems, click on Search and Indexing.
On Windows 11, it's Start, Settings, System, then click on Troubleshoot and Other troubleshooters, and finally, on the Run button next to Search and Indexing. Microsoft has a few other options to try if nothing else works for search issues.
If nothing else works?
If you've gone through these troubleshooting steps and your PC still seems slow, we recommend thinking about upgrades. That could be upgrading individual parts inside your existing PC or replacing it completely.
Desktop PCs are made to be easily upgradeable. Every part can be upgraded; not every individual part is worth the upgrade. Laptops can often have memory and storage upgrades unless the manufacturer takes steps to prevent this.
The biggest speed upgrade you can make to any PC is to replace your HDD with an SSD. The boost in speed for data access can be astonishing, for not a huge amount of cash. Plus, you can always move that storage to another computer in the future, so it's not wasted money at any stage.
The next part to target is system memory. For modern computing tasks, you want a baseline of 16 gigabytes of DRAM. Check your system specs and if your motherboard supports DDR3 or DDR4. If you find you're using DDR3, it might be a sign that you should shop around for a full system, not individual parts.
You can always bring your PC to your friendly neighborhood computer repair shop — making sure you've checked their ratings and real human feedback first. If your computer is still covered under warranty, talk to the manufacturer that made your PC in the first place or the one that made the individual parts that you suspect might be slowing down. Or you could just build a new one.