How To Replace A Light Switch Yourself: A Step-By-Step Guide
For many, the idea of jumping into the wiring system of your home can be a daunting task. And for good reason, as the wiring running throughout the walls and ceilings in your home is the linchpin of a complex electrical system – a system that can also be dangerous if caution is not exercised. That said, even the uninitiated can learn how to change a basic light switch. The key is in proper preparation, a willingness to learn, and knowing how to respect electricity and the dangers it can present.
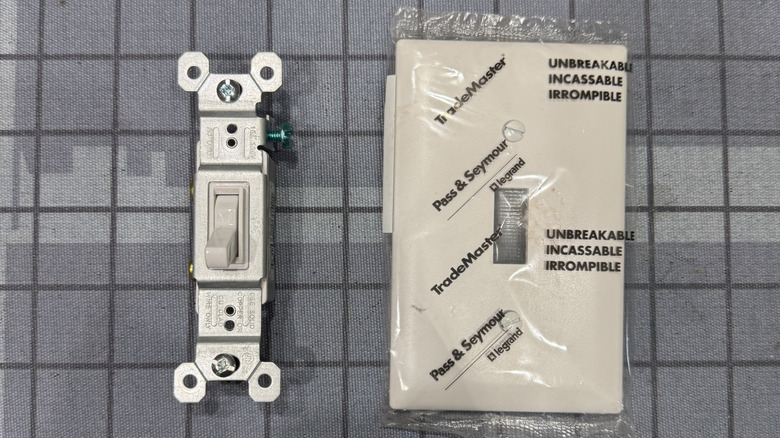
Now, with the disclaimer out of the way, we need to gather a few basic tools – many of which can be had at Home Depot for $100 or less – and a light switch of your choosing. Don't forget to pick up a matching faceplate if you need one. For the purpose of this guide, we're covering a basic single-pole switch, and not getting into how to test if a light switch is bad or troubleshooting more complex problems. Also, if you encounter problems or wiring not within the scope of this guide, you should stop and contact an electrician. Keeping yourself safe, as well as keeping your property safe, should always be the priority.
The tools required to change a light switch
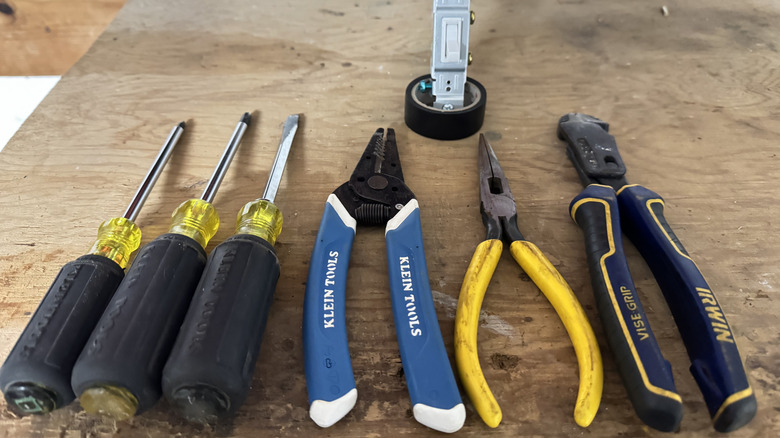
You won't need any fancy tools to change a light switch, and all of the tools I'm about to show you can be had at Home Depot, Lowe's, or any big box store that's convenient for you. Also, as someone who has spent years working as an electrician, it would be remiss of me – maybe even heretical – not to mention Klein Tools. Most of the tools you'll see me using in this guide will be Klein, which isn't to say you need to go out and buy Klein tools. However, if you feel so inclined, a number of Klein tools can be had for under $20, which includes the screwdrivers and wire strippers you'll see here.
In order to change a light switch, you will need: a pair of wire strippers, a screwdriver (#2 Phillips or #1 square recommended), a non-contact voltage tester or multi-meter, and a flashlight. Having some black electrical tape on hand isn't a bad idea, and a small pair of needle nose pliers and diagonal cutters could come in handy. A pair of gloves is also a good idea, and I personally prefer nitrile dipped gloves.
Step 1: Locate the circuit breaker and turn the power off
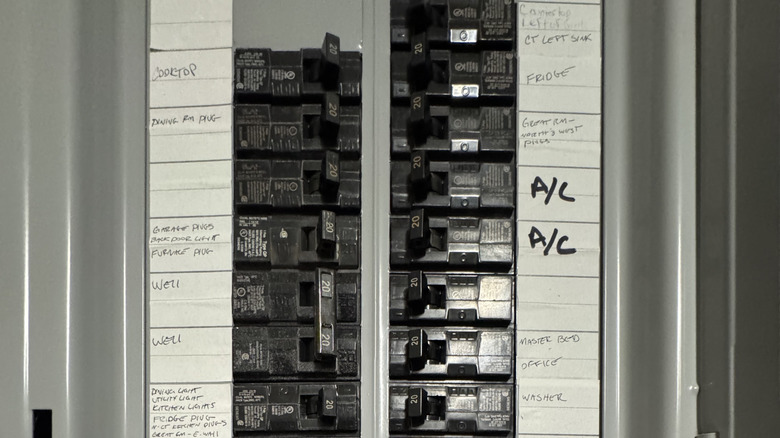
This is the first and most important step. Remember what I said about respecting electricity? Unless you are a professional, you should never work on anything that's energized. So, you'll need to locate your panelboard (or breaker box, as some like to call it) and find the circuit breaker that serves the light switch you intend to replace. Hopefully, your circuit breakers are labeled properly, but it's entirely possible they are not.
If your breakers aren't labeled, you have two options. You could invest in a circuit breaker finder tool, or you can go about it the old-fashioned way by shutting breakers off individually until you find the one you need. After you've located the right breaker and turned it off, we now need to verify that the circuit feeding the switch is dead. To do this, take your non-contact voltage detector, turn it on, and hold it in close proximity to the wires attached to the switch. If voltage is detected, the tester should light up and make an audible tone. If you're familiar with a multi-meter, you can also check the switch for voltage. The meter should read zero, or very close to it.
Step 2: Remove the old light switch
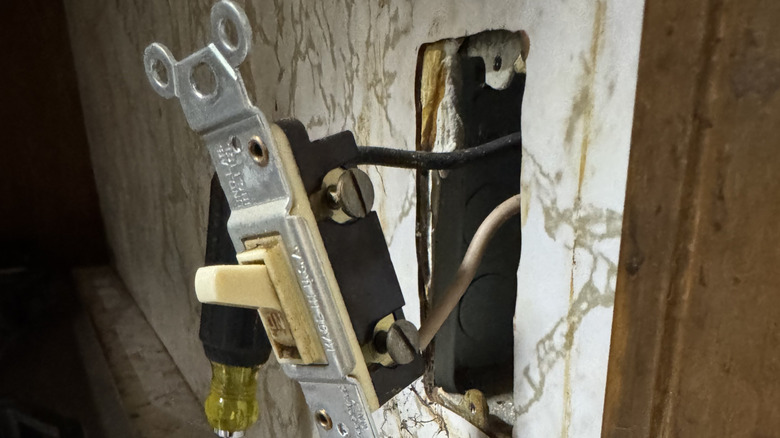
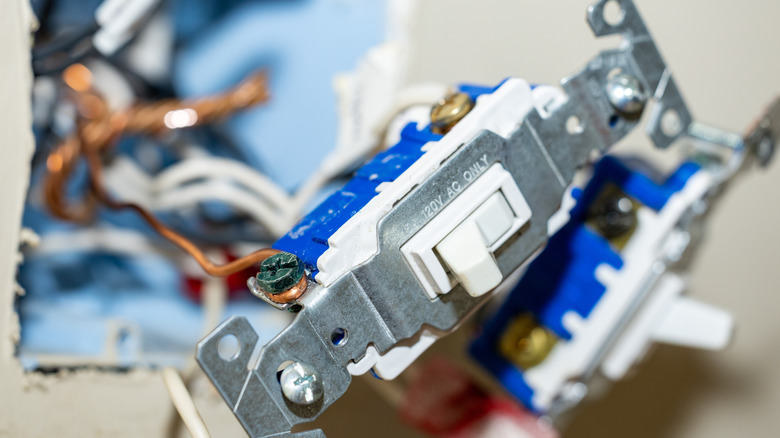
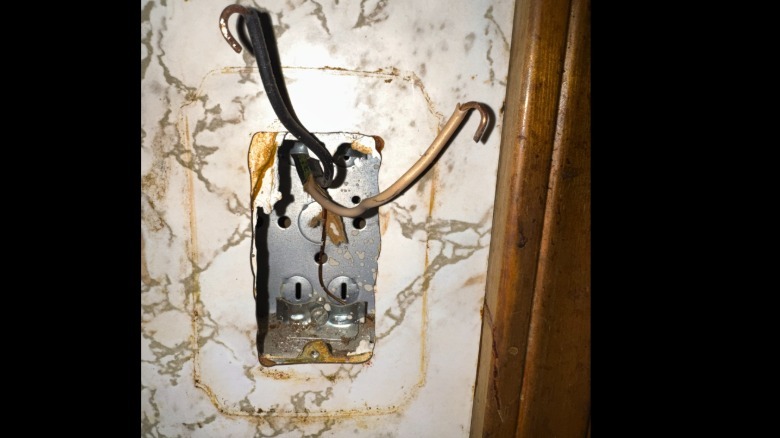
Begin removing the old switch by removing the faceplate and unscrewing the switch from the device box. The screws fastening the switch to the device box should be Phillips or slotted #6-32 machine screws, so use the appropriate screwdriver. Once you have the switch removed from the box, gently pull it out towards you (depending on how much wire you have to work with) so you can comfortably work on it. At this point, it may be a good idea to take a picture of the wired switch, in case you need to reference it later.
Next, you'll need to get ready to remove the wires. Depending on the age of your home, the switch you're replacing may be outdated, and you might notice the wires entering the back of the switch (which you'll see in the above image). This is called back wiring — or "backstabbing," as electricians like to call it — and was common throughout the '70s and '80s. While this wiring method is still accepted, it comes with the important caveat that only 14-gauge solid copper wire can be used. For simplicity's sake, we'll focus on side wiring.
If the switch is back wired, you can gently pull the wires while moving the switch back and forth to slowly disconnect them. Alternatively, you can use a pair of diagonal cutters to cut the wires flush with the back of the switch body. For a side wired switch, you simply need to use a screwdriver to loosen the terminals, and then remove the wires and lift them out of the way for now.
Step 3: Prepare the new switch and existing wires
With the old switch out, we're ready to prepare for the new one. To do this, start by loosening the screws on the side terminals of the new switch. These screws will only loosen to a point before you start feeling resistance – don't loosen them beyond this point, or you risk stripping the screw and ruining the switch. A bonus tip is to use a #1 square screwdriver here, as modern switches and receptacles have wire binding screws that are also combination screws, meaning they will accept a variety of screwdriver types. By using a #1 square screwdriver, you minimize the risk of stripping the screw when it's time to torque the wires down, and you also reduce the risk of slipping a screwdriver off of the switch and into your hand.
For the next step, we'll need to strip the wires and form a small hook on them. If your old device was side wired, then the wires should already be stripped and have hooks on them, and you don't need to worry about this particular step. Just visually inspect the exposed copper wires and make sure there are no signs of crush damage or cuts before attaching them to your new switch. If you find any damage, it's best just to re-strip the wires and expose fresh copper, as long as you have enough wire to do so.
Step 4: Install the new switch, turn the breaker back on, and test the switch
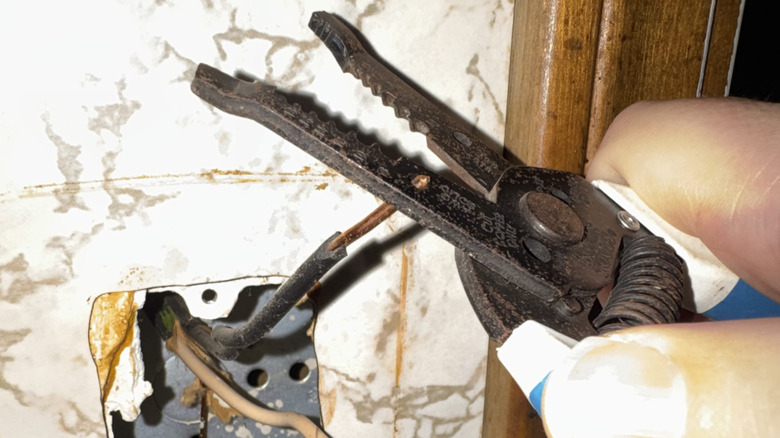
To begin installing the new switch, you'll first need to strip the wires. So find the correct notch on your wire strippers and then strip off about three-quarters of an inch of insulation. To form the hooks, you'll notice that there are a couple of small holes towards the handles of your strippers. Insert the tip of the wire through one of these holes until you just barely see it emerge on the other side. Then, slowly turn the wire strippers in a kind of semicircle to form a small hook. Do this for both of your hot wires and your ground wire.
 Eric Hamilton/SlashGear
The purpose of these hooks is to give us a strong anchoring point to bind the wire, and when we attach these hooks in the same direction that the screw torques (clockwise), it forces the wire to wrap around the screw terminal, yielding a long-lasting, reliable connection. So, go ahead and attach the wires to the terminals in a clockwise orientation; hot wires go on the brass colored terminals, and the ground wire goes on the green terminal. Use your screwdriver to carefully tighten the terminal screws, being careful not to overtighten them. As you tighten the screw, you should notice the wires turning with the screw.
 Eric Hamilton/SlashGear
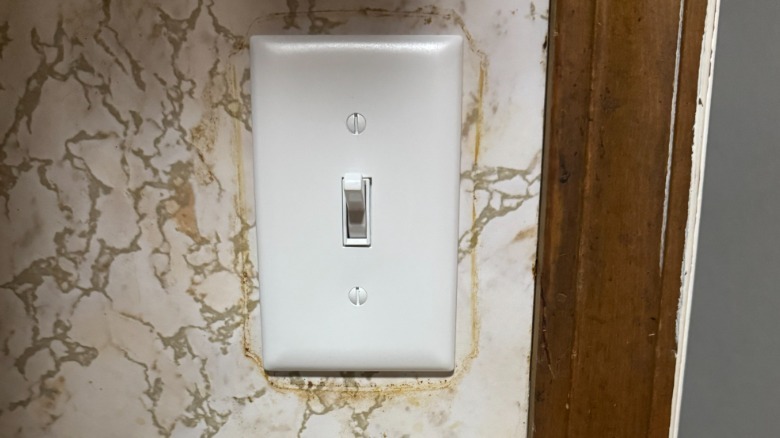
Once that's done, gently push the wires back into the device box, attach the switch to the box using the machine screws that came with it, and put the faceplate back on. With the new switch installed, restore power to the circuit and test the switch. If it doesn't work, turn the power back off, retrace your steps, and double check your wiring.