5 Advanced iPhone Camera Settings You Probably Didn't Know Existed
Apple's iPhones are known for many things, one of which is the quality of their cameras. The iPhone 16 Pro and 15 Max made their way onto our list of the best smartphone cameras of 2025, and their successor, the iPhone 17 Pro Max, produced photos that impressed us greatly when we tested one in late 2025.
The hardware is just part of the photographic process, though; Apple's default Camera app also plays a major role in the overall experience. It offers a streamlined, easy-to-use experience — especially in iOS 26 — that ensures that almost anyone can start taking photos after unboxing their iPhone without spending any time going through menus and setting things up.
That said, while it's entirely possible to take excellent photos with the Camera app the way it is from the factory, sticking with the defaults won't necessarily offer an in-depth enough experience for the hardcore photographers out there. Thankfully, there many things you may not have realized the Camera app can do, and Apple's app also has advanced settings that you can adjust. These range from changing the image resolution to tweaking the app's user interface. Of course, Apple's app will never be as flexible as Camera alternatives like Halide, but depending on your needs, these may be all the changes you'll ever have to make.
Change the main camera's resolution
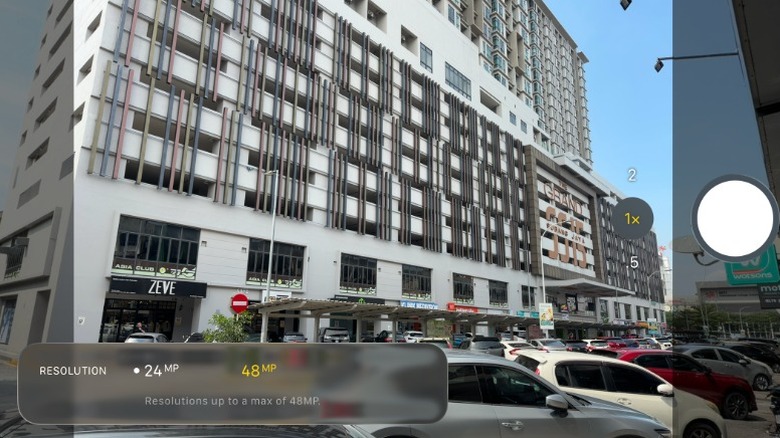
A modern iPhone takes photos at 24 MP by default. On an iPhone 17, this results in 5,712 x 4,814 photos that generally take up about 3 MB or so of storage. While this will be adequate for most people, those who want to either maximize storage space or eke out some more resolution can change this.
On iOS 26, go into Settings, then Camera. To change resolution, tap on Formats. You'll see a few more options here, but the one you want to look for is Photo Mode. Tapping on that will let you choose between 24 MP and 12 MP, with the latter dropping file sizes to around 2 MB or so. While that's not a huge reduction in file size, it will add up, especially if you're rocking an older iPhone with less built-in storage.
You can also increase the resolution to 48 MP if you desire by enabling the Resolution Control and ProRAW settings (depending on the iPhone you have). This doesn't, however, let you select 48 MP in the above submenu. Instead, it'll expose a new control in the top-left section of the Camera app, which is where you'll choose the higher resolution. Now, while this may seem appealing, do remember that more megapixels don't always make for a better image, and you won't suddenly be taking photos as detailed as those of a full-frame camera. This also comes with a big storage penalty, with these 8,064 x 6,048 photos capable of hitting 9 MB or more.
Customize the main camera lens
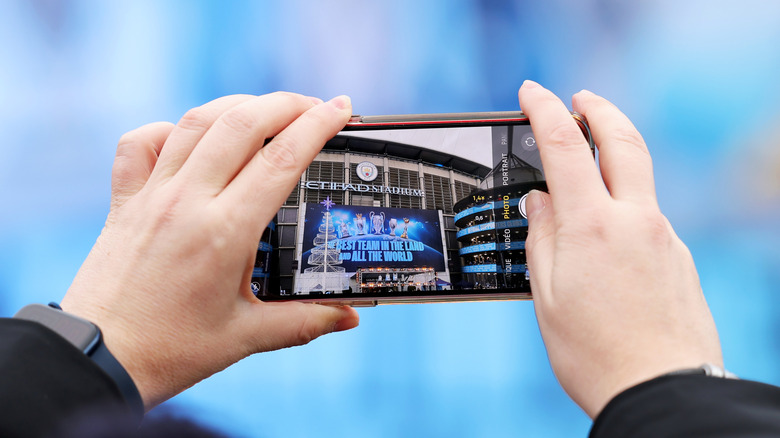
The Camera app usually lets you choose between 0.5x, 1x, 2x, and 3x (or 5x) zoom settings, but certain iPhone models offer a couple of extra "lenses" you can toggle and even set as default if you prefer them. This setting isn't available on all iPhones — it's only accessible on the Pro and Pro Max versions of the iPhone 15, 16, and 17, as well as the iPhone Air.
From the Camera settings menu, tap Main Camera or Fusion Camera, depending on your model. Here, you'll find a section called Additional Lenses, where you can toggle two extra "lenses" (which are really zoomed-in versions of the main camera's image). If you're using any of the Pro or Pro Max iPhones, you'll see 1.2x and 1.5x lenses, while the iPhone Air offers 1.1x and 1.4x lenses. Regardless, both equate to the same simulated 28 and 35 mm lenses.
Swapping between these variants of the main 1x lens is easy, and you can just quickly tap in the Camera app to cycle between them. However, if you prefer one of the two closer zooms, you can also make use of the Default Lens section below Additional Lenses. As the name suggests, this section lets you choose the zoom level your Camera app uses by default. Do note, however, that this feature requires you to set the Camera to 24 MP.
Decide whether you see what's beyond the frame
By default, the iOS 26 Camera app shows you a darkened preview of what's beyond the current frame on all iPhones since the iPhone 11. This is generally a very useful feature, acting as a reminder of all the extra image content you could capture by swapping to a different lens.
Let's say, for example, that you're trying to take a big group photo using the 1x lens but are having trouble squeezing everyone in. You could, of course, move back or try a different angle, but this feature, which Apple calls View Outside the Frame, means that the app will also show you what would be in the image if you swapped to the 0.5x lens instead. Depending on the situation, that may be a much quicker solution than repositioning yourself.
This feature can also be useful when taking more artistic photos, as it lets you orient yourself and remain aware of other ways to compose a photo. That said, if you prefer a distraction-free Camera preview, you can disable this feature by going to the Camera settings menu and toggling View Outside the Frame.
Enable or disable lens correction
Ever since the iPhone 12, the iOS Camera app has had a feature — enabled by default — that helps compensate for some of the optical faults present in the front and ultra-wide rear cameras. Wide lenses, such as the iPhone 17's ultra-wide camera (which has a 13 mm focal length) are prone to barrel distortion, which can make images look warped and fish-eyed, especially toward the edges of the frame.
How severe this distortion is depends on the subject matter, but you'll generally want to keep this feature enabled to nip any issues in the bud — especially if you like to take photos of architecture. However, the feature isn't always perfect, and iPhone 12 reviews from the likes of The Verge even revealed some situations where the correction made things worse. While Apple has likely improved things over the years, those of you who want to avoid any possible processing issues can disable the lens correction feature by going into the Camera's settings and toggling Lens Correction.
There are, of course, other reasons to disable this feature, too. For instance, you may want to experiment with your photos, leaning into the ultra-wide lens' character and working with, not against, the distortion. Conversely, more experienced photographers could conceivably want to perform their own lens correction in a photo-editing program like Adobe Lightroom instead. No matter the reason, though, it's thankfully a very simple setting to change.
Choose between rapid photos or better processing
Smartphones, including the iPhone, rely heavily on image processing to compensate for the relatively small size of their sensors. Thus, instead of capturing a ton of raw data, they use use their beefy CPUs to enhance what the sensors can capture, generating the high-quality photos we're all familiar with. While the results are generally desirable, this process takes time, which can raise problems in those situations where a user needs to take mulitple photos in succession.
To that end, iOS 26 enables a feature called Prioritize Faster Shooting out of the box. This reduces the quality of the image processing when you press the shutter repeatedly, ensuring you can snap more photos faster. While disabling this may sound like an easy image quality win, it's not really that simple: PetaPixel's 2023 test of the feature found that not only were the quality reductions minimal, the changes in processing only happened once the user tapped the shutter "roughly more than three times in a second." That is very quick and likely not what most users will be doing, especially since Burst mode lets iPhone owners do just that without any image quality downgrades.
That said, those who want to eliminate the possibility, however remote, of having worse images than they would otherwise get — even at the risk of missing out on rapid-fire photos — can disable this feature. To do so, head into the Camera's settings menu and scroll down until you find the Prioritize Faster Shooting toggle, and disable it. We think it's a crucial iPhone Camera setting for better photos, but hey, you do you.