15 Tips & Tricks To Increase Your TV's Image Quality
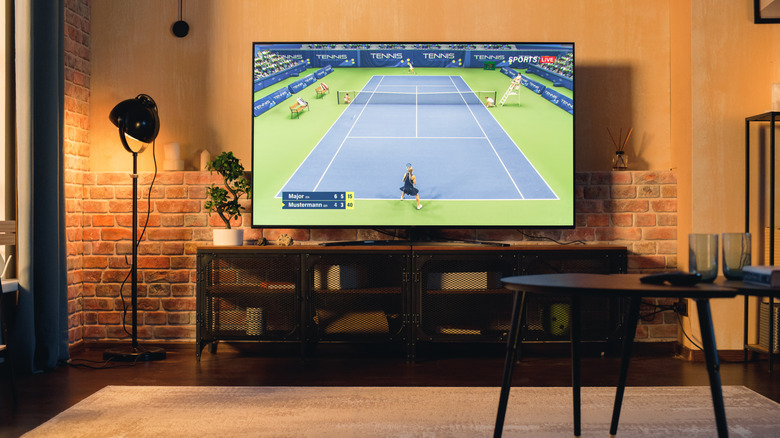
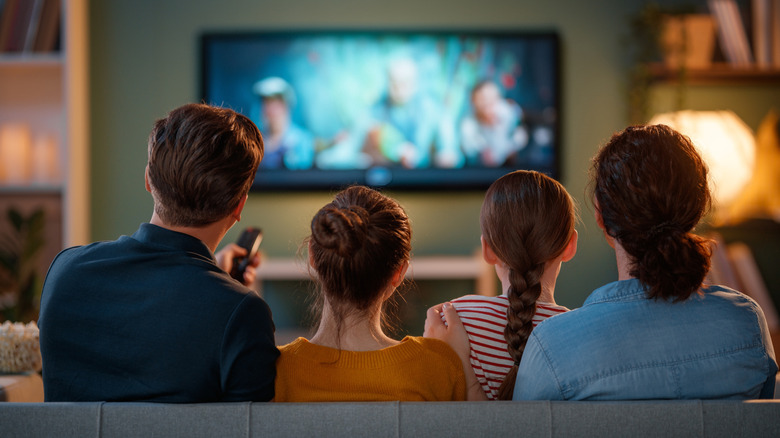
Watching your favorite shows or movies is always a fun experience on a large screen. So if you recently upgraded from viewing content on your smartphone or laptop to using streaming apps on your smart TV, you're definitely going to enjoy the extra real estate. That said, not all types of content are optimized for a larger screen, so you may experience some niggles or quality issues here and there. Even if you've already been using a TV for a while but feel like you're not getting the best out of it, you can make use of some tips and tricks to improve the image quality, resulting in a superior viewing experience.
While some of these tips are software-dependent and need you to change your TV settings, others can help you improve your TV's placement and port selection, or require adding a TV gadget or two. You can use these tips and tricks regardless of which TV you have, since they're universal solutions that work across brands and a wide range of TV sizes and technologies. Whether you have a 65-inch or 32-inch TV, with an OLED or QLED screen, you can improve the picture quality by following some simple steps.
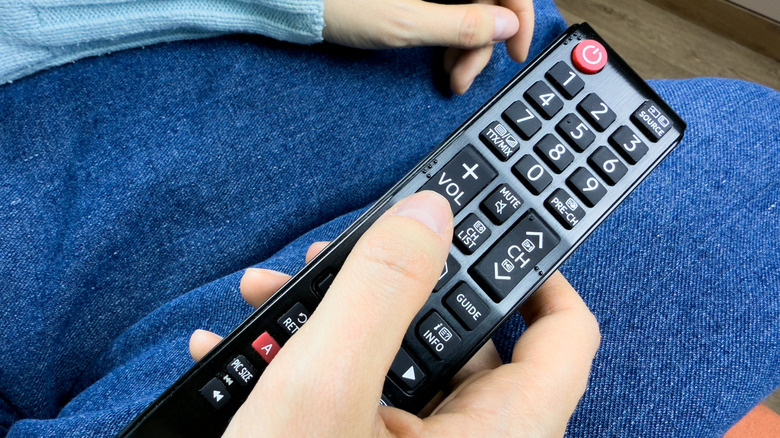
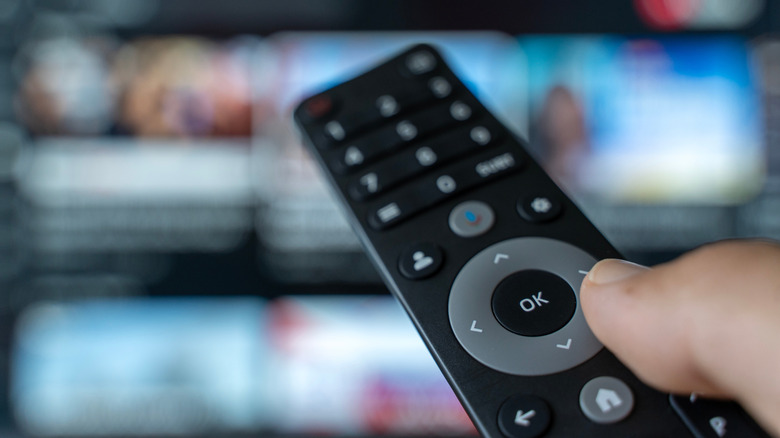
Pick the right HDMI port on your TV
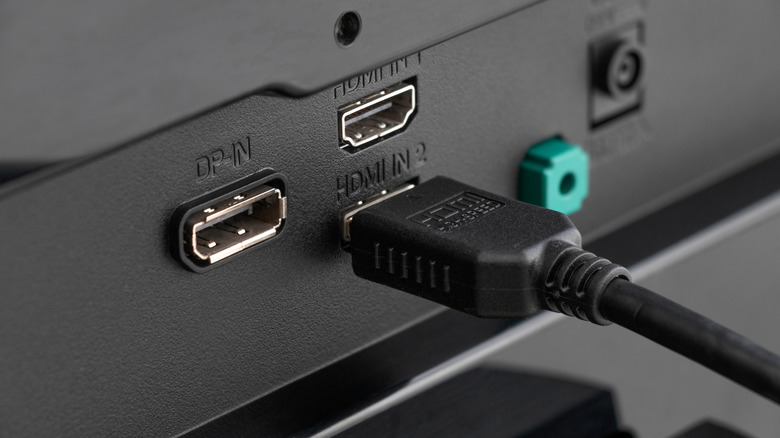
Most new TVs come with multiple HDMI ports. There are usually two or more of them to connect multiple peripherals, such as Blu-ray players, streaming devices, and gaming consoles. Since there are multiple ports, you may think that using any of them would result in the same picture quality. Well, that's not always true. The HDMI ports on TVs are often of different types, and support different resolutions and frame rates, so using the one apt for your specific device type is extremely important. Otherwise, it may result in poor video quality.
For instance, when gaming it's recommended to connect your console to an HDMI port that supports the HDMI 2.1 standard, to get the highest frame rate and resolution. If you're not displaying content with a frame rate above 60 fps, an HDMI 2.0 port will be just fine. Look for the port specifications in your TV's user manual and connect external devices accordingly.
Use a high-quality HDMI cable
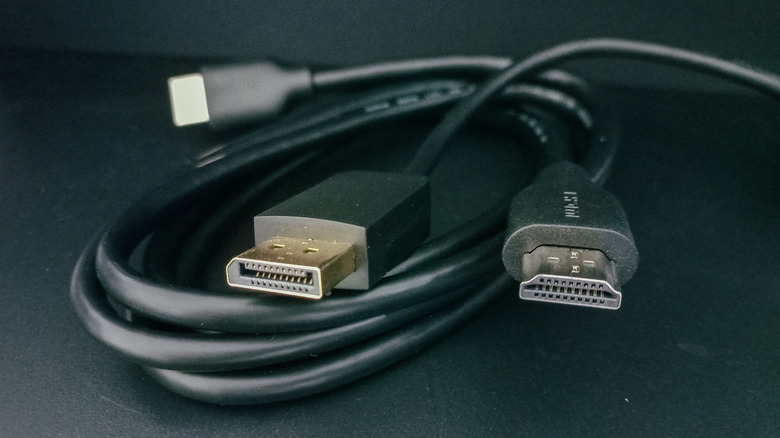
Just like how all HDMI ports aren't the same, HDMI cables come in many varieties. There are multiple types of HDMI cables that support different standards, and using the right one with your device will determine the picture quality. If you're using a Blu-ray disc to watch a movie, but the HDMI cable connecting your device to the TV only supports the HDMI 1.0 standard, you're not going to enjoy the maximum supported resolution, resulting in inferior picture quality. The same applies to gaming consoles, as using a cheap HDMI cable may not allow you to play games at higher frame rates.
You need to choose the right HDMI cable for your TV, depending on the use case. You don't always need a high-end cable with gold-plated connectors. All you need is a good HDMI cable that's actually worth the money. An HDMI 2.1 cable will give you the best picture quality and frame rates while also being future-proof, so it's worth splurging a little extra on one.
Adjust picture modes based on media type
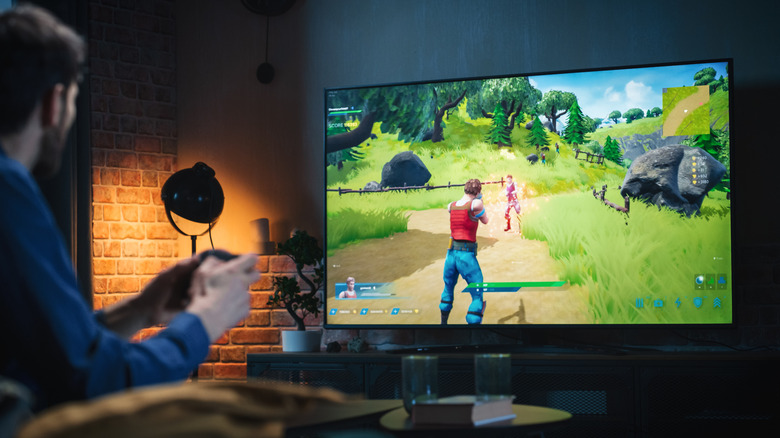
Every TV comes with several picture profiles that you can use based on the type of content you're viewing on the screen. For instance, if you're watching a movie, using the Movie mode or profile sometimes reproduce natural colors, brightness, and contrast just the way the maker intended it to be watched. On other TVs, the Cinema mode may also add extra bass or surround sound effects to make the experience more immersive. There are similar picture profiles for sports, games, standard viewing, etc. Try switching between all the included picture profiles to find the one that meets your requirements.
You don't necessarily have to use the picture profile corresponding to the type of content you're viewing. For example, you may prefer using the Sports profile even when watching a movie, and that's totally fine. Switch to the Sports mode and enjoy the content. The point is to watch different types of media on different profiles to figure out what looks good in which mode. Some TVs also have the ability to automatically switch modes based on what you're watching.
Play around with display settings manually
Picture profiles are like default filters that you can find inside a phone's camera or gallery app. They can help you alter the picture quality to a certain extent with preset values, but that doesn't necessarily provide a customized experience. If you know you want the picture to look a certain way, it's best to take things into your own hands. That's where manual controls come into play. Instead of cycling through different profiles manually, most TVs offer custom sliders for various image parameters.
You can change the brightness, contrast, saturation, hue, color temperature, etc., of the picture on your TV screen, allowing you to completely change the way your content appears. You can even create custom profiles using these sliders, which you can then set based on the type of media you're watching. For instance, some may prefer higher contrast when watching movies, but lower saturation when viewing a game of football. You can change these settings as per your preferences.
Disable motion smoothing
Most new smart TVs come with a feature known as motion smoothing — a software algorithm that uses frame interpolation to add extra frames between existing ones to make the content appear smoother. For example, if a sports broadcast is shot 30fps, the TV could add one additional "fake" frame in between each real one to push the content to 60fps, making it appear more visually pleasing. While some viewers like this feature, it can look worse than the original, and it's not how the creator intended you to watch a scene.
Hence, we recommend you turn off motion smoothing on your TV. Depending on the make of your TV, you may find the setting under different names, such as MEMC, Auto Motion Plus, Action Smoothing, Motion Enhancement, etc.
Use LED light strips behind the TV
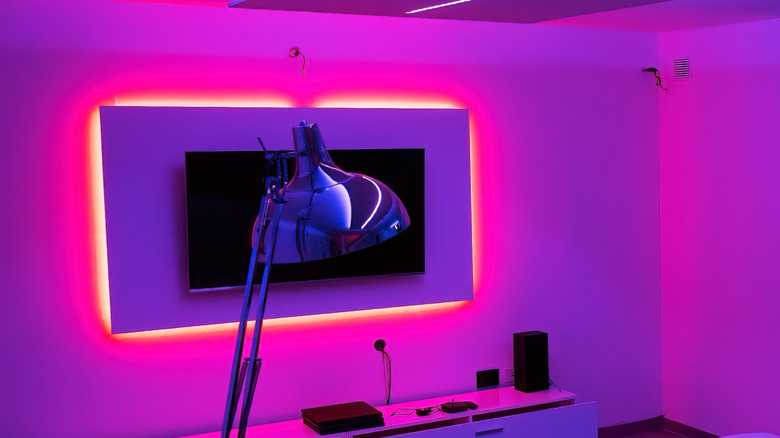
You may have seen several pictures or videos online of people installing colorful LED light strips behind their TVs, to give them a nice visual appeal. Apart from the fact that they look cool, you may be surprised to know that these LED strips serve another purpose. While they don't directly improve the picture quality when watching movies, they create something known as bias lighting that indirectly leads you to a more pleasing experience when watching TV.
This is especially true if you watch a lot of TV in the dark. Bias lighting reduces the contrast between bright scenes on the TV and a dark room, which also results in less eye strain when watching TV for long durations. Due to this effect, you may experience that there's additional depth to the picture when viewing the TV, along with better contrast levels. It also creates a nice mood, giving you a cinema-like experience at home. Notably, some LED lights also have mics or cameras that react based on the content playing on the TV for an even better experience.
Remove light sources in front of the TV
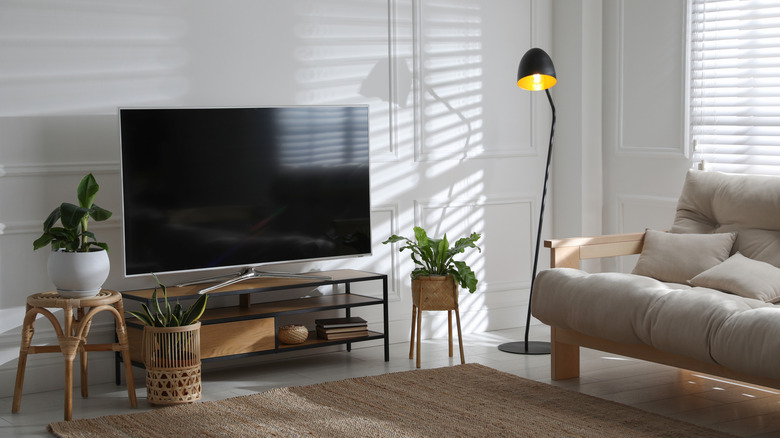
While adding LED lights behind your TV may result in better perceived image quality, the light sources in front of the panel also play a crucial role in determining your TV-watching experience. Since most TVs have reflective display panels, placing bright sources of light in front of them can ruin the picture quality. This is especially true if you view the TV from an angle. Having a large number of light sources, such as bulbs, lamps, and windows in front of a TV, will cause too many reflections, leading to washed-out pictures.
So, it's best to place your TV in an area where there aren't any large sources of light right in front of it. If you have lamps, place them beside the TV. In case your TV is placed facing some large windows, we suggest you use blackout curtains or blinds to block the light entirely. If you haven't mounted your TV on a wall, you can always change its position slightly by adjusting the angle of the table it is kept on, so that the screen doesn't face any source of light directly.
Place the TV at the correct viewing distance
Along with the correct position and angle to avoid light reflections, placing your TV at the correct viewing distance away from your couch or bed is also extremely important to ensure you have a pleasing experience. While there's no one rule from manufacturers telling you how far you should place your TV, there are suggested distances for the best viewing, depending on the size and resolution of your TV. For instance, a 55-inch TV should ideally be placed 5.5 feet away for the best movie-watching experience.
This cuts out elements in the background for a more immersive viewing experience. Additionally, it strikes a good balance between viewing the entire frame and not squinting to read subtitles or other small elements on the screen. A good thumb rule is to divide the size of your TV's screen in inches by 10 to get the ideal distance in feet. Of course, if you have a small room or if your TV is mounted on your bedroom wall, you may not have enough space to make such adjustments.
Enable HDR for supported content

High Dynamic Range or HDR creates a massive difference in picture quality, especially when viewing movies or TV shows with extremely dark or bright scenes. With HDR enabled, highlights are boosted, while shadows appear darker — improving the contrast to a massive extent. If your TV supports HDR, and the content you're viewing is also available in HDR, it's recommended to enable it from the TV's settings menu and from the streaming app as well. Sometimes, a streaming service may offer HDR content only on certain subscription tiers.
If you watch a lot of movies and want to enjoy a more immersive experience, it's recommended to upgrade to the tier that offers HDR capabilities. Some TVs also limit HDR content to certain input sources, so plugging your streaming stick or Blu-ray player into the correct port becomes important. You may also find the Dolby Vision setting on some TVs. If it is present on yours, turn it on for superior picture quality.
Use a good-quality streaming device
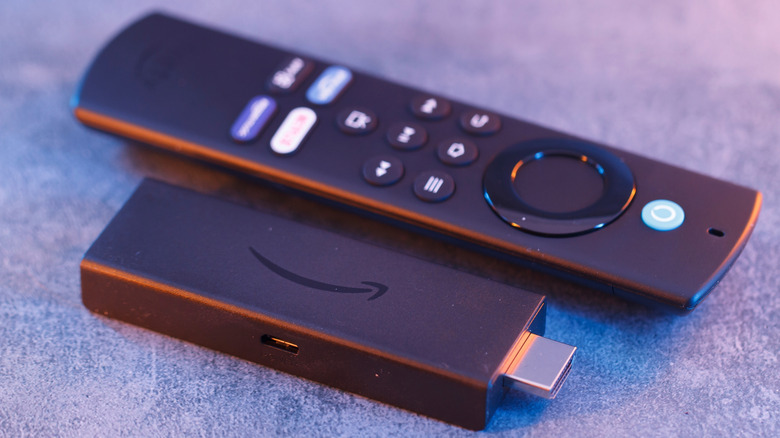
Most smart TVs nowadays come with a built-in UI that lets you connect to the internet, stream content, install apps, play games, etc. However, some of these interfaces are quite barebones and laggy, which may persuade you to get a streaming stick. With so many options in the market, you may be confused. You may also want to purchase the cheapest option, based on the idea that all the device has to do is connect to your TV and provide an interface to use streaming apps. Unfortunately, that's not the case. Your streaming stick will decide how good the content appears on your TV.
If you have a nice 4K 65-inch OLED TV and you end up purchasing a 1080p streaming device, you can never make complete use of all those extra pixels on your TV panel. You should pick a 4K streaming stick with HDR capabilities, if that's what your TV has, since this way it won't limit the content to a lower resolution. If you use an iPhone or other Apple products, the Apple TV 4K is one of the best streaming devices you can buy. The Google TV Streamer 4K and Amazon Fire TV Cube are excellent options, too.
Clean the TV screen periodically
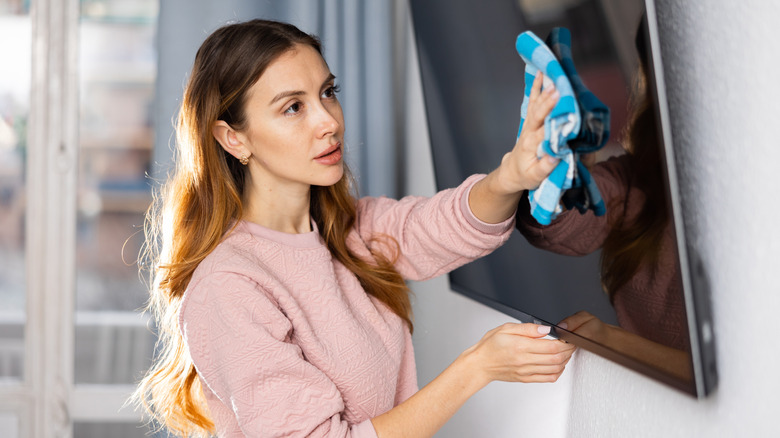
Depending on where you've placed your TV, it's extremely easy for dust and other debris in the atmosphere to land and settle on the screen over time. While it may not be immediately visible to the naked eye, even a thin layer of dust deposited on the TV can result in a degraded viewing experience. So, it's wise to clean your TV screen every now and then. Use a microfiber cloth to gently wipe the screen. Make sure you don't apply too much force, as it may damage the screen.
Do not spray any type of glass or surface cleaner onto the TV, as the abrasive liquid may damage it. If there are stains on the glass or there's a thick layer of dust, you can spray some lens cleaner onto the microfiber cloth and rub gently. Repeat the process every week to prevent dust build-up in the long run. While you're at it, ensure the windows near your TV are closed at all times so that external dust doesn't enter the room and settle on its screen.
Use an Ethernet cable or capable mesh network
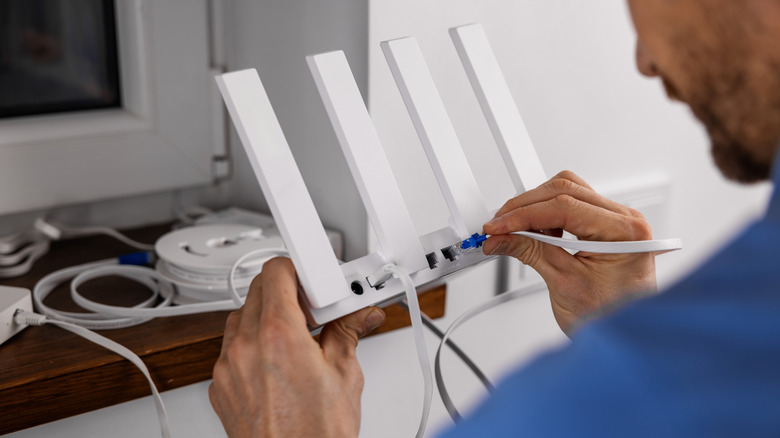
A minor issue that most people ignore, but which can result in poor picture quality when watching TV, is a slow internet connection. Since most people stream content via online platforms nowadays, it's vital to have a fast internet connection with a high bandwidth. This might mean placing your TV close to your Wi-Fi router so that there are no connection issues. If you're using a TV in your bedroom but the router is in the living room, you may face buffering issues or pixelated visuals when watching movies or shows.
The ideal fix for this problem is to either use an Ethernet cable that plugs straight into the TV, to provide a stable, wired internet connection, or to use a mesh Wi-Fi system that delivers consistent internet speeds wirelessly throughout the house. While using an Ethernet cable will result in better stability, a mesh network is more practical. It provides high-speed Wi-Fi for multiple devices, not just your TV. So if you have also been facing connectivity issues on your phone or laptop in certain parts of the house, it's time to get a mesh router.
Update the TV frequently for bug fixes
Operating systems and UIs have drastically improved over the years. Thanks to this, we have sophisticated UIs on phones, TVs, projectors, and whatnot. That said, a small bug can ruin the experience of using a device. For instance, your TV's software may have a bug preventing it from loading 4K content when watching YouTube. Or, there could be an issue with the Wi-Fi antenna's firmware, limiting its range. To fix these errors, manufacturers often roll out software updates over the air. However, most people ignore these updates, assuming they aren't of much use.
If you're facing issues with picture quality on your TV, update the software to the latest version by heading to the Settings menu. It's possible that the brand may have optimized the software and tweaked certain settings to match the display's requirements, resulting in better visual quality. Updates may also bring new security patches to fix vulnerabilities, so keeping your TV up to date is also better from a privacy standpoint.
Reduce image sharpness

A sharper image is always a better image, right? Well, that's unfortunately not true when it comes to TVs — at least, not all the time. The Sharpness setting or slider on your TV isn't making the picture appear sharper or more detailed. Instead, it's just improving the details at the edges of an image by making it sharper, which may result in poor visuals. We've also observed that turning up the sharpness levels on some TVs leads to weird visual artifacts or ghosting showing up on the screen, which is why it's a good idea to entirely disable sharpening or reduce it to the lowest possible level.
You should find the Sharpness slider in the same menu as other manual controls, such as Brightness, Contrast, Saturation, etc. If you want to know exactly what the option does, we recommend playing a movie of your choice and observing the same scene with the sharpness slider set to different levels. Since picture quality may be subjective, you can decide which level of sharpness suits your requirements.
Disable Eco and power-saving modes
Lots of new TVs have built-in power-saving modes or an Eco mode that saves power, making it better for both your pocket and the environment. While it's definitely an excellent feature to have, enabling the power-saving mode may result in reduced performance or inferior image quality. This is because the TV limits the power intake, leading to reduced brightness, lower CPU usage, and less backlight. The result is that movies look dull, and the selected content may take longer to play.
So, it's best to reserve the power-saving or Eco modes for when you're not necessarily looking for the best visual experience, but are watching a simple tutorial or recipe video on YouTube, where you don't really care about how good the visuals are. When gaming or watching a movie, turn off all such modes to enjoy bright and colorful visuals. It's also worth noting that these energy-saving modes aren't going to save you a lot of money either way, so the compromise in picture quality may not be worth it at all.