10 Settings You Should Immediately Change On Your Ring Camera
Your home may be your castle, but security measures like building a moat around your house and filling it with alligators are out of the question these days — both because it would cost too much money and most zoning laws would prohibit it. Nevertheless, you can't be too careful when it comes to home security. So how do you protect your home? Recording everyone who comes and goes isn't a bad place to start.
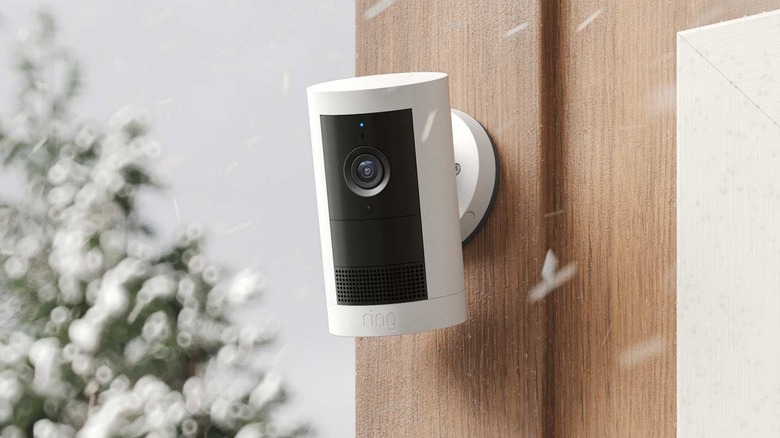
Ring manufactures and sells a popular and well-respected line of home security cameras. Odds are you have seen some of its products, such as the Ring Battery Doorbell Pro and the Ring Spotlight Cam Pro, just by going for a walk around town. You may even have considered purchasing one. Who wouldn't want to see if the person at their front door really is the pizza delivery guy they claim to be?
However, Ring cameras are far from perfect, and not just because technologically savvy thieves can disable them. If you buy one, you should probably change a few settings to make the device easier to use, improve its energy efficiency, and keep its digital eyes squarely on your property. It's supposed to keep your house safe, not snoop on your neighbors.
Here are 10 settings you should immediately change after you purchase and install your Ring camera.
Deactivate certain power settings
Like all modern cameras, Ring cameras don't work without electricity. Some can plug into outlets, while other others run on batteries that can last months. You can lower your electricity bill and squeeze a few more days out of your Ring camera batteries by changing a few settings.
The first thing to do when you get your Ring camera is check where it's drawing power. Models like the Spotlight Cam Pro and Outdoor Cam accept both a power adapter and battery source via a dual power mode — they can even swap between the two during a blackout. To check which source the camera is using or to switch, open the Ring app and tap on the Menu button (the three horizontal lines). Then tap Devices and select your camera, followed by Device Settings and General Settings. Hit Power Mode and then pick either Wired Mode or Battery Mode depending on your preference.
Some video settings also drain extra energy. One example is high dynamic range (HDR) video, which provides a higher image fidelity — you can turn it off in the Ring app by tapping the More (...) option on the camera. Open the Settings menu, followed by Video Settings. Tap the HDR toggle button to Off, or leave it turned on if you believe the clarity is worth the energy cost. Color night vision, which does exactly as its name advertises, is another power hog of a setting. To turn it off (or on), open the Ring app, tap on the Menu button, then pick Devices. Select the camera of your choice, tap Device Settings, then Video Settings, and finally toggle Color Night Vision On or Off.
Narrow detection locations
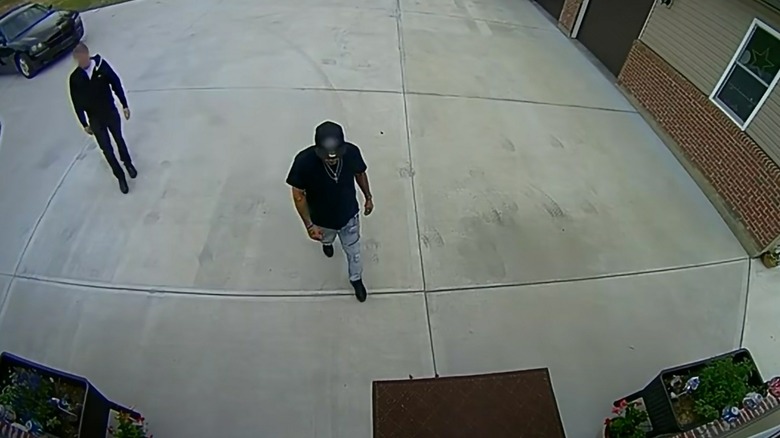
The Ring camera is supposed to notify you if it detects movement. It does this by keeping its electronic eye open 24/7, sort of like how an Amazon Echo is always listening. You can limit where the notification-worthy movement occurs.
Motion zones are designed to keep an eye on areas that you deem crucial. Most movements in these zones will trigger the device to start recording and send you a video. By narrowing this monitoring area to, say, your front porch, your Ring camera won't send you a notification every time a truck or car passes by. To add a motion zone, open the Ring app, tap the More button for your camera, then the camera's Settings. Select Motion Settings, then Camera Motion Zones, and tap Add Zone. Drag and drop the points on the screen to cover your property, and finally hit Save. If you need to edit your camera's Motion Zones, select Edit Zones from the Motion Settings menu instead. Pick the zone you want to change, adjust the boundaries, and hit the Save button.
You can also create the opposite of a motion zone via a privacy zone, a special area blocked out and not monitored or recorded. It's ideal for preventing your camera from accidentally videotaping your neighbors, for instance. First, open the Ring app and tap the More button, followed by Settings. To add a privacy zone, select Add Privacy Zones, hit the plus (+) button to create a new zone, and adjust its boundaries. Press Done when you're finished. If you need to edit a privacy zone, pick Edit Privacy Zones, tap on the preexisting privacy box, and adjust it. Again, punch Done when you're finished.
Alter motion sensitivity
Many Ring camera owners have complained about the devices' motion detection. This is often the result of several systems working in tandem. We already talked about the system in charge of knowing where to look, but there's also on to determine whether whatever is detected is worth raising the alarm.
You can adjust the sensitivity of your Ring camera in the motion detection settings. The lower the sensitivity, the smaller the Ring camera's detection distance. If the sensitivity is set too close, the camera might not notice events worth recording, but this has the added advantage of reducing the likelihood of false alerts. To tweak the camera's Motion Sensitivity for your needs, open the Ring app, tap on the More button, then Settings. Select Motion Settings, and then Adjust Motion Sensitivity. Alter the setting to your liking.
Ring cameras have many other motion detection-centric systems you can alter to provide the best protection. Advanced motion detection improves motion detection accuracy and reduces the possibility of a false positive detection, albeit at the cost of battery life. To activate this setting, select Advanced Settings from the Motion Settings menu, then Advanced Motion Detection, and switch it to On.
Motion frequency determines how often a Ring camera should check for motion events. This might seem counter-intuitive since a potential burglary can happen at any time, but it helps battery-powered cameras last longer. To change this setting, select Motion Frequency from the Advanced Settings menu. You can pick from Frequently (motion detection is always active), Regularly (motion detection takes a short break after a motion alert), and Periodically (motion detection takes a long break).
Turn on snapshot capture
As we previously established, Ring cameras aren't perfect. Even if you think you've got the motion detection set up just right, the device probably won't capture everything you think it should. But it can still let you know everything is ok...or not...every so often.
If you have altered a Ring camera's motion frequency settings to maximize battery life, or you suspect the motion detection settings aren't calibrated correctly, the device can still keep an eye on things via Snapshot Capture. As the name suggests, this feature periodically takes pictures throughout the day, and you can review them at your convenience. Even if someone or something is too far away to trigger the motion sensor, it can't escape the snapshot.
To turn on Snapshot Capture, open the Ring app, and tap on the More button. Pick Settings, then Device Settings, and finally tap Snapshot Capture. Toggle Snapshot Capture either On or Off. You can also change the frequency of these snapshots from the same menu. Just make sure to hit the Save button when you're done. Unlike other media recorded by the Ring camera, you can only view these images through the Ring app, not the Ring website.
Turn on bird's eye view
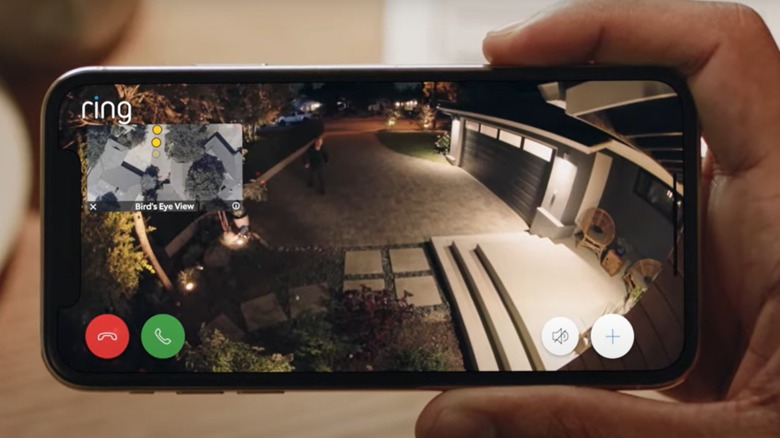
Security cameras such as a Ring camera can record whatever they see, but they have both literal and figurative blind spots. Obviously, if someone is no longer in view of the camera, you'll have no idea where they are. However, some Ring cameras can shore up this weakness.
The Bird's Eye View setting can show you an aerial map of your premises and, more importantly, show you the paths people took when your Ring camera detected them. If a delivery person dropped off a package and your camera registers them as a movement event, Bird's Eye View will tell you if they stuck to the walkway or trampled through your petunias. The feature can even provide live tracking if initiated quickly enough.
Before you can turn on Bird's Eye View, you should check if it's even compatible with your Ring camera. If you don't own a Battery Video Doorbell Pro, Wired Video Doorbell Pro, Floodlight Cam Wired Pro, Spotlight Cam Pro, or Stick Up Cam Pro, you can't use the feature. Furthermore, you should update the Ring app, but once that's done, open it and tap on the camera's More button, followed by Settings and Video Settings. If you have the Wired Video Doorbell Pro or Floodlight Cam Wired Pro, select Bird's Eye View, toggle Show on Timeline, and hit Save. If you have a Spotlight Cam Pro, Stick Up Cam Pro, or Battery Video Doorbell Pro, select Picture in Picture and toggle it, then hit Bird's Eye View, and finally punch the Save button.
Tweak alert notification frequency
One of the Ring camera's main selling points is its ability to notify you when someone is on your property, especially when you aren't home. However, depending on where you are, receiving notifications can prove bothersome. Thankfully, Ring cameras have several "do not disturb" modes.
By toggling on Motion Schedules, you can turn off Motion Alerts, so the Ring camera won't notify you during certain times of the day. The camera will still record them, since the device is useless if it isn't constantly monitoring your premises, it just won't notify you about it all. To create a Motion Schedule, open the Ring app, press your camera's More button, and select Settings. Then tap on Motion Settings, followed by Motion Schedules, and Add Schedule. Give the schedule a name if you want, pick Continue, and customize its planned days and times. Finally, press Save.
If for instance a party is being held in view of your Ring camera and you don't want to know about recordings, you can also temporarily snooze notifications without making a new Motion Schedule. From the Settings menu, tap Motion Snooze, and pick how long you want the device to stop sending alerts. This setting can cover between 30 minutes to four hours. If you own more than one Ring camera, you can alternatively turn off notifications from all of them with Global Snooze. Just hit the Global Snooze button (the moon symbol), and again pick how long the notification sleep will last. It's certainly easier than turning off app notifications from your phone's Settings menu.
Turn on voice settings
Most security cameras can't really prevent trespassing — they can only catch the perpetrator in the act and help police identify them after the fact. However, security cameras can be preventative measures if they announce their presence.
Ring cameras have two voice settings you can activate when the device detects motion. The first, Motion Warning, plays a standard "Hi, you are currently being recorded" message. This feature is only compatible with devices with speakers, like the Stick Up Cam Elite, Outdoor Cam Plus, Floodlight Cam Wired Pro, and Ring Video Doorbell Elite. To turn it on, you should open the Ring app, tap the camera's More button, and then tap Settings. Next, select the device again, pick Smart Responses, and hit Motion Warning. Toggle the feature to On and link it to a Motion Zone.
The second, and possibly more useful, voice feature is Quick Reply. Unlike Motion Warning, you can only use Quick Reply with Ring video doorbells, but it lets you customize your doorbell greeting and turn it into an answering machine for your front door. To set it up, open the Ring app and tap the Menu button. Then, select Devices, tap on the doorbell, hit Smart Responses, and then Quick Replies. Set the feature to On and select a Response Time, which can go up to 20 seconds. Oh, and don't forget to actually customize the message by selecting Quick Reply Message and choosing the one that you like the most. You can even pick a seasonal greeting message. As always, use Save to finalize your edits.
Link up devices

Ring cameras need a constant Wi-Fi connection. A small price to pay for added home security (on top of the actual cost of the camera). However, with a Wi-Fi network comes the ability to connect Ring cameras with other devices for extra security.
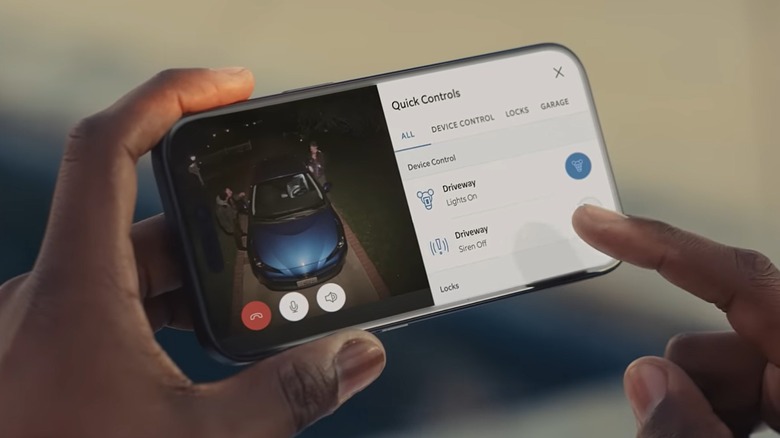
If you own numerous Ring cameras, you can sync them to activate all at once when one detects movement. This feature can provide a full view of your surrounding area and keep an eye on whoever or whatever set the system off in real time. To link your devices, open your Ring app and tap on the More button. Select Settings, then Linked Devices. Pick Motion Detected, highlight all the devices you want to synchronize, and then select either Record Event or Turn on Lights. You can alternatively use this feature to activate the cameras, floodlights, and even a siren if someone trips your Ring Alarm. Just select Alarm under Devices and follow the above steps. You can pick Record Event, Turn on Lights, or Sound Siren.
People who own a Ring camera doorbell have a few more options to help secure their homes. For instance, instead of selecting Motion Detected, use the Ring option to make a Ring camera doorbell trigger the cameras and floodlights when someone rings your bell. If you purchased a Chime, you can also link it with the rest of the system to go off whenever someone trips a camera or rings the doorbell. From the Settings menu, pick Linked Chimes, then either Rings or Motion Detected. Hit the music note icon, and tap Save. Oh, and don't forget to customize the Chime's tone and volume.
Turn on rich notifications
As we previously went over, Ring cameras can tell you someone is at the door or trying to break in when you're not home, and you can turn the notifications off if you are otherwise preoccupied. You can also turn on a different form of notification that gets to the meat of why the Ring camera thought it should inform you.
Ring camera's Rich Notifications feature serves as a Cliff's notes version of standard Ring camera notification videos. Instead of showing the recording in its entirety, this setting provides a small preview, summarizing what set off the device's motion detection in a glorified gif. After you're done previewing the Rich Notification, you can check out the live feed or review the full video if you want. It all depends on what the Rich Notification shows you, and if the preview showed a UPS delivery, you can thank Rich Notifications for saving you some time.
To set up Rich Notifications, open the Ring app and tap on the More button for your Ring camera. Then hit Settings, followed by Device Settings, and then Notification Settings. Finally, toggle Rich Notifications to On. To actually open and see the Rich Notification's video previews on iOS, you must hold down the notification, and to view it on Android, you must press and drag down the notification thumbnail. Unfortunately, Rich Notifications has one important stipulation: The features is only available if you have an active and compatible Ring Home subscription.
Extend video storage time

Ring cameras store all the pictures and videos they take. They can't do it without a Wi-Fi connection, but these recordings still serve a reliable record should you need them. Unfortunately, they are only available for a limited time. To keep videos for longer, you must fiddle with certain settings.
By default, Ring cameras store videos for 30 days. This is true for everyone's new devices and every new trial or subscription plan. However, users can alter these storage times to fit their specific needs and wants. Video retention can go as low as one day and as high as 180 days — to keep them any longer, you must download the recordings onto your computer or mobile device.
You can change your Ring camera's video storage time settings either through the app or the Ring website. To do it through the app, start by tapping on the Control Centre button. Then select Video and Snapshot Storage, then Video and Snapshot Storage Time. Tap Edit next to your Ring camera. Pick the time option you want and finalize it with the Save button. If you want to go through Ring.com, log into your account, then click on the Account button on the upper-right corner. Click on Control Centre, followed by Video and Snapshot Storage and Video and Snapshot Storage Time. Select the Edit button next to your camera, pick the time that you want, and hit Save. If you own more than one Ring camera, you will have to repeat this process for all of them; editing video storage time in bulk isn't an option.