How To Share Your Passkeys On macOS Sonoma

Apple showcased the new features coming to macOS Sonoma at WWDC 2023. It brings new widgets to the homescreen, breathtaking screensavers and wallpapers shot from a birds-eye view, a first-ever gaming mode for Mac, and more. Although Apple obviated from adding to the AI buzz by calling a massive upgrade to its voice assistant, Siri, macOS Sonoma also gets a splish-splash of AI features, including the ability to edit PDFs, augmented reality features in FaceTime and other video calling apps, and automatic filters for potentially NSFW media. While you still have to wait until after the iPhone 15's launch to use the stable version of macOS Sonoma, inquisitive users can already try out its features with the first public beta of macOS 14 Sonoma.
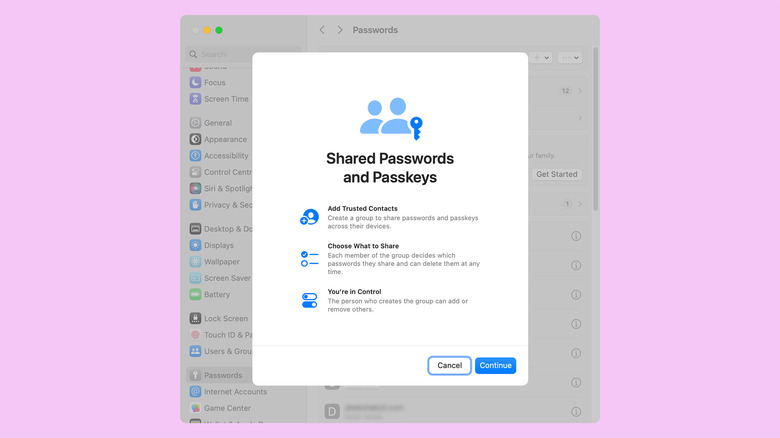
With macOS Sonoma, another practical update is coming to iCloud's Keychain password manager, which will now allow you to instantly share usernames and passwords of online services with friends and family. With macOS Sonoma and iOS 17, Apple will automatically migrate Apple IDs to passkeys — password's spiritual successor — and replace passwords with passkeys for its own services. This means the Keychain update also lets you share them with your intimate social circle, and in this article, we take you through the steps to share passkeys with your family using macOS Sonoma.
What are Passkeys?
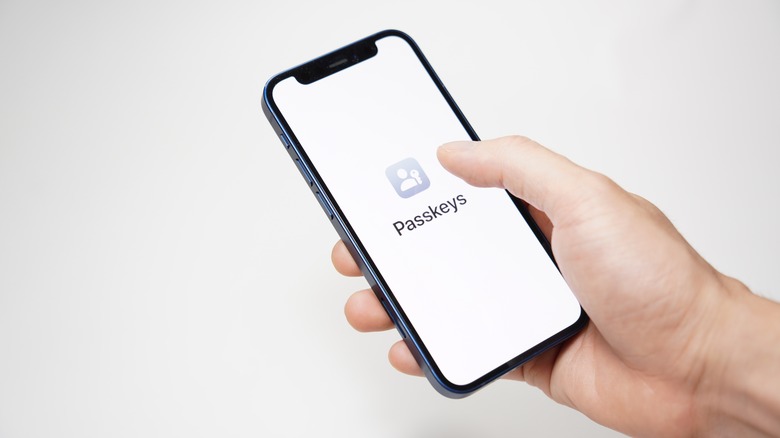
Passkeys are a new authentication method designed to make usernames and passwords obsolete. Instead of logging in to online services with your password, a passkey relies on biometric authentication and prompts you to sign in using fingerprint or facial recognition when logging into an account online. This method is identical to using a physical security key, except the security key is inside your phone.
The concept of passkeys was jointly developed by Google, Apple, Microsoft, and other leading technology companies and complies with the FIDO (Fast Identity Online) Alliance standards. The password-less technique is backed by the fact that passwords can be cracked through sophisticated guesswork or high-performing computers. While features like two-factor authentication (2FA) and online password managers rid us of the need to remember every password, these haven't proven entirely immune to relentless attacks.
Passkeys are stored in the form of encrypted private keys on your devices and cannot be easily replicated on other devices that you haven't validated. In addition, passkeys are portable, which means you can log in to a new (or publicly shared) computer simply by scanning a QR code using your phone. Note: we do not recommend setting up a passkey using a public computer.
Keychain lets you share those stored passkeys with friends and family using macOS Sonoma, iOS 17, and iPadOS 17, so individual members, especially the Luddites, do not have to set them up again.
How to share passkeys using macOS Sonoma?
Here are the steps to sharing a saved passkey with your friends and family:
- Ensure your Mac is running the macOS Sonoma beta. If you haven't already upgraded, follow our guide on how to install macOS Sonoma public beta.
- Once you have macOS Sonoma, open Settings and scroll down on the left panel to "Passwords" (not "Touch ID & Password"). Enter your Mac's password — or verify using Touch ID to access this section.
- Under "Share Passwords with Family," click "Get Started" and then "Continue."
- This will initiate the creation of a "New Shared Group" for sharing passwords. Make sure to only add those you trust. You may change the Group Name by clicking on the default name.
- Click "Add People" and search for your family members using their name, phone number, or Apple ID.
- Once you select all the members, click "Add." Note that you can only invite users who are already running macOS Sonoma, iOS 17, or iPadOS 17 on their respective Apple devices.
- On the following page, choose the services whose passwords you want to share, and click "Move" to complete the process.
- You can add or remove members or shared passwords from the groups later or create multiple password groups to include different people.
To share passkeys, you will need to ensure that you have already created passkeys. If you don't already know how, the next section takes you through the process of creating passkeys on Mac.
How to create Passkeys on Mac
Several major online service providers, including Google, 1Password, eBay, GoDaddy, WordPress, TikTok, etc., have already extended support for passkeys. If you would like to try, here are the simple steps to set up passkeys on any supported platform:
- Open a website or online service for which you want to set up a passkey.
- Make sure you use Safari to log into the website so the password can be synchronized with Keychain.
- Enter your username and password as usual and verify with additional verification, such as 2FA.
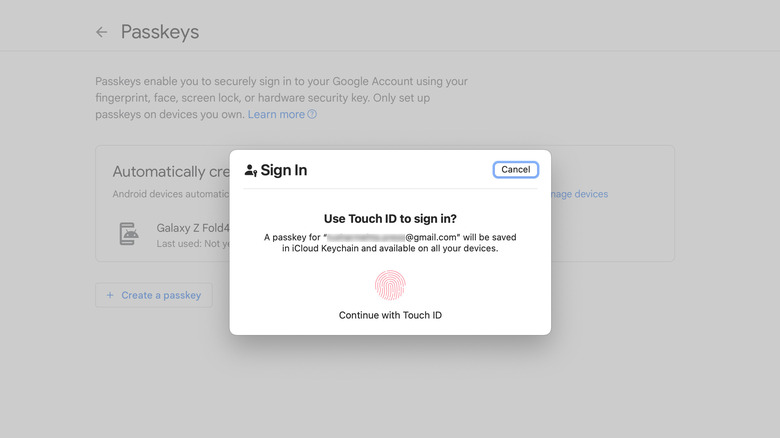
- Go to your account page on the service and find the Security section and find "Passkeys" on this page.
- Here, you should see the option to enroll or set up passkeys for your account. For instance, you will see an option that says "Use passkeys" on your Google Account settings page.
- Now click "create a passkey," and you will see a prompt to allow Keychain to create a passkey for your account.
- Verify with your fingerprint (if your Mac has a Touch ID scanner) or with the machine's password.
- Now enable passkeys by clicking "Use passkeys." The flow will be similar on most online services that support passkeys.
Next time you log in to the same account, you will be prompted to log in with the passkey. Since Keychain is synchronized across all Apple devices, you can also sign in using passkeys on any other iPhone, iPad, or Mac that uses the same Apple ID.