5 iPhone Control Center Features You'll Wish You Had Added Sooner
One of the best parts of iOS 18 was Apple's complete reimagining of the iPhone Control Center for the first time in a long time. Now you can customize the drop-down menu to your taste by rearranging, enlarging, or removing the existing options. Whole extra pages of controls can be brought up in the same initial swipe that brings up the Control Center; drag your finger down the right side to open pages for Now Playing widgets, HomeKit devices, etc. More importantly, though, tons of new control options were added (including from third parties) to quickly access functions across your phone.
It's the last part we want to focus on because there are a ton of Control Center features. Scroll through the list of options yourself, and you'll probably find at least one or two you've been sleeping on. These five are our personal favorites that you should add. None of them require installing a third-party app; they should be available on every iPhone updated to at least iOS 18.
Vehicle Motion Cues
iPhones are legendary when it comes to accessibility features. After all, this is the smartphone that lets you scroll with your stuck-out tongue. What about those of us with motion sickness? Using your phone while in a moving car quickly gives you a headache and tells your body, "I would like to blow chunks, please," but iOS 18 and onward have you covered with Vehicle Motion Cues. Little dynamically colored dots overlay the edges of your phone and flow in all four directions to seemingly prevent your brain from experiencing a sensory conflict between a static iPhone screen and a moving vehicle. Anecdotally, Vehicle Motion Cues all but erase motion sickness, even during long trips. Seriously, I was able to watch YouTube for hours on a long road trip (with nary a nauseated hiccup) thanks to this thing. The only way to quickly, manually control it is through the Control Center.
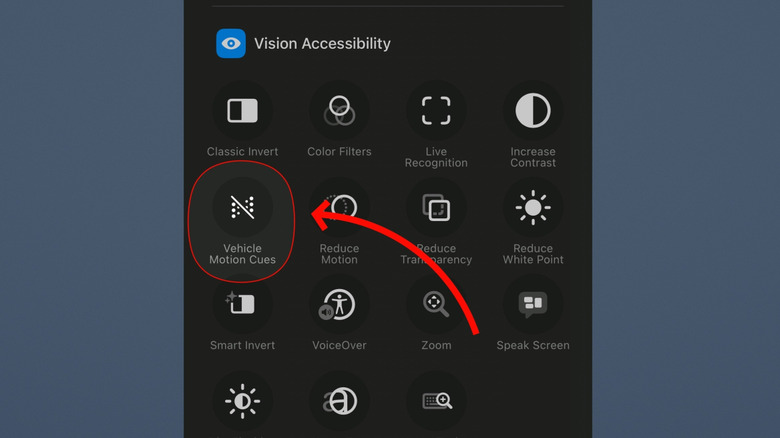
Open the Control Center, then tap the plus icon at the top left. Then tap the "Add a Control" option at the very bottom. Here, you can search for Vehicle Motion Cues or scroll down to it. Look for the Vision Accessibility section.
Vehicle Motion Cues has three settings. One, you can set it to enable "Automatically in vehicle." Note, based on personal experience, this setting is finicky and works only if your cell signal is good or you're connected to a car via Bluetooth. The other two settings are to manually turn it on and off. And voila, now you no longer have to decorate anyone's car in whatever you had for lunch.
Background Sounds and Ambient Music
For a while now, the iPhone has had a built-in set of soundscapes — white noise, ocean waves, rain, that whole thing. They're super helpful if you need some non-distracting sound to mask a noisy environment, or just to sleep better when it's pouring outside. In addition to this, there's an Ambient Music option that plays a whole bunch of free music playlists for specific categories of focus and relaxation. You can make either one much more accessible with a customizable Control Center control.
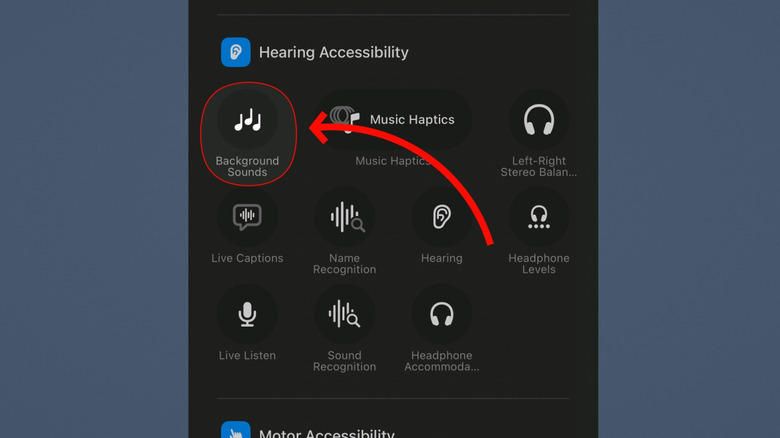
You know the drill. Open the Control Center, press the plus button, tap "Add a Control," and then search or scroll down for each. Ambient Music has its own section near the top with four distinct controls: Sleep, Chill, Productivity, and Wellbeing; Background Sounds is under the Hearing Accessibility section further down.
Tapping either one will start it automatically. Background Sounds allows you to press and hold to bring up a menu for volume control and background sound selection. There's a surprisingly large collection of sounds, including options like a bus, boat, airplane, and night ambience. Frustratingly, Ambient Music does not allow for a one-control-fits-all toggle. You'll have to stick with one music type or add multiple categories that you want. Regardless, in both cases, it is a literal one-press solution to get the backdrop you need for, say, writing your thesis or falling asleep.
Scan Code
Most people probably know by now how to scan a QR code with an iPhone. Point the camera app at the QR code and tap the yellow link that pops up. Easy. However, the "Scan Code" control lets you instantly scan and open the link in one step, rather than wasting a few seconds opening the camera app, waiting for the link to appear, and tapping it. This could really come in handy if you frequently have to scan QR codes and want to save yourself a couple of seconds.
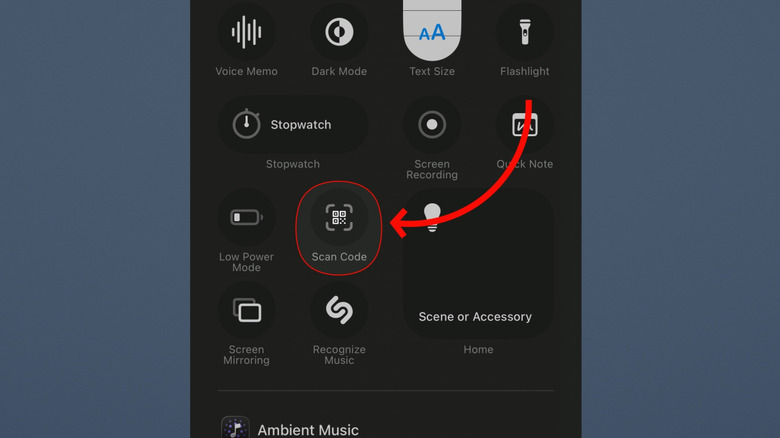
Once again, open up the menu for Control Center controls and find the Scan Code option. It should be right there at the top. Tap it to activate, and away you go. The link opens almost instantaneously if your phone's camera is already pointed at the code.
Having said all this, please, for the love of all that is holy, do not scan QR codes indiscriminately. That's a great way to get yourself scammed or possibly even compromise your iPhone. The FBI has been telling people not to scan QR codes on mystery packages, and that logic applies to any QR code you're not 100% certain is legitimate. Even then, scammers will paste seemingly legitimate QR codes on paid parking meters, as just one example. If there's a QR code for free Wi-Fi, it doesn't hurt to ask someone who works there if that's the real one — or just not risk it.
Guided Access
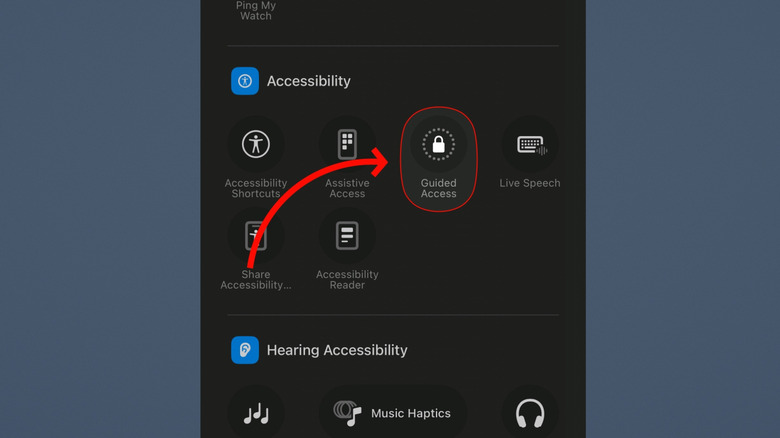
Do you ever hand your phone to someone who you don't entirely trust, hoping they'll do only the one thing you handed it to them for and nothing else? Guided Access was made for you. It's an iPhone Easter egg best for situations like showing a friend a photo. Guided Access on iPhone prevents someone from leaving the app that's currently open and can even restrict what they can do and for how long. Imagine how much less stressful it would be to, say, hand your phone to a stranger in public so they can take your group picture. It's easy to activate, too, with a Control Center control.
Either search for it among the controls, or scroll down to the Accessibility section. You will have to enable Guided Access the first time around. There are a plethora of customization options. You can set a passcode (bolstered with Face ID), give the app a time limit, stop someone from using the buttons, from opening the keyboard, or from even touching the screen.
So if you have that one friend who has a bad habit of swiping through your camera roll, you could quite literally limit them to the one photo they're looking at and nothing else. It's extremely useful for the privacy-conscious, easy to use, and can be activated in any app just by tapping it from the Control Center.
Home smart light toggles (and more)
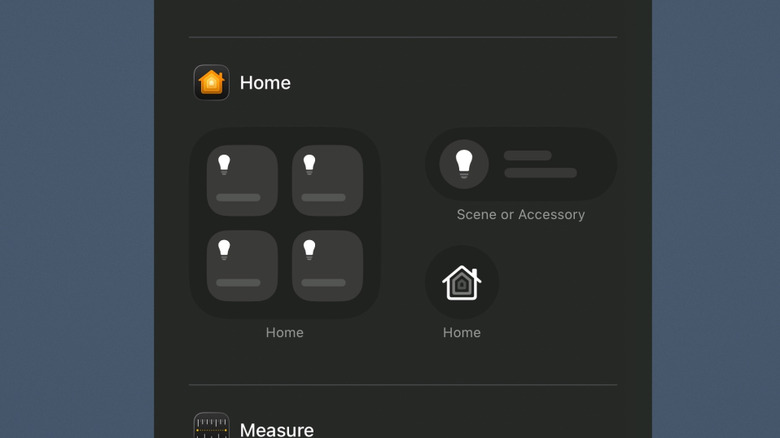
Apple HomeKit controls have been in the Control Center for a decade now. It's nothing new. What is new is that with the iOS 18 Control Center redesign, the size of those controls can be adjusted. So if you have only one light — or smart lock, or garage door, or what have you — that you'd prefer not to have hog half the space in the Control Center, you now have that option.
Go to the "Home" section in the list of Control Center options, and you'll see three choices: a 2x2 square of HomeKit toggles, a single-device toggle, or the option to just open the Home app. This is extremely helpful if, say, you want full-sized, distinct toggles for all the devices you want to manually control in your smart home.
Note, there's a surprising amount of customizability beyond this. Automatically, Control Center will group a bunch of proximate HomeKit icons and allow you to expand (or contract) them to include more or fewer of your home's devices. Also bear in mind that by default, the Control Center already has a separate Home page. If you want, you could just add separate pages to organize related devices, or simply give yourself more space for a smart home that can't be easily contained on a single page.