4 Handy Uses For Old Drill Bits You Probably Haven't Thought Of
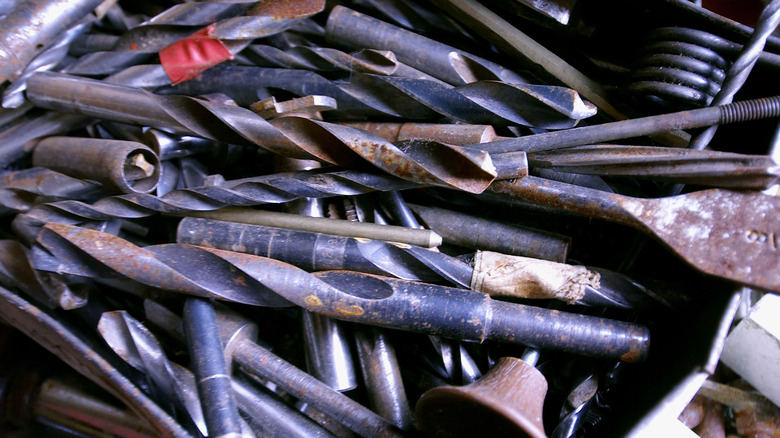
No garage is complete without a musty mixture of smells, an old tool set passed down from generation to generation, and a borderline absurd ton of old screws and drill bits that you promise yourself you're going to use someday. The screws are easier to find a home for, but it's the drill bits that pose a greater challenge. Once a bit is worn out, the uses it can then serve are severely limited. Most people would just tell you to trash them or shred them, then treat yourself to a top-rated drill bit set from Harbor Freight. You'd waste less time wondering what to do with them and might get a couple of bucks from recycling to buy yourself a Coke along the way. But if you're both creative and determined, there's still potential.
We want to be abundantly clear here. This is a list for people who refuse to get rid of good metal that could be put to a new use. The options we recommend aren't always ideal or practical and are more the sort of thing you do if you like DIY projects from old odds and ends. Then again, most people don't put this much thought into reusing old bits, so if you're reading this, you already know what you're getting yourself into. Try these four ideas for giving a drill bit a second life.
Always consider resharpening first
Old drill bits can often be resharpened to work again as long as they've got enough metal to hold an edge and enough flutes — even if they're broken in half. Bigger bits are ideal since they'll be easier to sharpen. Having said that, buying a new drill set will be way easier.
A bench grinder is all you need to sharpen drill bits. Carefully place your bit's cutting edge at a 30-degree angle to your grinding stone and then drag it horizontally to sharpen, then tilt again another 30 degrees to edge the rest of the heel. Once you've done that, make sure your tip has mirror-image cutting edges so the drill cuts true. If you want to expedite the process and have more accuracy than just eyeballing it, you can make a 45-degree wooden block with a trough to seat the drill, and then press its tip consistently against the angle grinder every time. We've heavily simplified the process for clarity, but if you want an in-depth look at how to sharpen bits, check out the guided YouTube video by Watch Wes Work above.
Sharpening one bit shouldn't take you longer than a couple of minutes. As you can see, scaled across a dozen drill bits — or more — this is going to take a lot of time, so it depends on whether you decide all that effort is worth it. But where there's a will, there's a way, and these bits can last a surprisingly long time. Old bits that you've had in your garage for decades may take a few more sharpenings than you thought possible. However, try to sharpen sooner rather than later; a worn-out bit will be harder to resurrect.
DIY awl
Old drill bits, in many ways, are perfect for DIY projects because they're tough, hardened alloys of steel, carbide, cobalt, and titanium. In other words, they're good metal that could serve well in a variety of uses. We'll detail a few DIY tool ideas for you here. First, an awl.
This video by Muyong Workshop details the process. You cut off the tip and then use a grinder to pare the drill bit down to a sharp point. Then, the point is heated until red hot and quenched in oil to temper it, followed by wire brushing and sanding to get a polished finish. Some of these steps are not necessary depending on your intended use; if you're not picky and not trying to create a tool that you could bet your life on, then simply grinding it down to taste is all you really need.
The creator makes a fancy, lacquered awl handle from red heartwood on a lathe and even uses a brass nut to stand in for the tip's holder. The end result is beautiful, but if that's outside the scope of your toolset — or your intention — you can create a cheap wooden handle out of just about any wood you've got lying around. Make sure to keep your wooden handles from splintering with this garage staple. This is a great option if you need a quick-and-dirty ice pick to clean out your freezer or break up frozen-solid bags of ice.
A forged blade (or other metalworking projects)
Drill bits are metal, and most metals can be reforged into something else. There's practically an entire category of YouTube videos where people take drill bits that have been gathering rust and transform them into blades. If you don't have a forge handy, don't worry. YouTuber Anvil Knocker shows you how to make a dirt-cheap forge with things like hair dryers as bellows and an old hammer head as a Viking-style anvil. YouTuber TKOR shows you how to make an even easier one with stacked firebricks and a torch.
A few disclaimers. First, you need to know what type of metal your drill bit is made of, what grade it is, and so on; this information dictates the correct forging temperature. That said, if you're just trying to have fun and not take things too seriously, you can probably get away with heating the metal until it's red hot and hammering it out; I did a fair amount of that as a kid on mystery metals with little issue. This project also lends itself best to bigger industrial drill bits. More metal, more knife. In the video above, YouTuber Knives Project untwists a big drill bit with a hammer before shaping it into a Ka-Bar-sized blade.
But what if you've got a bunch of smaller drill bits? You may be able to create canister Damascus steel — but prepare to have your work cut out for you. YouTuber Random Workshop shows how you can weld the old drill bits into a metal container and then gradually forge and fold it down. The result is that smoky, swirly Damascus pattern. We focused on knives here, but you can make just about anything you want.
DIY lathe tools
There's a lot of cool things you can make with a wood lathe, and a drill bit may be a helpful tool for the lathing process. When you think about it, a drill is doing a job that's not too dissimilar from a lathe; it's hard metal meant to hold its edge under heat, speed, and pressure to cut through wood. It's not high-speed steel designed for this purpose, to be clear, but it is reasonably close. In that spirit, you can reshape old drill bits into DIY lathe cutters. YouTuber Artisan Makes has a video demonstrating how to do this, shown above.
Artisan Makes is clear that this is not meant to replace the lathe tools you already have, but rather to make specialized ones for edge cases where your other tools aren't quite cutting it, pun intended. Since they're old and destined for the shredder, it's no skin off your nose if one goes dull or breaks on the lathe. And best of all, it's (mostly) free.
Lathes don't need a long drill bit to work with — and that might make it more prone to breaking, anyway — so you should be fine cutting away the fluted section and then shaping your tool from the small leftover stump. From there, it's back to the grinder to form your tool, then a diamond stone to hone it. You'll need some kind of holder to secure the finished bit when you're using it on the lathe. Artisan Makes recommends making your own from a steel bar and heat-treating it with linseed oil. He also recommends making a whole bunch of these DIY lathe tools in one sitting so they're ready to go when you need them.
DIY carving tools
You may have noticed a running theme here: these drill bits can, in some situations, save you money and do almost as good a job as a professionally made tool. Another area where drill bits can help is when you're looking at woodworking starter toolkits. Carving tools aren't expensive, per se, but if you've got a bunch of leftover drill bits and you like working with your hands, why not make your own? You'll have only the tools you need, and they'll be easily replaceable if they break.
YouTuber Young Je provides a quick guide in the video above on how to make a simple carving tool from a drill bit and wood for a handle. They use a grinder and files to shape the tool, and a lathe to craft the handle. You will naturally be limited to the width of the drill bit, so this wouldn't be a complete carving tool set, but it could stand in for the smaller ones.