3 Things To Keep In Mind When Buying A Used Starlink Dish

Whether you live in a rural area that doesn't have reliable internet coverage or are a vanlifer looking to take high-speed connectivity on the road with you, you may have considered purchasing a Starlink dish. There's no question that Starlink represents a major step forward in internet technology, which is one of the reasons it's become so popular in recent years. With Starlink, you can get internet access in areas that usually aren't served by cable or fiber internet providers. While Starlink has opened the door to high-speed internet in hard-to-reach places, the price for one of these dishes isn't exactly cheap. Depending on the Starlink dish you choose, you could find yourself paying anywhere from a few hundred to a couple of thousand dollars for a new setup.
Buying a used Starlink dish is one way to cut down on these upfront costs. However, buying a secondhand Starlink isn't just a simple matter of logging onto a website like eBay or Facebook Marketplace and clicking "buy now." There are a few important steps and restrictions you'll need to keep in mind to ensure you'll be able to activate the dish, connect to the network, and actually use the service in your location. Get all of this right, and you'll be able to enjoy high-speed internet connectivity with a used Starlink dish for a fraction of the cost of purchasing a new one.
Check transfer eligibility and get the serial number
Before you purchase a dish from a third-party seller, you need to understand how Starlink handles ownership transfers and make sure the dish is eligible for transfer. If it's not, you won't be able to activate the dish. Starlink enforces a strict prohibition on transfers during the first few months of ownership. A Starlink dish doesn't become eligible for transfer until 120 days after it's purchased or 90 days after it's activated, whichever comes first. An owner can't transfer a Starlink dish to another person unless these conditions are met.
The seller can confirm their dish is eligible for transfer by canceling their Starlink service and removing the dish from their account. To do this, they'll need to log into their Starlink account, select the subscription they want to cancel, and follow the prompts to cancel the service. After that, they should be able to go to the Devices section, find their dish, and click Transfer to initiate the transfer. Once they've completed those steps, the dish will be permanently removed from their account.
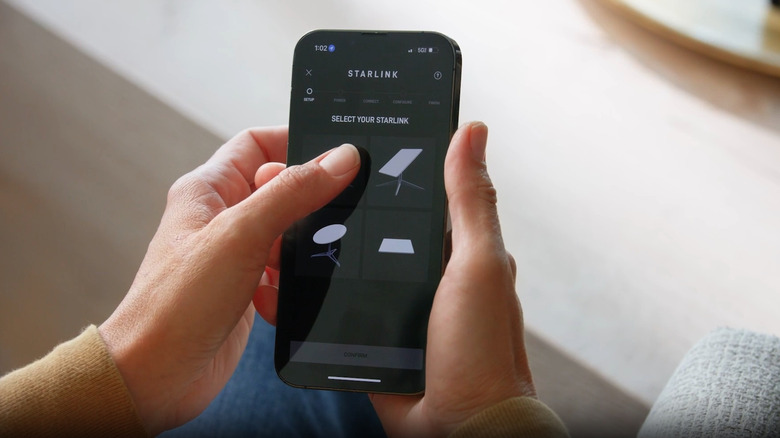
As a buyer, you'll need the dish's serial number or KIT number to activate the service on your account. You can usually find these identifiers on the bottom of the dish or within the original packaging. When you have this information, you can go to Starlink's activation page, enter the requested information, and set up your service. Since Starlink availability can vary by region, you should also check to see if Starlink service is available in your area before buying one used. You can do this by entering your address on the Starlink for homes website to confirm coverage is currently offered in your area.
Know what the warranty does (and doesn't) cover

As with any other purchase, you want to understand how the warranty works when you buy a used Starlink. Starlink's limited warranty is tied to the original purchase date, not the date of the transfer. If you buy a Starlink dish secondhand while it's still within its original warranty period, you should still be covered, but only for the time remaining from when the original owner bought it. There's no warranty reset or extension when the equipment changes hands. The warranty period for Starlink dishes purchased in the US and other countries besides the EU and UK is 12 months for the standard and mini kits and 24 months for the high-performance kit. All kits purchased in the EU and UK are covered by 24-month warranties.
If you buy a Starlink dish while the kit is still under warranty, this gives you some protection from defects. That's why, before purchasing a Starlink used, you should make sure you verify the dish's purchase date and condition before completing the sale. To the extent possible, you should inspect the hardware and ask for proof of purchase when buying a dish from a third-party seller to determine if the dish is still covered by the warranty. Something else to remember is that the warranty doesn't cover damage from improper use, unauthorized modifications like connecting two Starlink cables together, or severe weather, so you should try to test the dish before finalizing a purchase.
Confirm all required hardware is included
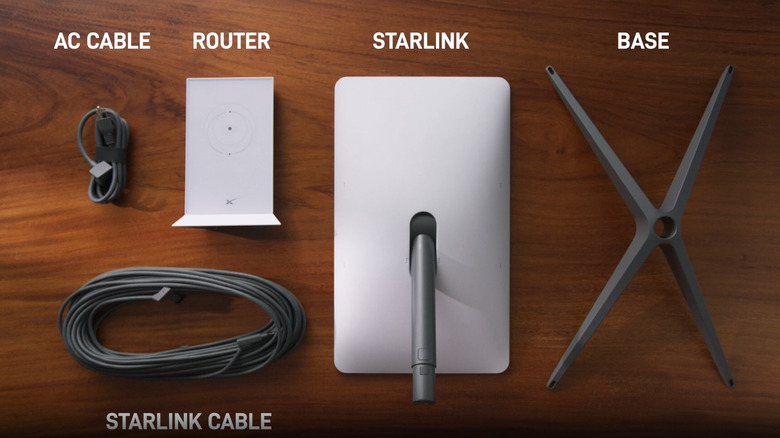
You don't want to find that you don't have the equipment to hook up your Starlink dish after you've purchased it. Therefore, before you purchase a dish from a third-party seller, you should ensure that they're including all the hardware components you'll need to use it and that they're in good working condition. A complete standard Starlink kit includes the satellite dish (also known as "Dishy"), a kickstand, Gen 3 router, Starlink cable, AC cable, and power supply. If any of these parts are missing or damaged, it'll make it difficult for you to use the service.
For example, if you don't confirm that the power supply or router is included, you could end up with a Starlink system that can't be powered on or connected to the internet. Of course, you can replace missing components, but that's an unexpected expense that could cut into the savings you were hoping to get from buying the dish used. Furthermore, parts like the Gen 3 POE Injector are not sold separately, which means you may have trouble finding a replacement if they're missing from the kit. If you can't check out the kit in person, request photos from the seller so you can confirm all parts are present and appear undamaged. If it's an in-person purchase, arrange to inspect and test the hardware.