How To Use A Multimeter When Working On Your Car: A Beginner's Guide
We may receive a commission on purchases made from links.
Electrical diagnostic work is one of the most challenging parts of automotive repair. It can be incredibly daunting for beginners or DIY enthusiasts because the problems are often not as obvious as many other issues cars can have. One can, for instance, easily diagnose a flat tire, or a broken sway bar link. With electrical issues, however, it's rarely as simple as replacing a fuse or bulb. One, instead, needs to find out why that fuse blew, or whether it's the bulb, housing, or wiring that is causing the light to malfunction.
Fortunately, the multimeter is a common, inexpensive tool that automotive technicians have been using for simple diagnostics since the dawn of time, figuratively speaking. It's capable of performing many functions around the house, but for automotive applications, it's a godsend. Multimeters can measure voltage, amperage, and resistance — things a knowledgeable mechanic can apply to several systems in a vehicle.
As vehicles become more like computers than machines, electrical diagnosis is even more important — and more difficult. Scan tools and code readers, even moderately priced ones, can provide more information than ever before. Still, there will always be a place for a mechanic who knows their way around a multimeter, one of the most versatile tools an automotive technician has in their arsenal.
Analog versus Digital Multimeters

When a beginner is looking to purchase a multimeter, the first and most obvious choice to be made will be between an analog or a digital display. Both readouts have their benefits, but one is a far better option for automotive use.
Measuring an active system, with a constantly changing measurement, is one area where an analog needle shines. A simple pointer provides a faster reaction to these changes than a digital readout can, and larger analog displays can be very accurate. Analog multimeters don't need to "settle" as digital ones do; one can simply average out small variances in needle movement. They can be used without battery power for basic measurements, while a digital multimeter with a dead battery is useless. However, the multiple scales that often line the tick marks on analog displays can be confusing, and specific numbers can be subject to the user's viewing angle. Analog multimeters also require a larger display to accurately show precise readouts, making many analog multimeters bulky and impractical.
Digital readouts are large, precise, and consistent. A digital readout will give an easy-to-read number that's not subject to interpretation. Digital multimeters also incorporate several handy quality-of-life features that make them easier to use, and they're less delicate than their analog counterparts.
We'll be focusing on digital multimeters because of their precision, speed, and versatility. They are also much easier for beginners to learn to use, and they teach skills that can be applied to several forms of automotive repairs.
The Most Important Extras In A Multimeter
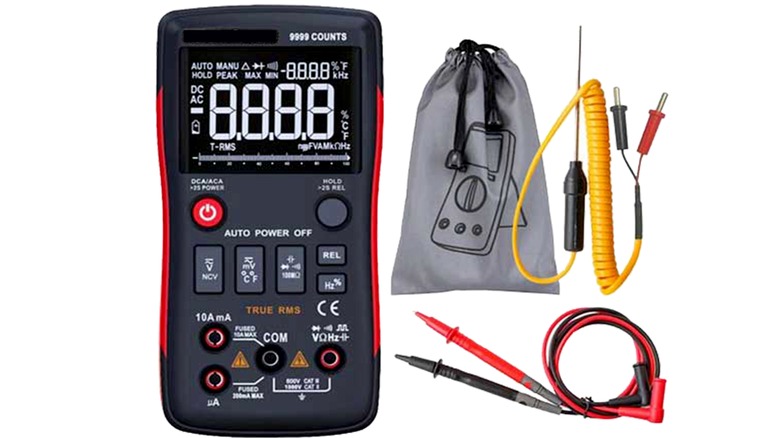
Now that we've decided on a digital multimeter (DMM) we need to know what features will help, especially as it applies to automotive work. One doesn't need to spend a ton on a fancy one; however, that doesn't mean that one shouldn't at least consider a few extra bells and whistles.
A backlight, for example, is incredibly useful when testing circuits under the hood. Along those same lines, a large display makes checking fuses a lot easier when you're in the dim light of the footwell or trunk where the secondary fuse box tends to be located. A durable rubber casing, whether it's built-in or the slipcover style, provides some protection for one's investment.
Additional probes, especially the "puncture" or "piercing" style that can directly touch bare wire without fully stripping it, are incredibly useful for tracing automotive wiring issues; many multimeters come in kits with these extra probes. Auto-ranging to keep readings accurate without the user needing to manually change ranges are all valuable as well.
While digital multimeters like the Fluke 115 (which the author has had in his toolbox for over 20 years), provide all the above features and more, the price tag for that popular brand is significant. If one is just starting, an affordable DMM like this Cen-Tech P37772 from Harbor Freight is surprisingly well-equipped, and it includes several of the same testing features as the Fluke for a fraction of the price.
The Relevancy of Multimeters
As cars get more and more technologically advanced, the number of applications one can do without a big, expensive handheld automotive computer seems to drop with every model year. However, for basic DIYers and shade-tree mechanics, a multimeter is just as important as a full diagnostic scan tool to figure out most problems. Those other tools can easily cost several hundred dollars, and a beginner will often never use many of the additional features and diagnostic applications they have available. A humble multimeter can measure many of the most common, and easy to repair, problems a vehicle can have.
As one gains more experience, there are a few tools one might consider upgrading to. A Power Probe, which connects to the car's battery or another 12-volt power source, can make electrical testing far easier, as one can apply power directly to accessories with it while also performing a whole suite of electrical tests. Checking blower motors or other difficult-to-access parts is made far simpler when one can verify a bad part with the touch of a button.
A scan tool, often provided by most shops but available for individuals to purchase as well, is a worthwhile investment if one is getting into serious diagnostic work, or is looking to move further into the field of automotive repair. However, it's a big investment, one not for a hobbyist to jump into without some thought. After all, as a high-end example, the Snap-On ZEUS+ diagnostic computer costs nearly $12,000.
Setting Up A Multimeter For Automotive Applications
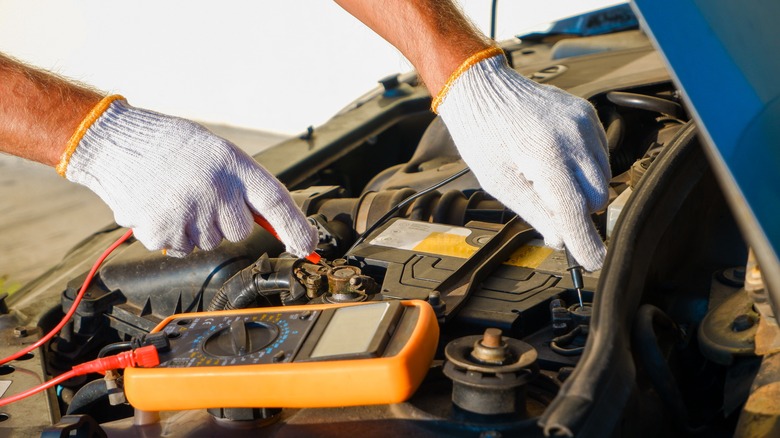
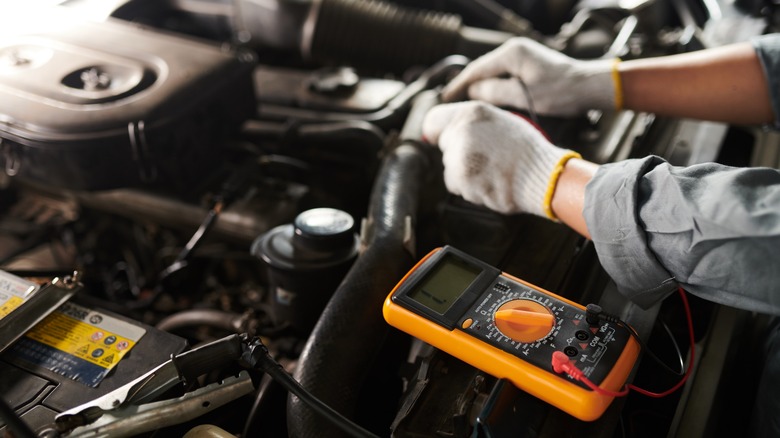
Once the investment has been made, it's time to set that multimeter up. The location of probe installation in that new DMM is going to depend on what it is one will be testing first. For a simple battery test, like the one we'll be covering below, the black lead will be installed in the COM port, while the red will go into the one labeled for V/Ω/Hz. Set the dial of the multimeter to measure a 0-20 volts range DC, typically labeled with a "V⎓" symbol.
As most American vehicles operate using a 12-volt system, this setup will allow for measurements all across the car, and the 20-volt maximum will allow for fairly precise readings. Opening that range to 200, or even 1000 volts will simply provide less accuracy.
For resistance testing, the dial will be set to ohms, represented by the omega (Ω) symbol. If amperage is needed, the dial goes to the DC amps section, labeled with "A⎓", and the red probe will be inserted into the appropriate connection point, either mA or 20A Max on most multimeters.
Testing A Car Battery With A Multimeter
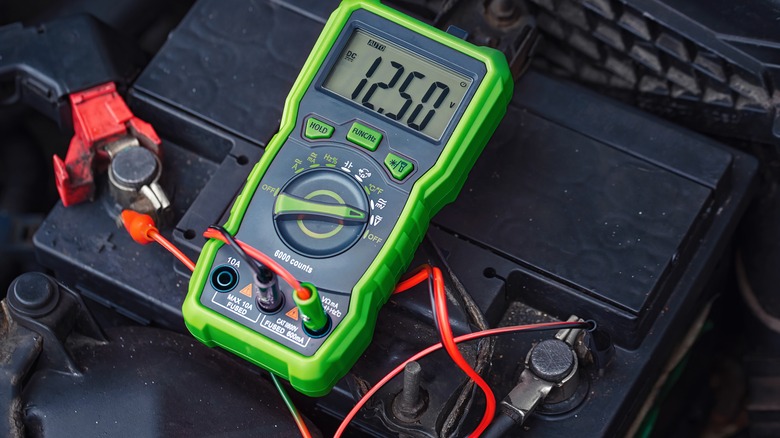
One of the simplest tasks a digital multimeter can perform is a basic voltage test on a car battery. Positive and negative terminals, hooked up to the car or not, will give a base number. The expected number should be 12.6 volts – any less and the battery might not be holding a charge, or it might have a bad cell – either is a reason for replacement.
There are a few things to do to properly prepare a battery before a voltage test, just to ensure reliable results. Cleaning the terminals with a wire brush and a solution of water and baking soda, or a commercially available product, will ensure good contact between one's battery and multimeter probes. Cleaning up terminal connections will ensure minimal resistance, but also often reveals damaged terminals that may require replacement. Finally, allowing the battery to rest overnight (no less than an hour) after the vehicle was running will give a more accurate reading than testing immediately after a drive.
One final note – before disconnecting the battery terminal ends for any reason, be sure to find the anti-theft code for the vehicle's stereo. Ideally, it will be on a card the dealership provides in the glove box, or it may be hand-written on the first page of the owner's manual. Getting a code after the fact can be a headache that requires a call to the dealership or the removal of the entire stereo.
Testing the Starting and Charging Systems With A Multimeter
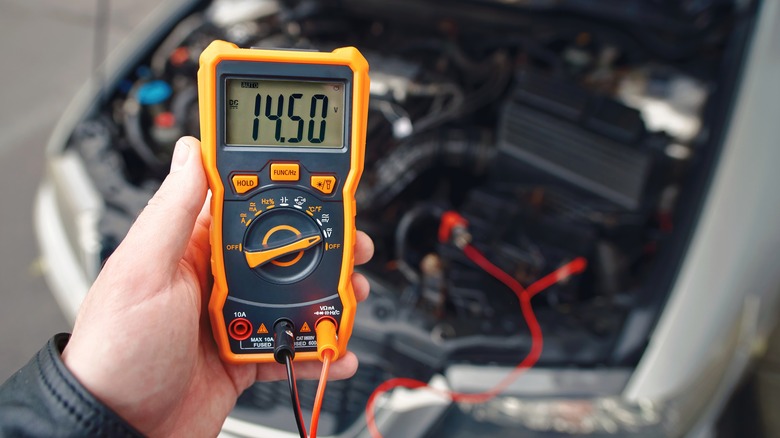
A very basic test of the charging system (alternator/generator) can be performed just as easily as a battery test, but with the car running. Proceed with caution to avoid any belts, fans, or other moving parts, touch the probe ends of the multimeter to the battery terminals – that should produce a reading of around 13.8-14.4 volts.
Anything in that range means the alternator is doing its job, keeping the battery charged while the vehicle is running and also running the car's electrical accessories. This is why a jump start works — it basically bypasses the battery and starts the vehicle with another power source, and then the vehicle's alternator recharges the dead battery as the vehicle runs.
Testing a starter directly can be more difficult, as they're often harder to access than an alternator. Testing across the battery while having a buddy attempt to start the vehicle can provide some starter information, as the battery should not dip lower than 10.5 volts when the car's key is turned. Any lower, and the battery is the likeliest suspect. If the voltage is where it should be, suspect a wiring issue or a bad starter.
A bench test is the most reliable method, but testing to make sure battery voltage is getting to the starter itself is something any beginner can check. Once the starter has been located, it's simply a matter of touching the positive probe of one's multimeter to the solenoid output terminal and touching the negative to the ground; a 12-volt reading means power is getting where it should.
Testing Fuses With A Multimeter
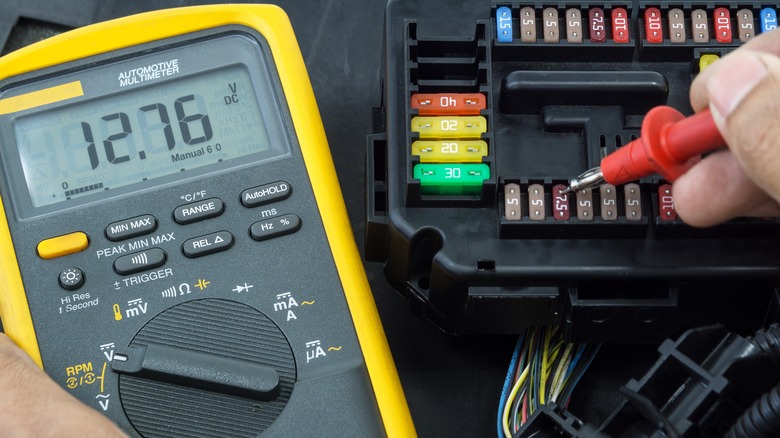
A blown fuse is one of the most common electrical problems in a car. While mechanics will often stress the importance of finding and repairing the cause of a blown fuse, the first step in that process is to check fuses and/or relays. One could simply pull each fuse individually to inspect it for a melted conductor, but that's time-consuming, and changing anything in the system one is testing can provide faulty results. It's more efficient to test across fuses using the probes on a multimeter.
The process is a simple one: find the fuse box. Most vehicles have one under the hood, and another in the passenger area, often under a panel on the side of the dashboard facing the doors on either side, or under the dash near the hood release. The owner's manual will list each fuse box location, and both the manual and the box covers often map out the fuses and their purposes. Testing is accomplished by touching the multimeter's negative probe to a good ground and touching each blade. Since the fuse is a small conductor, one should expect 12 volts on either side. If one side reads zero, the fuse is likely blown.
If it's not obvious whether or not a fuse is blown on physical inspection, a resistance test should come next. Switch the multimeter to measure resistance at its lowest setting, and test across the fuse. A reading of OL, or significantly higher than 20 ohms, suggests the fuse is blown.
Use a Multimeter To Check Light Bulbs
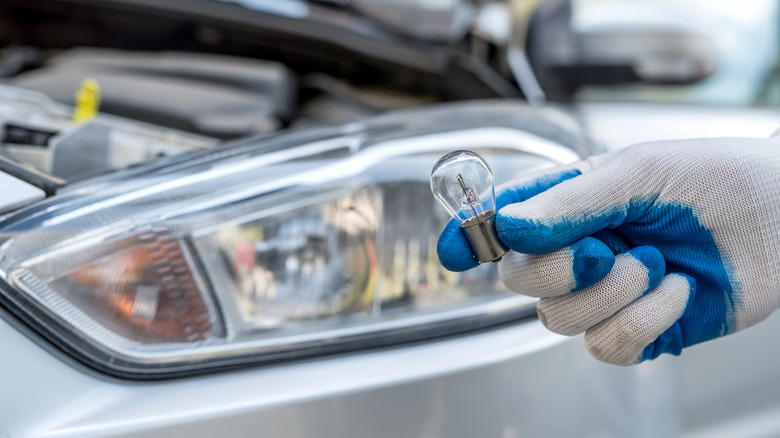
Testing for power and ground are some of the most important duties of a mechanic, and a job that's often overlooked by those more interested in replacement rather than repair. A complete circuit from power, to accessory, to ground, is the backbone to the entire electrical system of a vehicle, and understanding where things can go wrong is just as important as fixing the problem, even if it's something as simple as a burnt-out bulb.
Testing resistance across a bulb, as well as testing the socket for power and ground, can quickly identify bad parts and save money on unnecessary replacement bulbs if they aren't the problem. To test a headlight bulb, one would first inspect the bulb. If it's not obvious that a filament is broken, testing for resistance across the bulb's two contacts can provide an answer. Much like a fuse, if the reading comes up with an "OL," or infinite resistance, the bulb is faulty. However, if the bulb is good, testing for power is the next step.
Switch the multimeter to test the DC voltage and put the battery back in its connector. Touch both probes to the back of the connector where the wires come in — black to the black (ground) wire, and red to red. Sometimes the powered wire will be a different color, but the ground is always black. If a number relative to 12 volts comes up, the connector is fine and the bulb is getting power. If no power is evident, then there's something else at play, perhaps a wiring issue or a blown fuse.
Testing Spark Plug Wires For Resistance
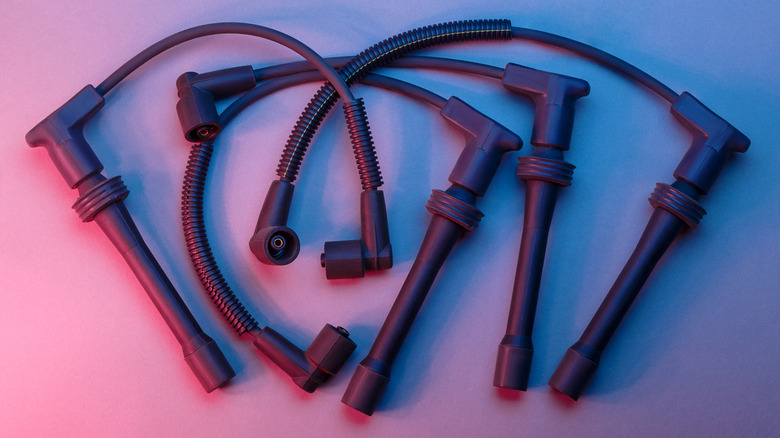
When dealing with a battery, one of the most common causes for increased resistance is obvious. A corroded terminal, covered in blue fuzz, will dramatically increase the resistance in the connections, which can make for poor starting ability. With spark plug wires, the effects of age and normal wear can be less obvious while producing a similar effect. Fortunately, testing wires is as easy as removing them.
The first thing one will need is the plug wire resistance range, which is often in the owner's manual. Some math will be required to get a range, based on the length of the wire – for example, if the required resistance is 10-20k ohms per foot, a 1-½ foot length of spark plug wire should show 15-30k ohms of resistance. With a digital multimeter set to the range just above what's expected, touching either end of the wire with the two probes would display something within that 15 to 30k range; if not, the wire should be replaced. Often, it's simpler to just replace the entire set, unless the wires are relatively new and one is simply damaged.
If you're replacing the wires, it probably wouldn't hurt to replace the spark plugs at the same time.