5 Secrets All New Airpod Pro Owners Should Know About
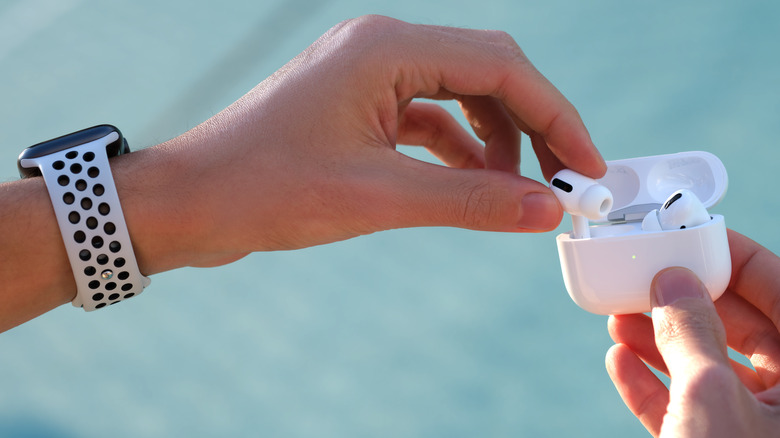
Apple's AirPods Pro are the best wireless earbuds for iPhone users, bringing several upgrades over standard AirPods. The first-generation AirPods Pro were released in 2019, while the AirPods Pro 2 were launched three years later in 2022. The AirPods Pro features silicone ear tips, providing a customized fit, unlike the semi-in ear design of the regular AirPods. This in-ear design also enables features such as Active Noise Cancelation and Transparency mode. While noise cancelation eliminates external sounds, Transparency mode lets in outside sound, allowing you to be aware of your surroundings while the AirPods Pro are in use.
Whether you're upgrading from standard AirPods to the AirPods Pro or are using AirPods for the first time, there are some features that can be a game-changer when it comes to your daily usage. It's worth noting that while AirPods Pro can be connected to Android and Windows devices, they work best with the iPhone, iPad, and Mac. As a result, you'll be missing out on many features if you use them with a non-Apple device.
Enable Find My to locate lost AirPods

One of the first things you should do when you get your new AirPods Pro is enable Find My. This helps you find lost or stolen AirPods (and even the charging case on the AirPods Pro 2) by viewing their location on a map. Find My is automatically enabled for AirPods when they're connected to an iPhone with Find My enabled. If you haven't enabled Find My on iPhone, follow these steps:
-
Open the Settings app.
-
Tap your name at the top.
-
Tap Find My.
-
Turn on the toggles next to Find My iPhone, Find My Network, and Send Last Location.
You can now open the Find My app on an iPhone, Mac, or even iCloud in a browser to view the location of your AirPods. Just select the AirPods under the Devices tab to view their location. If your AirPods are out of the case and separated, you can view the location of individual earbuds and the charging case (for AirPods Pro 2). If your AirPods Pro are within Bluetooth range of your connected device, you can tap Play Sound to make them beep.
While in the Find My app, it's also worth setting up separation alerts, which will notify you if you leave your AirPods Pro behind. To do this, select the AirPods Pro in the app and tap Notify When Left Behind. Turn on the toggle on the next page.
Use and customize touch controls
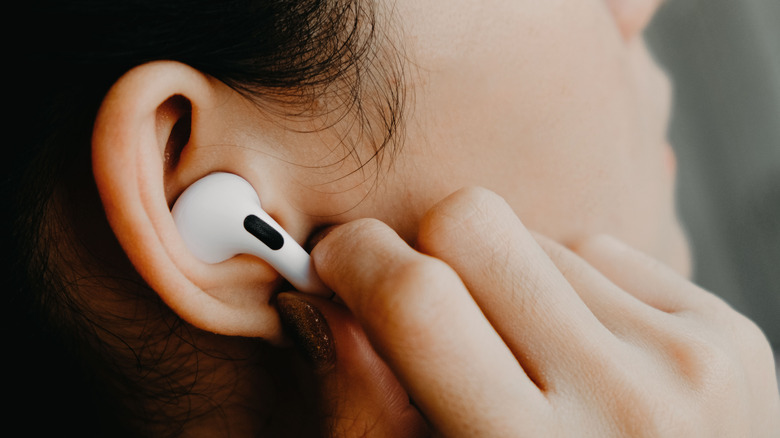
The AirPods Pro have sensors on the stem that can be used to answer/end calls and control audio. In addition, the AirPods Pro 2 also have touch controls for adjusting volume. To play or pause audio, press the stem once. Double press the stem to skip to the next track, or triple press to play the previous track.
If you have the AirPods Pro 2, you can adjust volume by sliding your finger up and down on the stem. The first-generation AirPods Pro don't have a volume control, so you'll need to control the volume on your connected device or ask Siri to change the volume. While listening to music, you can toggle between Active Noise Cancelation and Transparency modes by pressing and holding the stem. Incoming calls can be answered by pressing the stem or declined and sent it to voicemail by double pressing.
Some AirPods Pro touch controls can even be customized on a paired iPhone or iPad. Here's how:
-
With the AirPods in your ears, open the Settings app.
-
Go to Bluetooth.
-
Tap 'i' next to your AirPods Pro.
-
Under Press and Hold AirPods, tap Left or Right to choose between Noise Control and Siri.
-
Under Call Controls, tap Answer Call or End Call to choose a preferred action.
On a Mac, the same actions can be customized by clicking on the Apple menu, going to System Settings, and then selecting the AirPods Pro in the sidebar.
Take the Ear Tip Fit Test
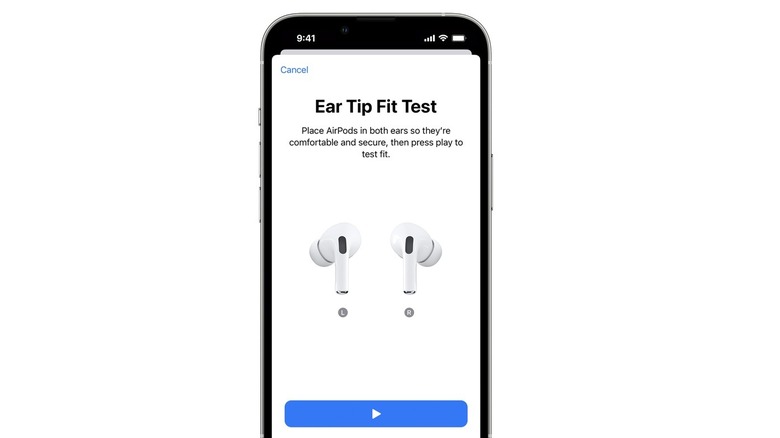
The AirPods Pro come with different size ear tips in the box. The first-generation model comes with small, medium, and large ear tips, while the AirPods Pro 2 include an additional extra small size. Both models come with the medium size ear tip attached.
The right size ear tips are important for a secure, comfortable fit and ensure that noise cancelation works as expected and you get the best possible audio quality. To help you find the right size ear tips, you can take Apple's Ear Tip Fit Test to find out which size suits you best. Here's how to do it:
-
Place the AirPods in your ears and connect them to your iPhone or iPad.
-
Open the Settings app.
-
Tap Bluetooth.
-
Tap the 'i' button next to the AirPods Pro.
-
Tap Ear Tip Fit Test.
-
Tap Continue.
-
Tap the play button.
Music will now begin playing. The test might tell you that your ear tips have a good seal or ask you to adjust the AirPods in your ear or switch to a different size of ear tips. You can now make adjustments and repeat the test. Tap Done when complete.
To remove an ear tip, pull firmly from the base where it's attached to the AirPod. When re-inserting the ear tip, align the base with the oval-shaped connector on the AirPod, and press gently until you hear it click into place.
Use wireless and MagSafe chargers
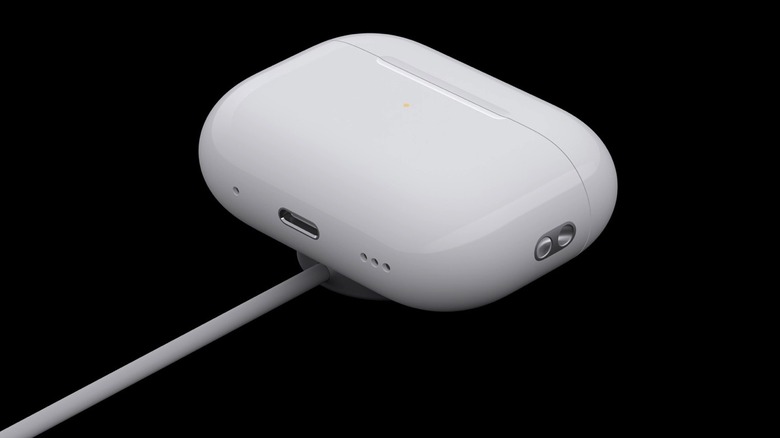
The AirPods Pro case has a Lightning connector for conventional wired charging, but that's not the only way to charge it. Both the first and second-generation AirPods Pro cases support wireless and MagSafe charging, which means you can charge them on a conventional Qi wireless charger or your iPhone's MagSafe charger.
To do this, place the case with the status light facing upward in the center of a wireless charger or MagSafe charger. While this works best on a flat charger, it can also work on a vertical charger. You might need to position the case vertically if you're using a wireless charging stand so that it comes in contact with the charging coil. The AirPods Pro 2 case is also compatible with Apple Watch chargers. Just place the case in the center of the Apple Watch charger with the status light facing up to charge it.
The status light on the AirPods case glows amber when it's charging and green when fully charged. The status light only glows when the AirPods are first connected to the charger. To view the charge status while charging, tap the case to make the status light turn on.
You can check the battery status of your AirPods Pro on an iPhone by opening the case with your AirPods inside. On a Mac, click on Bluetooth in the menu bar and move your pointer over the AirPods to view their battery percentage.
Enable Personalized Spatial Audio
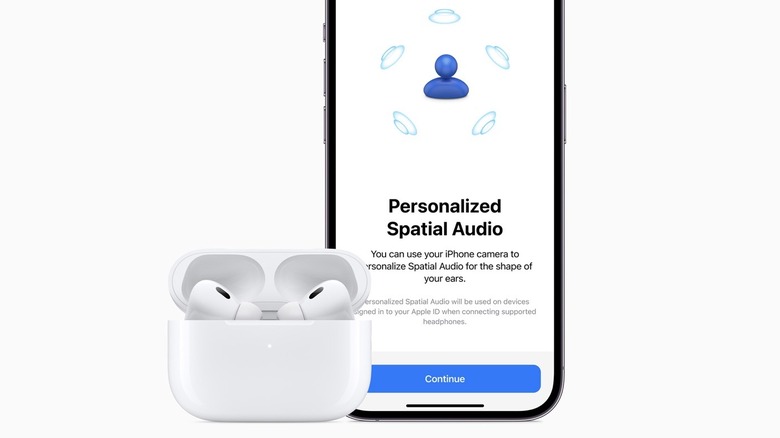
Apple's Spatial Audio feature creates a theater-like surround sound experience with head tracking for music, movies, and TV shows. With the AirPods Pro, you also get Personalized Spatial Audio which creates a personalized listening profile based on the size and shape of your ears and head using the camera on your iPhone (iPhone X or later). Here's how to set it up:
-
Wear your AirPods and connect them to your iPhone or iPad, then go to Settings.
-
Tap the AirPods Pro at the top.
-
Tap Personalized Spatial Audio.
-
Tap Personalize Spatial Audio on the next page.
-
Follow the onscreen instructions to capture a front view of your head and side view of your left and right ears.
Once enabled, you can control Spatial Audio for supported apps on both iPhone and Mac. Here's how to do it on iPhone:
-
Place your AirPods in your ears and connect them to your iPhone.
-
Swipe down from the top right corner of the screen to open Control Center.
-
Press and hold the volume control.
-
Tap Spatial Audio.
-
Choose from Off, Fixed, or Head Tracked options.
Spatial Audio with head tracking can be controlled on Macs with Apple Silicon running macOS 12.3 or later. Here's how:
-
Wear your AirPods and connect them to your Mac.
-
Click on the AirPods icon in the menu bar.
-
Choose between Off, Fixed, and Head Tracked options.