

4 Essential Gmail Security Settings & Tips You Should Use
A Gmail account is tied to so much of what we log into inside and outside of Google Workspace. If a Gmail account were to get hacked, it could give the hackers access to sensitive communications, including those that are financial, legal, or medical. With this information in the hands of nefarious individuals, they could use it to turn your life upside down personally and financially. Not only that, but they could put you in some legal trouble if they go about committing fraud using your Gmail account. This is why it's worth thinking about just how secure that account really is.
Luckily, Google has the tools you need to keep your Gmail account safe. For the most part, securing your Google account will also protect your Gmail account. This comes down to running a Security Checkup and ensuring you either have a passkey for your Google account or have two-step verification enabled. Besides that, there are also some Gmail-specific settings that need to be checked to ensure that only you have access to that account.
Do a security checkup first
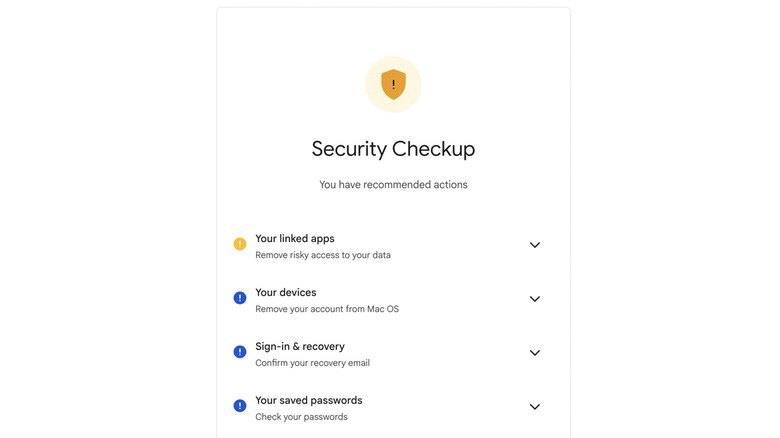
Google has a way of taking the guesswork out of securing your account. All you have to do is head to the Google Security Checkup page and sign in to your Google account. This simple account review checks your Google account for risks and gives you recommendations on how to quickly secure it. From there, you can go through them one by one and see if you want to tweak them.
For example, one of the first options you will see is to add a recovery email if you haven't already. It comes in handy in instances where you've lost access to your account and need to regain it. It can be because you forgot the password or because someone has hacked your Gmail account and locked you out. Once you click Add, you will be taken through the necessary steps to add the recovery email (make sure you confirm it afterward). Another example of why this page is important is because you will also be able to review any linked apps that have access to the Google products you use, including Gmail. If you see an app you don't recognize, click Remove access, then click Confirm in the pop-up.
What recommendations show up on the Security Checkup page will depend on the vulnerabilities Google has identified. Other recommendations include setting up a passkey or enabling two-step verification. These are all optional but worth considering.
Use a passkey instead of a password
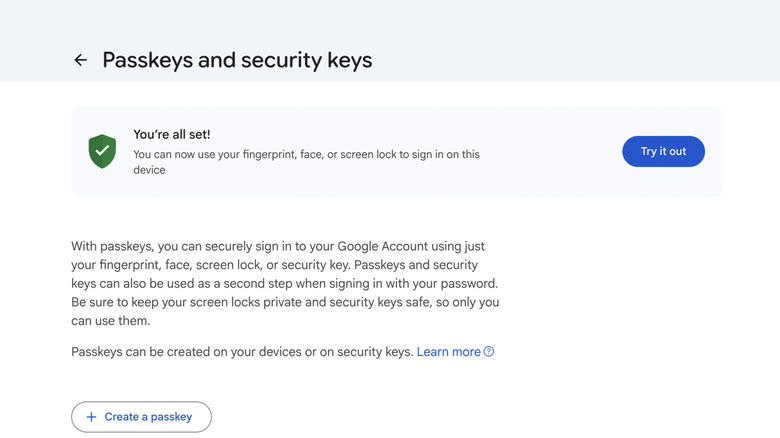
These days, you can easily sign in to your online accounts without a password, as long as they support what's known as passkeys. Essentially, passkeys are a passwordless sign-in method that uses a cryptographic key stored on your device. When you sign in to a website or app, the passkey can be unlocked only using your device's authentication methods, such as PINs, fingerprints, or facial recognition.
Unlike passwords, passkeys cannot be guessed or phished out of you. This is a major selling point because they exist solely on your trusted devices and are protected by other layers of on-device security. For these reasons, when an online account offers a passkey option, it's highly recommended that you use it.
Luckily, you can use passkeys with your Gmail account. You just need to create them in your Google account. Here's how:
-
Click your profile picture icon in the top-right corner of the screen.
-
Select Manage your Google account.
-
Click Security & sign-in.
-
Under How you sign in to Google, click Passkeys and security keys.
-
Complete the additional security, which may include approving a prompt on a trusted device.
-
Click Create a passkey.
-
Follow the steps to create a passkey using the device you're using or another one.
Use two-step verification with Google Authenticator
Although it's highly recommended to use a passkey, you might not want to, since passkeys do have their drawbacks. In that case, enabling two-factor authentication is a simple way to make an online account safer. You will still be using a password. You just need to ensure that the password isn't pretty easy to guess, is unique to your Gmail account, and isn't shared with others. Here's how to enable two-step verification:
-
Click your profile picture icon in the top-right corner of the screen.
-
Select Manage your Google Account.
-
Click Security & sign-in.
-
Under "How you sign in to Google," click Turn on 2-Step Verification.
-
Follow the on-screen instructions.
By default, Google may send a code using a text message. It can even be a prompt sent to a trusted device. However, text messages don't always come through, and if you don't have internet on your phone, the prompt might not arrive. Using Google Authenticator on your phone will ensure that you always have a way to get the code since it generates codes continuously, even when the phone is offline. Here's how to add Google Authenticator to your Google Account:
-
Click your profile picture icon in the top-right corner.
-
Select Manage your Google Account.
-
Click Security & sign-in.
-
Under "How you sign in to Google," click 2-Step Verification.
-
Click Authenticator, then select Set up Authenticator to display a QR code.
-
Open the Google Authenticator app on your phone.
-
Tap the plus icon in the bottom-right corner of the screen.
-
Tap Scan a QR code and scan the code on your computer screen.
-
Once you scan the QR code, click Next, enter the six-digit code shown in Google Authenticator, and click Verify to finish setup.
Make sure no one else is using your Gmail account

After you've secured your Google Account, it's time to make sure that no one is spying on your emails. You need to access some advanced settings here, and these are only available on the Gmail website. So you will need to do this on a desktop browser. Start by doing the following in Gmail:
-
Click the gear icon in the top-right corner of the screen.
-
Select See all settings.
-
Select the Accounts and Import tab.
-
Check the email addresses next to Send mail as, Grant access to your account, and Check mail from other accounts (using POP3).
-
If you spot one that you don't recognize, click Delete next to it.
It could also be that your emails are being forwarded to an unknown account without your knowledge. Here's how you can check:
-
Select the Filters and Blocked Addresses tab.
-
Look for any Forward to filters that are forwarding emails to an unknown address.
-
If you find any, click Delete next to them.
-
Also remove any Delete it filters that you didn't set up, as hackers can use these to hide evidence like security alerts and password reset requests.
Now you need to check for any forwarding addresses that don't belong to you. Here's how:
-
Select the Forwarding and POP/IMAP tab.
-
Check the Forwarding section for unknown email addresses.
-
If found, click the dropdown next to them and select Remove [email address].
-
Click OK in the prompt.