5 Common Mistakes To Avoid When Adding Garage Lights
We may receive a commission on purchases made from links.
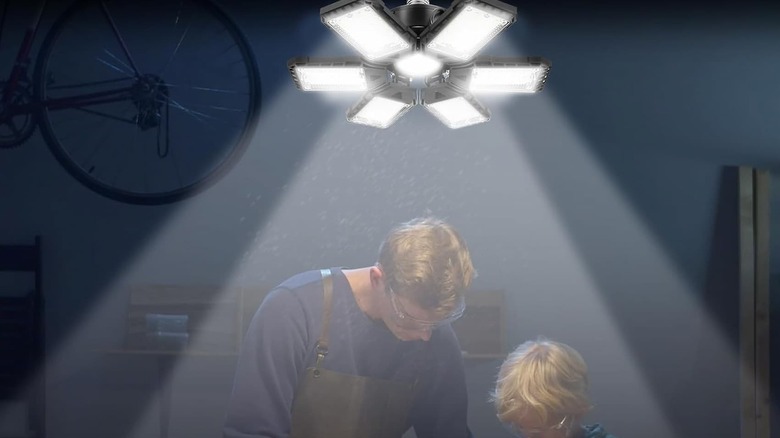
Your modern garage isn't just for parking a car anymore; for a lot of us, it's become a workshop, a dedicated DIY spot, or an important storage area. This big change in its function calls for a better lighting setup. Dimly lit garages are just inefficient, frustrating, and can even be dangerous for detailed work, so installing bright, linkable LED shop lights has become one of the most popular and affordable home improvement projects out there right now.
Getting a brightly lit workspace sounds great, but the easy installation often gives people a false sense of security. You shouldn't overlook important specifications and safety warnings. The actual problem isn't the lights themselves, but the big mistakes made when installing and maintaining them that can put your safety at risk, significantly shorten the lifespan of your investment, or even start an electrical fire.
Don't just look at brightness and where to put the lights, completely missing key manufacturer details like how many units you can link, temperature limits for the installation area, and how to handle extra power cords correctly. When you're dealing with permanently installed electrical lights, you should keep in mind the most common mistakes people tend to make.
Exceeding the maximum linkable limit
Some LED shop lights let you daisy-chain units together through continuous installation, which saves on outlet usage, but there's a hard limit, specified by the manufacturer, on how many you can connect in one electrical run. A common mistake is ignoring the specific capacity limits of your chosen fixtures. Exceeding this limit can overload the first fixture's internal wiring or trip your circuit breaker when the lights turn on.
The primary unit carries the electrical current for every subsequent fixture in the chain, so overloading the circuit presents a serious risk of fire, electric shock, or a blown fuse. Always check the rated wattage or unit count allowed for your model before installation. Ignoring these unit caps or wattage ceilings compromises the safety of your workspace.
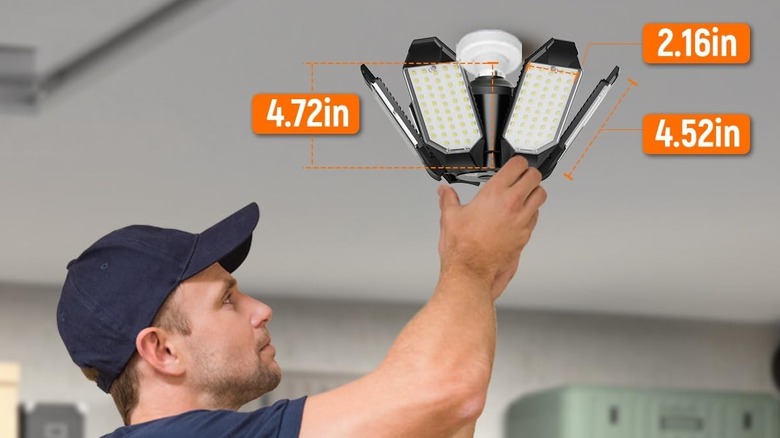
While it may be tempting to go to Home Depot to upgrade your lighting without a second thought, you need to follow the physical spacing restrictions between linked units. Some models restrict the distance between two linked light fixtures to about four feet to prevent dangerous cord tension. You need to manage any excess cord carefully, keeping it out of the workspace and properly secured without relying on the electrical cord itself for structural support.
Ignoring ceiling temperature and material constraints
When you're upgrading your garage, it's easy to miss how hot your ceiling gets or what it's made of. Putting a light fixture on a hot ceiling, or in an area that's just too warm, can make your LEDs fail prematurely or even cause a fire. Many homeowners don't know that some fixtures, especially certain LED shop lights, are incompatible with radiant heating ceilings.
This is because the heat coming from your ceiling messes with the light's cooling system, adding to the heat the LEDs already make, and that creates unsafe conditions. Also, garages are usually unconditioned, meaning temperatures can swing widely, and that intense heat often gets trapped up near the ceiling where you'd mount lights.
While you want to upgrade your garage lighting when you can, you always need to make sure your garage temperature stays within the manufacturer's specified range. For instance, some LED shop light manuals clearly say not to use the device if the ambient temperature is over 104 degrees Fahrenheit. Also, if you're mounting to drywall, you'll need special drywall anchors, but for wood, you can screw hooks directly into it.
Leaving cords loose or improperly secured
Leaving power cords dangling or loose in your workspace is a safety hazard, and it can cause accidental snags or falls. When you're installing suspended garage lighting, you'll often focus on positioning the light for the best illumination, but you might completely forget about safely routing the power cord. Lighting units are often installed directly beneath a ceiling-mounted electrical receptacle.
Since these fixtures come with standard-length power cords, like a 5-foot cord, you'll inevitably have some extra slack hanging down if your ceiling receptacle is pretty close to the top of the suspended fixture. That's not to mention how they can tangle when left alone. Instead of letting this extra cord drape loosely where it could get in the way of tools, materials, or just make your workspace look messy, you should securely tie it out of the way.
There are plenty of cable organizers you can use to get rid of excess length, but you can always just be more careful with how you route them. You should also make sure the wiring isn't exposed to the edges of sheet metal or other sharp objects. Exposing power cords to sharp edges can cause dangerous abrasion and wiring damage, which creates a significant risk of fire or electric shock.
Cleaning with harsh chemicals or liquids
You should remember that you can't clean units with just any product you find at the store. If you use regular window cleaners or harsh chemicals on LED fixtures, it can damage the delicate protective coverings or the LED diodes themselves. Just because it's a tough-looking garage fixture doesn't mean it can handle industrial-strength solvents. Using these harsh cleaning agents can wear down its specialized plastics and complex electronic components over time.
It's a mistake to spray liquids right onto the light, because moisture can get inside the wiring. You should be careful when cleaning any kind of bulb or light, because getting liquid into these delicate internal parts risks permanent damage to the fixture.
Once you've made sure the electricity is completely off, you still need to be careful with whatever cleaning materials you pick. The best way is always a soft, dry cloth or one that's just barely wet, but never dripping. If the fixture has gotten really dirty, you can put a tiny bit of a mild, non-abrasive cleaner directly onto your cloth before wiping the fixture, instead of putting it on the hardware itself.
Using dry-rated lights in wet locations

When you're setting up a workspace with new lights, a really big mistake to avoid is putting an indoor light that's not meant for it into a tough spot. Before you get a lighting solution from Harbor Freight or your favorite store, be careful. Not every garage light can handle moisture; using one rated just for dry or damp places where it could get splashed or rained on is pretty risky. For instance, standard lights will tell you plainly that the product isn't waterproof and is only for dry or damp use.
Makers of these dry-rated lights specifically warn you not to install them in really humid places. Also, trying to use regular indoor shop lights outside or in areas that see extreme weather is a serious product misuse. Improper installation can physically damage the light and also void the maker's warranty.
Even more important, ignoring a light's environmental rating and letting a dry-rated light get wet creates immediate safety dangers, dramatically raising the chance of electric shock, fire, or other potentially fatal injuries. Heavy-duty options are specially designed and clearly marked as suitable for wet spots. Moving up to these moisture-resistant models gives you crucial peace of mind when you're lighting areas that get a lot of condensation.