Changing These 3 Settings Will Immediately Make Your AirPods Pro Sound Better
The AirPods Pro sit pretty high on the recommendation list for best-sounding wireless earbuds. The prestige is warranted, especially in the face of stiff competition from the likes of Sony WF-1000XM6 and the second-gen Bose QuietComfort Ultra 2. But Apple's wireless earbuds are pretty good at a few other things, as well, especially their noise cancellation and audio transparency. And let's not forget the deep integration with Apple's ecosystem, which brings perks such as Find My tracking, hearing aid assistance, live translation, and even heart rate sensing on the latest version.
But they are not without their fair share of faults. The AirPods Pro sound great, but they don't quite deliver a character that you would get from Sony's earbuds, or even lesser-known names such as Status Pro X. The biggest miss? Lack of a proper EQ system, which lets you fine-tune the music output. The absence of benefits such as DSEE Extreme for upscaling compressed music files is also a crucial miss, something that Sony heavily markets to audiophiles. But the AirPods Pro aren't a total mess.
On the contrary, Apple offers a bunch of tools that can be adjusted to refine the listening experience. The AirPods Pro even throw a bit of personalization into the mix, tuning the audio output based on the unique shape of your ears. I've used every AirPods Pro model launched over the years, and what follows are a few settings I recommend to tweak and improve the listening experience on your flagship Apple earbuds.
Head over to headphone accommodations
If you seek granular control over different frequency bands, the AirPods don't have much to offer. But what you have on the table are broad adjustments that can adjust the tone, emphasize the vocals, or give a lift to the higher frequencies. These are not going to make a dramatic change in the listening experience, but the difference is still discernible. And if you've enabled noise cancellation and are listening in a quiet space, you can feel the difference. To access these settings, follow these steps:
- Open the Settings app, scroll down, and tap on Accessibility.
- On the Accessibility page, head down and tap on the Audio & Visual banner.
- At the top of the Audio & Visual dashboard, you will see Headphone Accommodations.
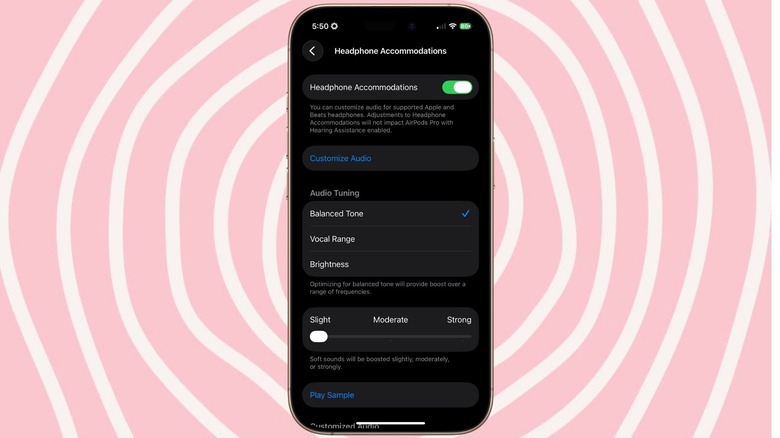
- Once you enable Headphone accommodations, you will land on the page where you will find three presets under the Audio Tuning banner.
- There are three options to pick from — Balanced Tone (slight boost for a few frequencies), Vocal Range (enhanced vocal clarity with raised mids), and Brightness (elevated higher frequencies).
- You can also adjust the strength of these presets across three levels, between slight and strong.
Now, headphone accommodations are not a magic trick to suddenly boost the listening experience on the AirPods. The difference you feel in the listening experience will also depend on the content. To me, instrumentals sound best on the brightness mode, while for Arabic and Persian tracks, I stick with the Vocal Range. More importantly, it will boil down to your personal taste, and you prefer each genre of music to sound in your ear canals. Notably, they can also make your AirPods Pro sound louder.
Take the seal test
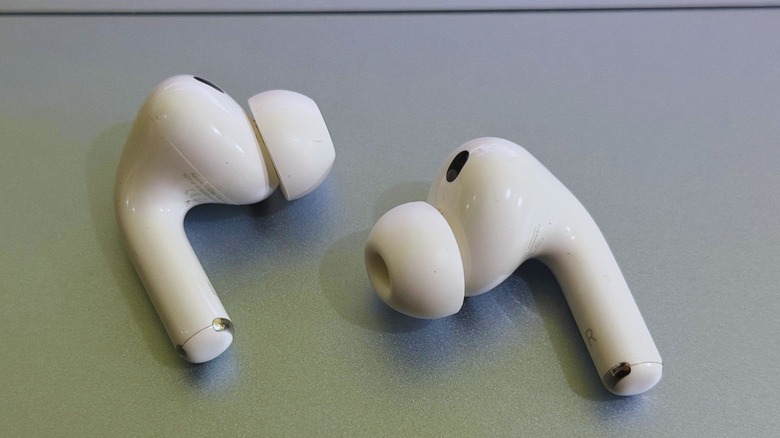
A huge chunk of what you would describe as "audio nirvana" on earbuds depends on the sound seal. The more noise gets in your ear canal from the peripheral areas, the worse your music is going to sound. It's not that the external frequencies worsen the sound produced by the drivers, but the sonic interference in your ear canal that gets the listening sessions muddied up. The best way forward is to pick the right ear tip size. With the third-generation AirPods Pro, for example, you get ear tips in five sizes. Make sure to try them and find the pair that offers the most snug fit in your ear canal. A tight fit ensures that you get decent passive isolation from external sounds.
A snug fit, however, doesn't mean a perfect acoustic seal from all sides. Or as Apple puts it, "the most comfortable tips for you may be different from the ones that provide the tightest seal." To help with that, Apple offers a seal test, and below are the steps to take it:
- Pair the AirPods Pro with your iPhone, open the Settings app, and tap on Bluetooth.
- On the Bluetooth dashboard, click on the info (the letter "i" in a circle) icon next to the name of your earbuds.
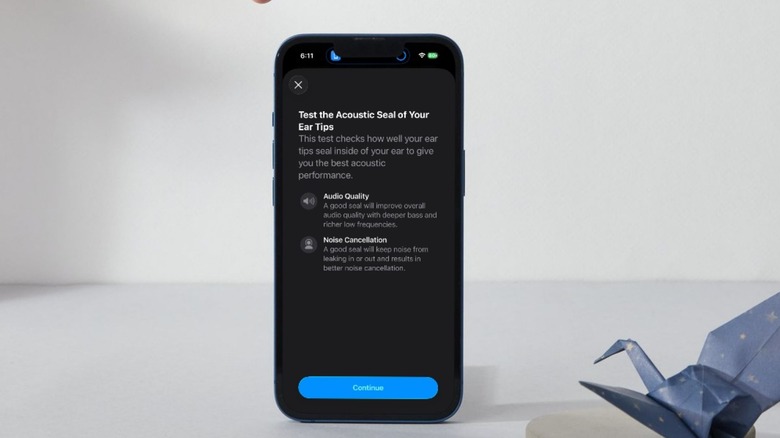
- On the next page, you will see an option named Test Acoustic Seal.
- The test involves playing a series of tones to test how good the sound seal is.
Based on the test results, you may have to try a different ear tip or just adjust the position of the earbuds in your canal to avoid sound leakage. I was usually stuck with the M-size ear tips for years, but after trying the seal test, I realized the S-size works best for me, and it improved the listening experience as well as noise cancellation output for me.
Personalize Spatial Audio

In its natural state, the sound produced by the AirPods Pro is in stereo format. Think of it as a bidirectional channel that pumps sound in your ear canal from each side. Spatial Audio gives a 3D effect to the same track, simulating an effect where the same track delivers an immersive, surround sound effect. Mind you, this is a virtual surround sound effect, and can't quite compare with sitting in a room that has a true multichannel surround sound system. You can still feel the difference between stereo and spatial audio on the AirPods Pro pretty easily.
Spatial audio, however, doesn't follow a one-size-fits-all approach. That's because the Spatial Audio algorithms rely on the head-related transfer function (HRTF) adjustment to ensure that the audio output is tuned to the shape of each listener's head and ear. And this is where Personalized Spatial Audio helps the immersive listening experience on the AirPods Pro. To enable it, follow this path on the connected iPhone: Settings > Bluetooth > Device name > Info > Personalized Spatial Audio. Once you enable it, the iPhone's camera will capture the front and side profile(s) of your face to personalize the output. And this is where things get interesting.
Once you have enabled Personalized Spatial Audio, you get two presets to play with: Fixed and Head Tracked. In the fixed format, the surround sound experience is locked to the static head position, and it won't respond to your head rotation. If you enable the head-tracked preset, the directional output of sound will respond to your head movement, and you will feel the music subtly changing as you twist your head. This mode is particularly well-suited when you are out and about.