5 Settings You Should Immediately Change On Your Hisense TV
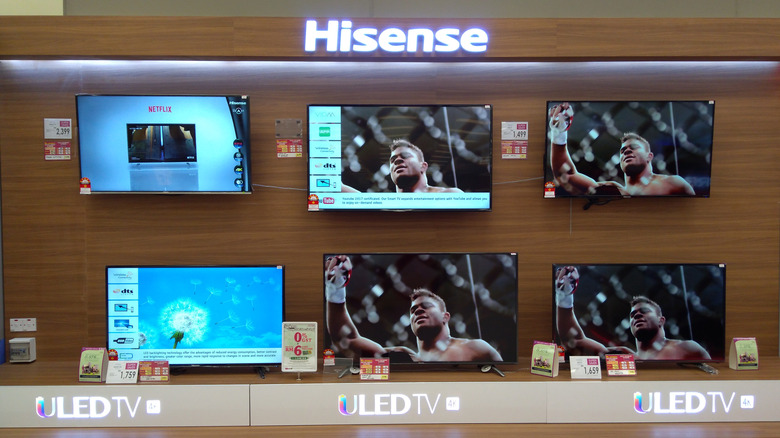
Although smartphones have become a source of entertainment for many people, TVs haven't been replaced by tiny screens. They come in various shapes and sizes, with many brands. Among them, Hisense sits near the top in SlashGear's rankings of the best major TV brands, thanks to its good picture quality -– particularly in terms of brightness and HDR –- and affordable pricing. If you want to purchase a new TV for your home, Hisense is worth considering. Just make sure to check for important features before choosing a model.
Hisense offers TVs in various sizes, making it easier to select one that suits your needs. Additionally, Hisense TVs are available with different operating systems –- Android TV, Fire TV, Google TV, Roku TV, Vidaa TV, and XClass TV.
Even with the best, top-of-the-line TV, getting the best output from a device depends on how we use its settings and features effectively. This guide covers a few simple tweaks that you can make to your Hisense TV to enjoy it the way it was meant to be experienced.
Change the picture mode
Stores crank up the picture settings to their highest to boost colors and make the picture pop under the harsh lighting conditions. You don't need everything dialed to a hundred inside your home. Many TVs come with a dedicated Store, Home, or Retail picture mode; however, when you select the Home option, the colors may not be to your preference. Over the years of watching TV, you might have just found the right picture setting that checks all the boxes.
To change the picture mode on your Hisense TV running Google TV OS, head over to the Home Screen, press the Settings button on your remote, and then navigate to Picture. Here, you will find different modes –- Vivid, Standard, Game, Sports, Theater Day, Theater Night (in some Hisense TVs it is called Cinema Day and Cinema Night), and Filmmaker Mode. According to Consumer Reports, you should avoid selecting Sports mode as it can make things appear artificial, and turns on motion smoothing, which could appear as stuttering for missing frames. Similarly, Vivid and Dynamic modes may be avoided too.
We recommend Theater Day, Theater Night, or Filmmaker Mode. While the two theater modes vary in terms of brightness, the Filmmaker mode aims to deliver the picture settings how the program was filmed. If you think selecting the perfect picture mode is a pain, you can choose to turn on Intelligent Scene mode under General settings, and let the TV decide the picture mode.
Disable Energy Saving Mode

Most household appliances, including TVs, come with an Energy Saver Mode. Enabling this allows devices to reduce electricity consumption. This is achieved by dimming the brightness level. However, this may not be apt for everyday use, and some people may find it difficult to view content in low brightness. In such cases, you should disable the Energy Saving Mode on your Hisense TV.
To disable this on your Google TV OS, press the Settings button on your remote or select the cogwheel icon on your TV. Then choose Picture, select General, and then under Picture mode, choose a different mode. Once you turn off the Energy Saver Mode, you will quickly see a difference in the picture quality –- the images will become bright, noticeably sharper, and much more visible. The highlights will now stand out, especially when watching HDR content.
Energy Saving mode can be distracting, as it automatically adjusts the brightness according to the ambience, which might not suit those who enjoy a consistent viewing experience. If you are using your Hisense TV to play high-quality games, disabling the Energy Saving Mode is the best option. Do note that Eco Mode and Energy Saver Mode are two different names for the same thing.
Set the HDMI inputs to their enhanced format
Imagine buying a superfast sports car that can go up to 200 mph but driving it in a neighborhood with a 30 mph speed limit. While the car is working, you haven't unlocked its full potential. The same is the case when you do not select the HDMI inputs to their enhanced format. If you are using the standard HDMI mode with your PS5, then your Hisense TV may limit the output to 4K at 60 hertz, even though the game and TV are capable of going 120 hertz. For that, you need to select the enhanced format mode for the HDMI port for the PS5.
Once you do that, it unlocks the full potential of the TV and lets the PS5 deliver 4K signals at 120 hertz with HDR and motion smoothing, all in all, giving you the best possible gaming experience. That is not limited just to a gaming console. It is also applicable for soundbars, 4K Blu-Ray players, and other devices. Just make sure that you are using the right HDMI cable for your devices.
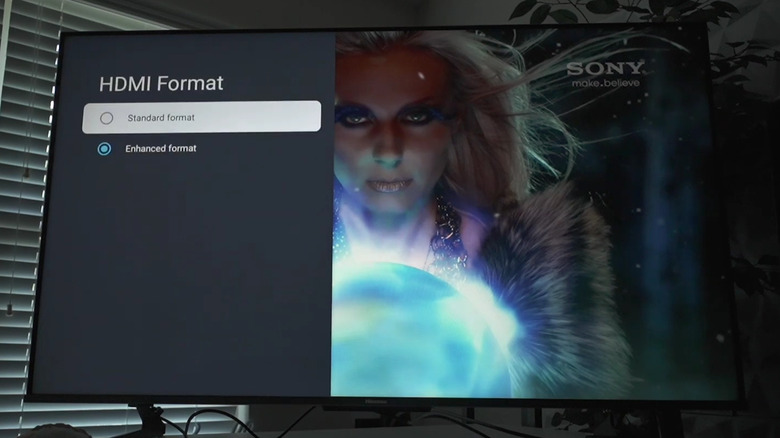
To change the HDMI input from standard mode to enhanced format mode, you need to open Settings, choose Channels & Inputs, then Inputs, and select HDMI Format. Then choose Enhanced Format for those HDMI ports where you have connected your device. Changing these settings will help your Hisense TV deliver the best possible output for that device and make the most of the device's capabilities.
Tweak Local Dimming and Peak Brightness
Before you turn on or off any picture setting on your TV, it is better to understand it rather than watch the content in a not-so-great picture calibration. Among the sea of picture options, Local Dimming is one such option that, when used wisely, can change the content that you are viewing on your TV. In simple words, local dimming is a feature that presents the picture in high contrast with deep blacks and controlled backlight. The benefit of turning on local dimming is that you will get improved picture quality, better contrast, better HDR, and cinematic colors.
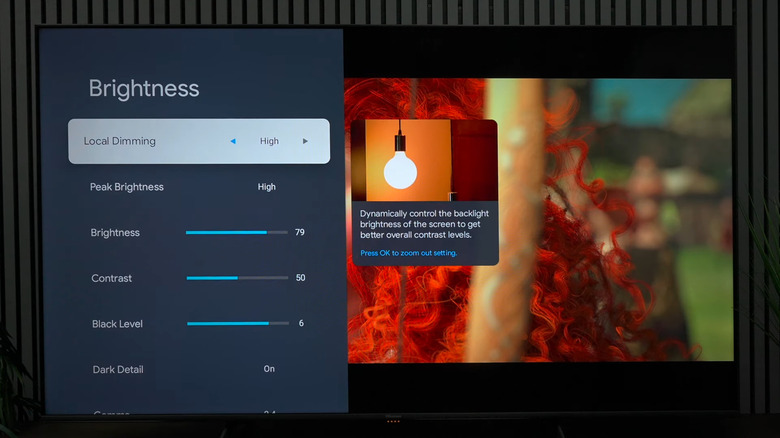
You will see multiple levels of local dimming settings in your Hisense TV. If you choose High, it will enhance the overall brightness, but will give you the best possible HDR experience. However, do note that choosing these settings will boost the brightness to max. Select High only if your eyes can handle that much brightness. You also have the option to go Medium and Low. To tweak the local dimming, you need to head over to Settings > Picture > Brightness and select Local Dimming.
Speaking of brightness, a dedicated Peak Brightness setting is under the Brightness sub-menu, just below the Local Dimming option. Many Hisense TVs are quite bright, so you can make use of this setting and enjoy the best picture quality even in a brightly lit room. If high is too bright for you, you can dial it down with Medium and Low settings.
Set SDR and HDR brightness

Most modern smart TVs support the HDR (High Dynamic Range) video format. This format enhances the video quality, gives punchy visuals, and boosts the highlights. Compared to the SDR (Standard Dynamic Range) content, which is what we usually see on TVs, the HDR content is noticeably brighter and more vibrant. According to RTINGS, when HDR content is played, the source sends either dynamic or static metadata to the TV and tells it "what exact color to display at which exact brightness level."
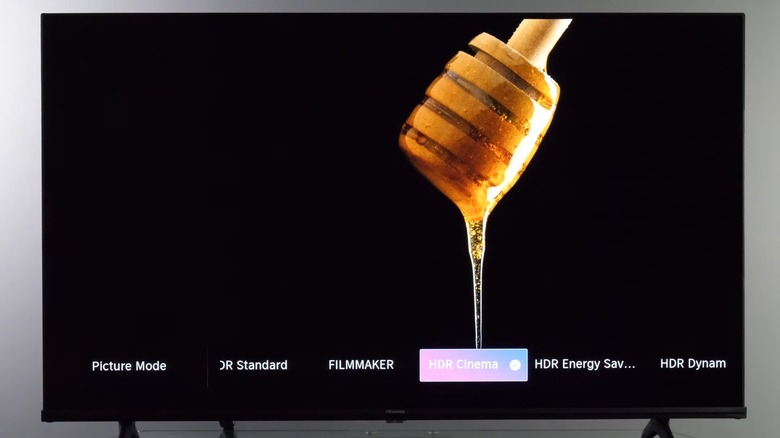
To set the SDR content brightness, you need to head over to Settings > Picture > Brightness and select the brightness accordingly. However, to set the HDR brightness, you need to play HDR content or pause it and then head over to Settings > Picture > General > Picture Mode. You will see that, by default, the HDR Energy Saving option is selected. Here, you can change it to HDR Vivid, HDR Standard, HDR Game, HDR Sport, HDR Theater, FILMMAKER MODE, or IMAX MODE.
You can further tweak the brightness by heading over to Picture > Brightness and choosing the levels you prefer to make the content appear punchier and brighter.