Here's The Best Way To Optimize Your Gaming Laptop For A Long-Lasting Battery

Modern gaming laptops can pack a whole lot of power into surprisingly slim and light packages, allowing users to play demanding games on the go. But their biggest strength is also their most common weakness. There are Windows laptops with amazing battery life, but gaming laptops are rarely among them. Like a street racing car tweaked to increase horsepower, gaming laptops are often optimized to feed as much power as possible to components such as the graphics card in order to increase gaming performance. (This is also why they often have such ludicrously sized power bricks.) If you don't have an outlet available, it's common for a gaming laptop to die after only a couple of hours, even when you're not gaming.
Luckily, there are a number of tweaks you can make to extend the battery life of a gaming laptop for non-gaming tasks. However, you still want the laptop to perform at its best when it's time to kick back with the latest video game. Although it's not possible to do both at once, you can make it easy to switch between the two modes by customizing your laptop's settings. This is best accomplished using the power plan settings in Windows, but there are also a number of smaller adjustments you can make to eke out even more time before you start searching for an outlet.
The tips in this article are specific to Windows 11, now that Windows 10 is on its way out to pasture. However, you can find these settings on the older OS version, too. So, here's the best way to optimize your gaming laptop for a long-lasting battery.
Power plan settings can extend your laptop's battery
The biggest battery boost to your gaming laptop comes from adjusting the power plan settings in Windows, as well as those found in any system management tools from your laptop's manufacturer, such as ASUS Armoury Crate or MSI Dragon Center. Those apps have performance profiles of their own, which can reduce CPU and GPU wattage for better battery life and thermals. As noted above, gaming laptops have power plans tweaked to prioritize performance over efficiency, but you can swap to an efficient plan easily — or even set up a custom plan of your own. To do so, open Settings, then navigate to System > Power and Battery.
Next to each setting, you'll see two dropdown boxes, one of which determines how the setting works when the laptop is plugged in, while the other one affects how it behaves when unplugged. The best way to ensure you're not constantly switching between gaming and general power plans is to set up a plan that boosts power when the laptop is plugged in and reduces it when it's unplugged. Since most gaming laptops don't last very long when gaming, you'll probably plug yours in before firing up a title.
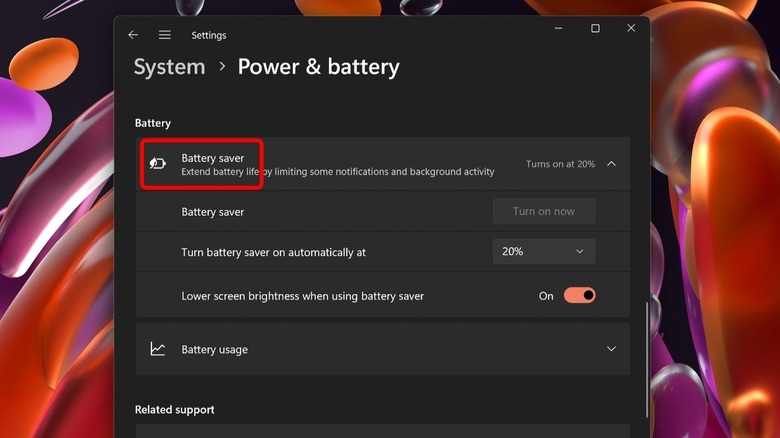
Under Power Mode, choose "Best Performance" for the plugged-in profile and "Recommended" for the on-battery profile. You can also adjust the Screen, Sleep, & Hibernate Timeout settings just below. Additionally, you can toggle on Energy Saver mode from this page, or set it to turn on when the battery drains to a chosen level. It can provide significant gains for your battery life at the cost of some functionality, such as reduced screen brightness and restricted background activity.
Gain more longevity by changing startup behavior, screen settings, and more
Clamshells from the major gaming laptop brands often come with high refresh rate displays, which look amazing when running games, but can tax the battery. When you're not gaming, you can squeeze a bit more battery life out of your computer by setting the refresh rate to a more standard 60 Hz. To do so, open Settings and click on System, then Display, then Advanced display settings. Find the dropdown menu labeled "Choose a refresh rate" and select 60 Hz. Your laptop screen may briefly flicker or go dark while making the change. When you want to game, simply change the refresh rate back to its highest available setting. While you're at it, turn down your display brightness using the slider in Quick Settings for even more battery savings.
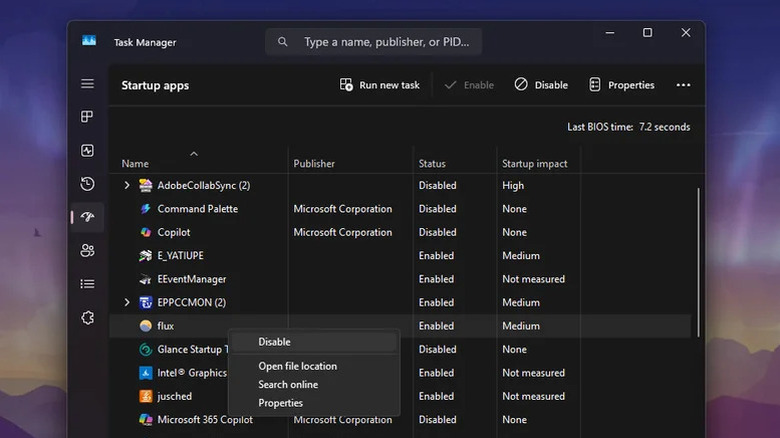
Open apps can also impact battery life, especially those that start up in the background when you turn your laptop on. Use the keyboard shortcut Ctrl + Shift + Esc to open Windows Task Manager, then click on the Startup tab. Here, you'll see a list of apps that can automatically start in the background when you boot up your computer. Sort them by status, which will make it easier to see which apps are enabled at startup. Using your own judgement, decide which apps you absolutely need running at all times (for example, antivirus or cloud storage syncing apps). To stop apps from running at startup, right-click on each one, then click Disable. You will still be able to run these apps manually, but they won't start themselves when Windows launches. If you're still looking for better battery life, check out some easy ways to fix Windows 11 battery drain issues.