The Easiest Ways To Fix Common Windows 11 Battery Drain Problems
If you own a Windows 11 tablet or laptop and are the type of person who brings your device everywhere so you can work on the go, you probably also have varying levels of battery anxiety, especially when you don't have access to a power outlet or a portable battery charger. Unfortunately, as is the case with any gadget running on battery power, the act of juggling a myriad of tasks and processes running all at once can cause serious issues with a computer battery's overall capacity.
In a time when working remotely is the new normal, having a machine that smoothly runs as advertised without suddenly conking out is definitely a requirement of sorts. Sure, this isn't a concern if you work at a desk all day with your laptop plugged in, but if you make working outside of the house a habit, you can leverage some features built into Windows 11 to keep your battery running as long as possible, and tweaking them is a good way to fix any ongoing battery drain issues you may be experiencing.
Switch to Battery Saver mode

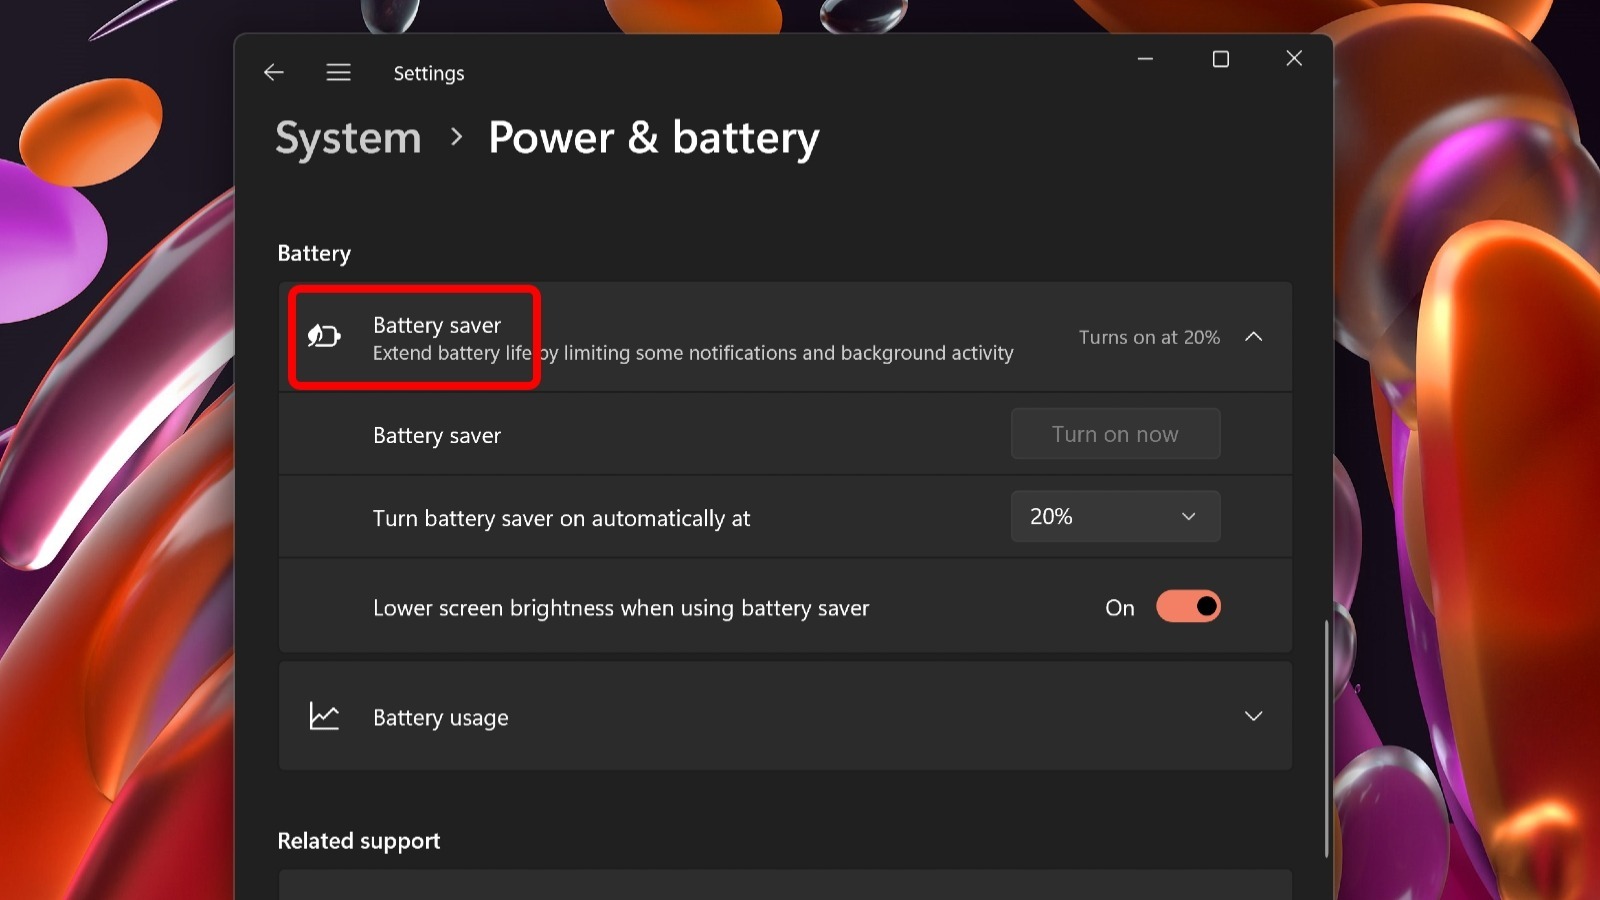
According to Microsoft, when Windows 11's battery-saving feature is enabled, the PC stretches out the device's battery runtime by shutting down power-hogging tasks and processes that may not be crucial at that moment, like certain built-in Windows app syncing features, updates, and other apps that may be left open but that are not currently in use. By default, Battery Saver is switched off and can only be enabled if the computer is unplugged. Here's how to turn it on:
 SlashGear
- Click the Windows Start button, then go to Settings by clicking the gear icon.
- Click the Power & Battery option within the Settings app.
- Click on the Battery Saver option, then click the button that says "Turn on now."
- Select the battery percentage threshold beyond which Battery Saver will automatically turn on.
You can also toggle on or off the feature that lowers your laptop's screen brightness in Batter Saver mode to help reduce battery drain. This same Settings menu also provides other power and battery features and information, including a log of your laptop's battery charge cycles, which power mode your PC is operating in, and which apps use the most battery power when the machine is unplugged.
Run Windows 11's built-in troubleshooter

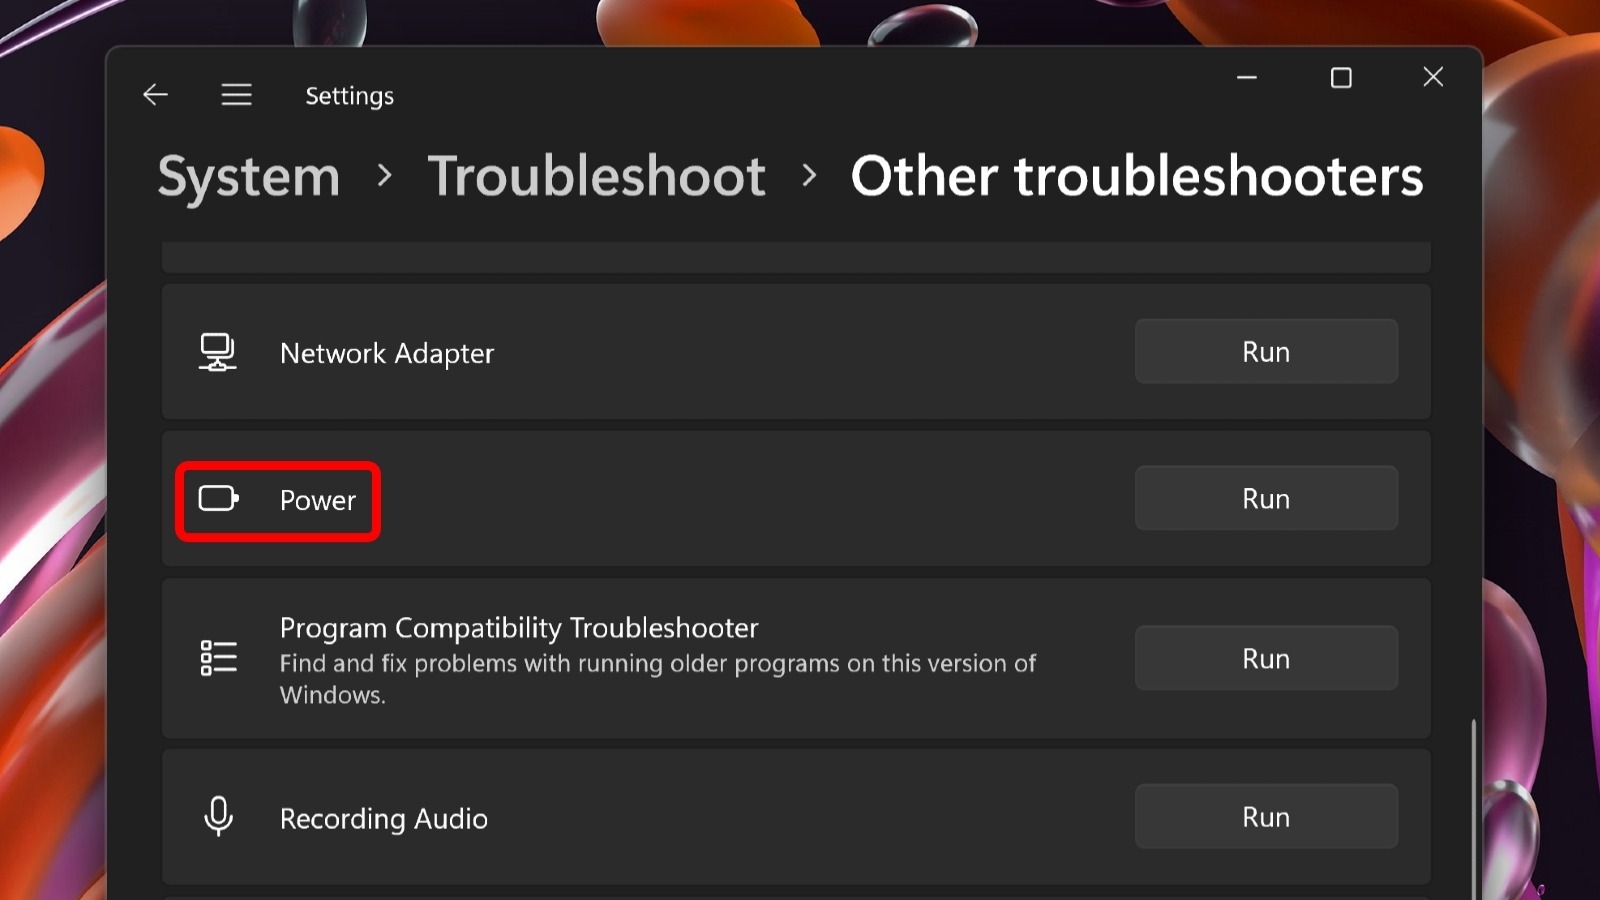
Windows 11 has a troubleshooting program that can offer quick power fixes by diagnosing potential battery issues and offering battery-saving solutions through settings changes. This same tool is also useful for finding and fixing other issues you may be having with your PC, as well.
 SlashGear
- Click on the Windows Start button, then open Settings by clicking the gear icon.
- Scroll down and click the Recovery option.
- Within the new menu that appears, click "Fix problems without resetting your PC."
- Select the Other Troubleshooters option.
- Scroll down and click the Run button next to the Power option.
Depending on whether a power problem actually exists on your computer, it may take a while for the program to detect issues. Once the process is done, you'll have an opportunity to make changes if they are necessary or send feedback back to Microsoft regarding your experience using the troubleshooter. You can also click on the "View detailed information" link to review which potential battery issues were checked and detected in your device.
Turn on Sleep mode before leaving your desk

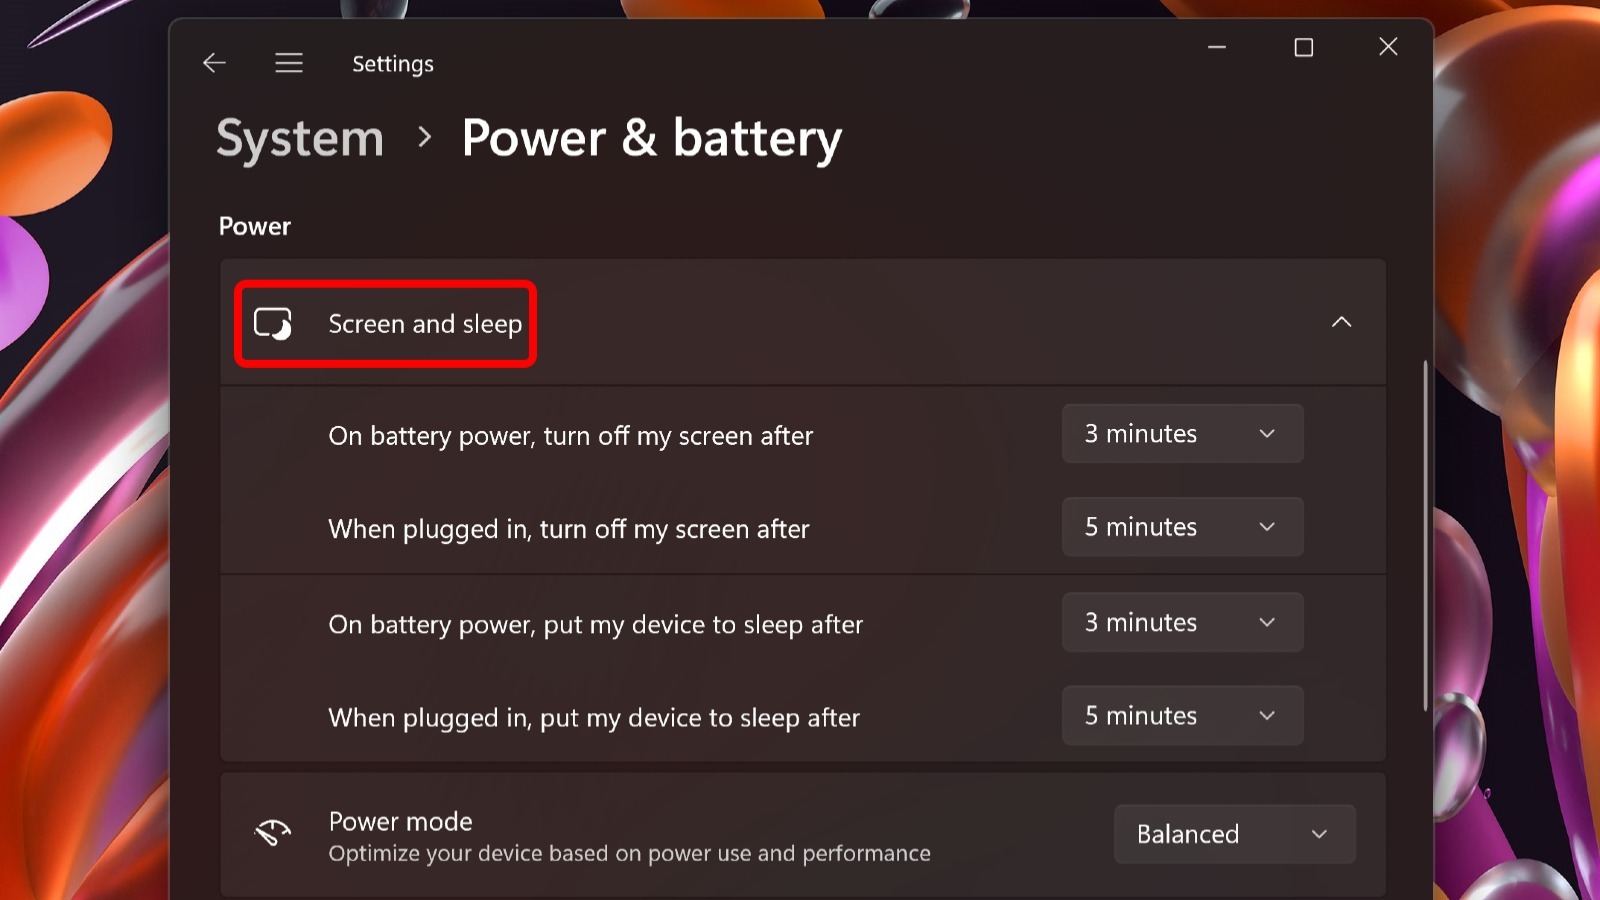
The next battery-saving feature to explore is Windows 11's Sleep function. Restarting a computer after shutting it down completely can take some time to complete. Sleep mode allows you to quickly wake up your inactive device and resume app use and tasks you may have left open and running. Once you're finished with your tasks, putting the laptop back into Sleep mode will help preserve your remaining battery charge.
 SlashGear
- Click the Windows Start button, then open Settings by clicking the gear icon.
- Scroll down and click on the Power & Battery option.
- Under the Screen and Sleep menu, use the drop-down menus to choose how long your PC will stay awake on battery power before Windows puts it to sleep.
You can set the Sleep function to kick in after durations ranging from one minute to five hours. Do not pick "Never" from the list, as this is a surefire way of unnecessarily using up precious battery power while your computer is unplugged. Pick a time limit that's long enough to cover breaks you need to take as well as errands you need to do off-keyboard.
Pick a suitable power plan

Computers require a different combination of settings — also known as power plans — to run efficiently when plugged in and when running on battery power. To ensure that your PC's hardware behavior and system settings dynamically switch to a more battery-friendly option when you're away from your desk, you can adjust your PC's power plan, though it requires heading into Control Panel to do so.
 SlashGear
- Click the magnifying glass icon in the Windows 11 taskbar.
- Type Control Panel in the search field and press Enter on your keyboard.
- In the Control Panel window that opens, click the drop-down menu next to "View by" and select the "Large icons" option.
- Click the Power Options setting.
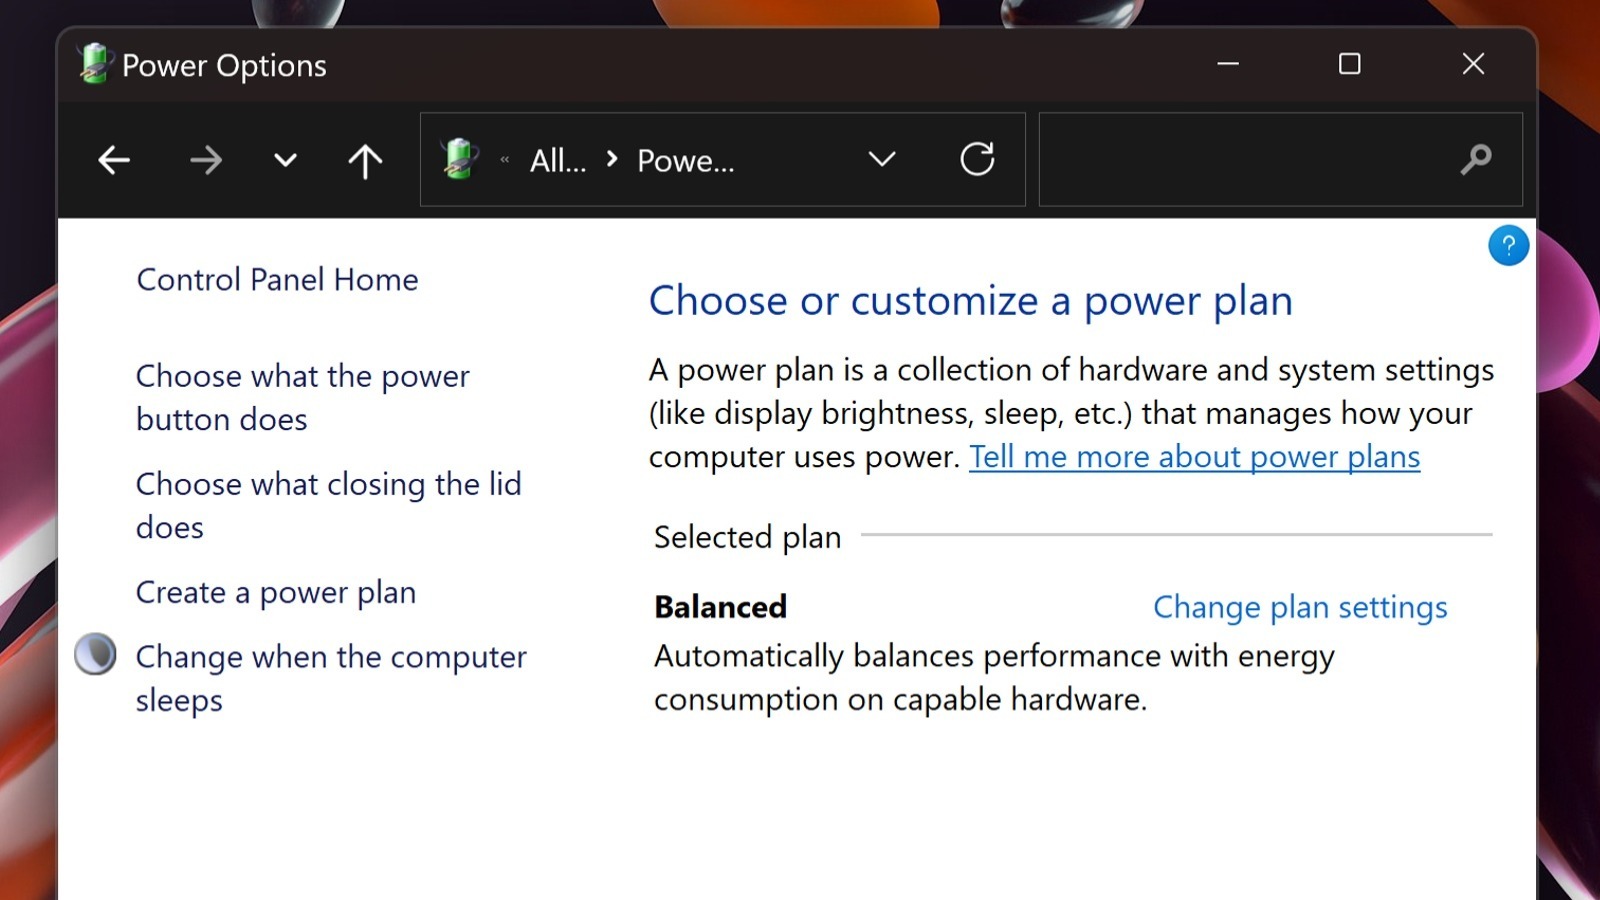
- Under "Choose or customize a power plan," pick "Balanced" or any option that says it "Automatically balances performance with energy consumption on capable hardware."
- Click on "Change plan settings."
- Next to "Put the computer to sleep" under the "On battery" column, set a shorter duration, then click "Save changes" to finalize.
- Click Apply to make the changes, then click OK to save the changes.
Windows 11 allows users to customize power plans that will automatically activate when applicable, such as one that kicks in whenever you unplug your laptop and that turns off when you plug the machine back in. Picking the right plan helps ensure that your machine's performance is evenly matched with the amount of power currently available.
Adjust your computer display's brightness and HDR settings

When you have your computer screen's brightness turned up, it will consume quite a bit of power — not to mention the risk of eyestrain over time. For this reason, consider lowering the display brightness to reduce the drain on your battery; you can, of course, turn the brightness back up once you're connected to a wall outlet. You can also change the screen's HDR and refresh rate settings to help reduce battery drain.
 SlashGear
- Click the Windows Start button, then open Settings by clicking the gear icon.
- Scroll down and select the Display option.
- Adjust the Brightness slider until your screen is dim, but not too dim to see.
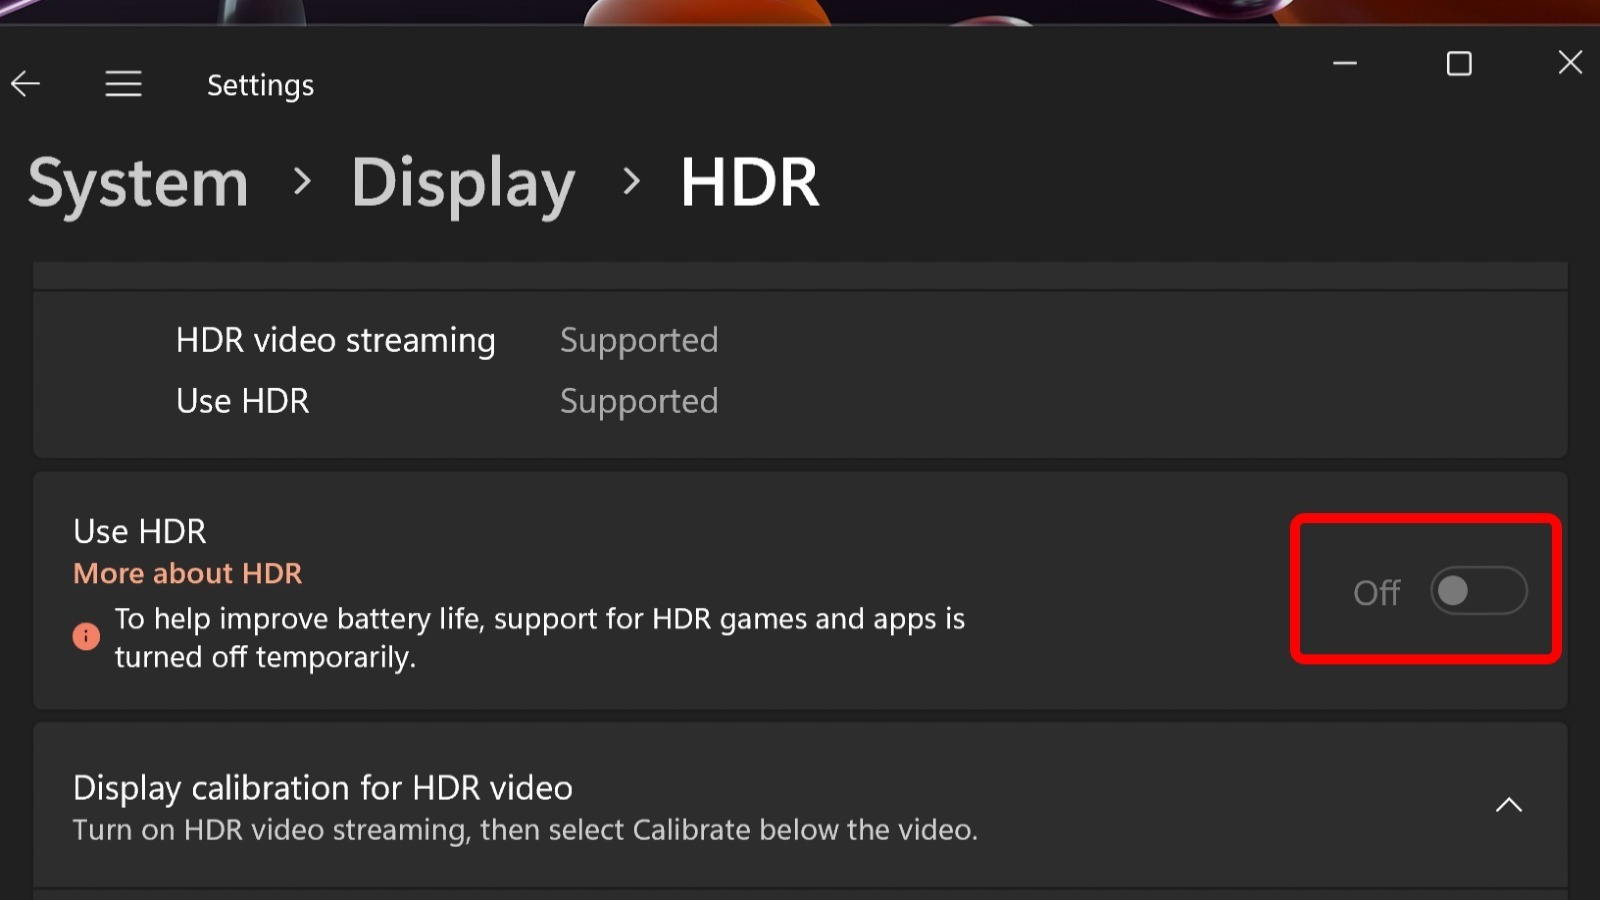
- Beneath the Brightness slider, click on the HDR option to open its settings.
- If your laptop is already in a balanced or battery saver mode, HDR will likely be disabled by default. If it is turned on, however, you can manually turn it off to save battery life by clicking the toggle switch.
Additionally, you can opt for a lower screen refresh rate, which would require less power. Press the back button until you're on the Display page again, click "Advanced display settings," then choose the lowest option available under "Refresh Rate." Do note that doing this may reduce the smoothness of motion shown on your screen.