These Third-Party Feet Make The Veto Pro Pac Compatible With Milwaukee Packout
As nice as it is to have a lot of products in a particular brand's system, you tend to run into compatibility problems as soon as you buy one product outside the framework. For example, let's say you have a big stack of Packout containers from Milwaukee, but for a personal tool pack, you prefer Veto Pro Pac's BlackOut backpack when compared to a Milwaukee Packout backpack. Naturally, since it's not a Milwaukee product, much less a Packout product, you're not going to find the required connecting grooves on a Veto Pro Pac product that allows it to connect to the rest of your stack. That means you're either hauling it around on your back all the time or leaving it behind in the truck, which defeats the purpose.
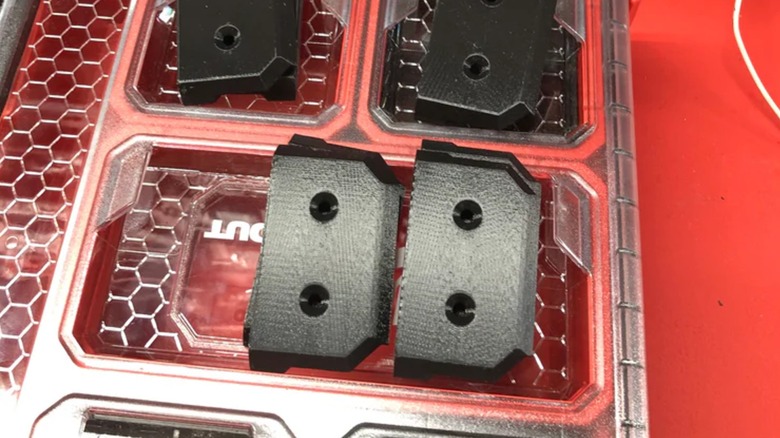
Luckily, there are plenty of Milwaukee and Veto Pro Pac users who aren't satisfied with this little point of incompatibility and have taken it upon themselves to offer a third option. There are a variety of useful third-party add-ons for your Milwaukee Packout, including connector feet for homemade connections. DIY YouTuber JakeOfALL sells his own 3D printed connecting feet, specifically fitted to slot into the grooves on a Packout lid. These feet can be attached to just about anything with a bit of drilling, including the bottom of a Veto Pro Pac backpack. It's a simple, yet cool Milwaukee Packout mod worth checking out.
For just three dollars, you can hook your Veto Pro Pac to a Packout stack
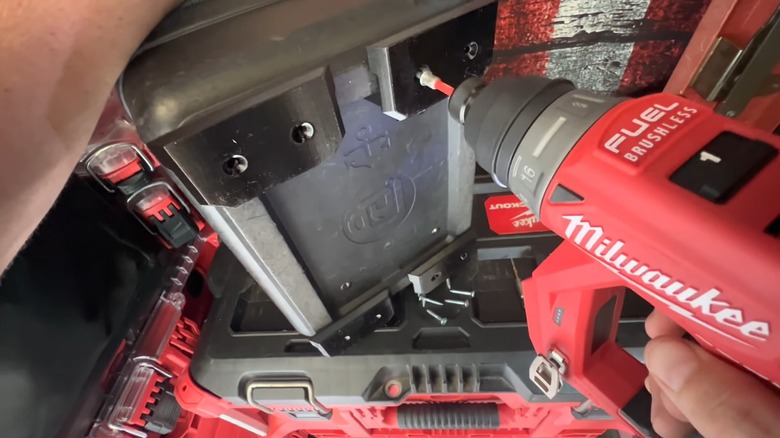
While installing the JakeOfALL feet on a Veto Pro Pac backpack does take a bit of modification, it's a fairly straightforward procedure. All you need is some double-sided sticky tape, a power drill with a bit that can fit through the holes on the bottoms of the feet, and some screws of the same size.
Place four of the feet into a Packout panel to ensure they're properly spaced and top each one with a strip of sticky tape. Press the backpack down onto the taped feet to temporarily secure them onto the pack's base. Once you've got them attached, flip the pack onto its side, grab the power drill, and drill pilot holes into the two divots on each foot. After you drill the holes, just drill the screws in, and the feet will be secured into the pack base. Don't worry about the sticky tape, you can just leave it in there.
With the feet secured to the pack base, you can now attach the whole thing to a Packout case or panel. Just press the base into the openings of the Packout grooves and shove them into the narrow ends, and the whole thing will be secured.