You Can Install Windows On Some Chromebooks - Here's What You Need & How To Do It
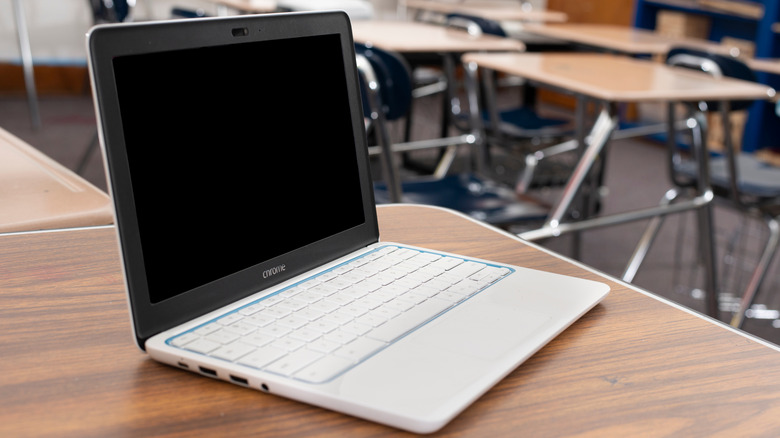
Chromebooks are some of the best value for money laptops you can buy. They're easy to use, secure, and have impressive battery life. But as good as Chromebooks are, they have their limitations. For one, ChromeOS doesn't support productivity tools like Microsoft Office, so you're limited to web apps. The selection of games is also much smaller than what you'll find on Windows, and you might run into trouble with certain peripherals or printers. If you're tired of these limitations, installing Windows on your Chromebook might seem like the perfect solution.
Don't get too excited just yet, though. Installing Windows 10 or 11 on a Chromebook isn't nearly as simple as putting ChromeOS on a Windows machine. The biggest hurdle is the hardware. Chromebooks are built for a lightweight OS, so they usually have modest specs that struggle with Windows. If your device has an ARM processor, you can't install Windows at all. You'll need one with an Intel or AMD chip instead. Thankfully, you can easily find out if your Chromebook can handle Windows by heading to CoolStar's website and looking up your model.
Even if your Chromebook can run Windows, there's no guarantee it'll do so smoothly. But if you've decided to give it a shot, you'll need a few things besides your Chromebook. Make sure you have a Windows PC or laptop, a flash drive, a USB keyboard, and a mouse.
Creating Windows installation media
The first thing you need to do is create Windows installation media using a Windows PC or laptop. The process is pretty much the same for both Windows 10 and Windows 11. Here's what you need to do:
- On your Windows PC, open any web browser and head to Microsoft's website to download the Windows 11 or Windows 10 Installation Media Tool.
- Plug in the USB flash drive to your Windows PC and run the downloaded tool.
- Review Microsoft's terms and notices and click Accept to continue.
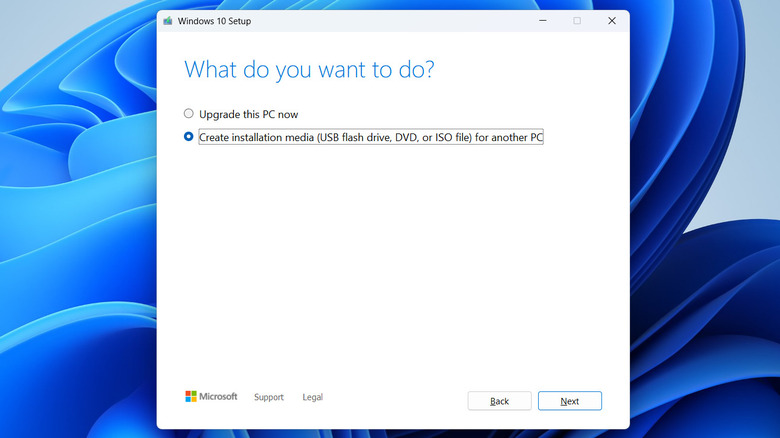
- Select the "Create installation media (USB flash drive, DVD, or ISO file) for another PC" option and click Next.
- Click the "Use the recommended options for this PC" option and hit Next.
- Choose your USB flash drive once it appears and click Next again.
- Now, wait for the tool to download the installation file onto your flash drive and click Finish.
Once the flash drive is ready, your next step is to prepare your Chromebook for Windows installation.
Preparing your Chromebook for Windows 11 installation
Before installing Windows on your Chromebook, it's a good idea to back up any files stored locally so you don't lose anything important. The steps for installing Windows vary depending on whether you're going for Windows 10 or Windows 11. To run Windows 11, your Chromebook needs to have an Intel processor and support for Linux, since it relies on tools like QEMU and Virtual Machine Manager.
If your Chromebook is compatible, you can get it ready for Windows by enabling Developer Mode and downloading QEMU and Virtual Machine Manager. Here's how:
- On your Chromebook, press and hold Esc + Refresh + Power button together to enter Recovery Mode.
- Select Enable Debugging Features.
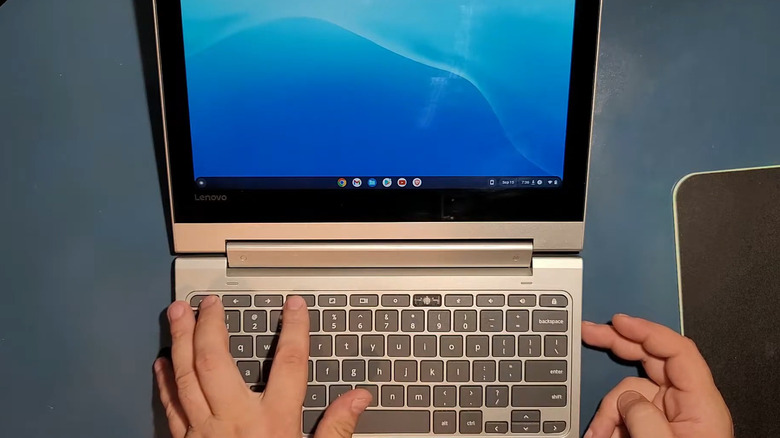
- Now, press Ctrl + Alt + T to open the terminal.
- Then, type the following command and hit Enter to download QEMU: sudo apt-get install qemu
- Next, type the following command and hit Enter to download the Virtual Machine Manager: sudo apt-get install virt-manager
Installing Windows 11 on Chromebook
Once you've set up your Chromebook and have the flash drive with the Windows installer, you're all set to run Windows 11 on it. Here's what to do next:
- Connect your USB flash drive to the Chromebook and press Ctrl + Alt + T to open the terminal window.
- Type in virt-manager and hit Enter to open the Virtual Machine Manager.
- Now, select the Create New Virtual Machine option.
- Choose Local installation media (ISO image or CD-ROM) and click Forward.
- Click the Browse option and choose the Windows 11 installation file. Then, click Forward.
- Now, you'll need to specify how much RAM and storage Windows 11 can use. It requires at least 4GB of RAM and 64GB of storage, but giving it more will help it run more smoothly.
- Finally, click Finish to begin installation and wait for it to complete.
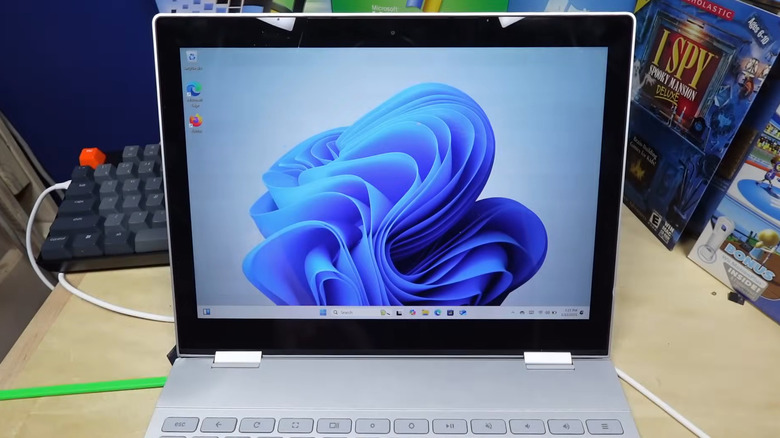
That's it. You should now be able to run Windows 11 on your Chromebook through the Virtual Machine Manager and enjoy its best features.
Preparing your Chromebook for Windows 10 installation
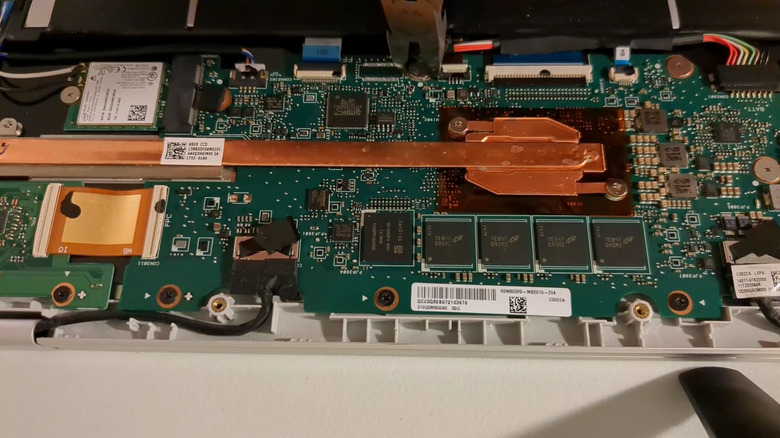
Installing Windows 10 on a Chromebook is a bit more involved because it requires you to remove the write-protect screw from the motherboard. If you're comfortable taking off the back cover and have the right tools, you can do this yourself. The screw's location can vary by model, so if you can't find it, simply look up your specific Chromebook model online. Once the screw is out, follow these steps:
- Turn on your Chromebook, and press Esc + Refresh + Power to enter Recovery Mode.
- Press Ctrl + D and then hit Enter to turn off OS verification. Wait for your Chromebook to reboot and press Ctrl + D again.
- Now, press Ctrl + Alt + T to open the terminal window. Type in shell and hit Enter.
- Type in the following command and hit Enter: cd ~; curl -L -O https://mrchromebox.tech/uefi-flash.sh && sudo bash uefi-flash.sh
- Select the Full coreboot Firmware option and hit Enter. Then, type Y to confirm.
- Now, type U to install the UEFI firmware on your Chromebook.
Installing Windows 10 on Chromebook
After installing the firmware, plug the flash drive with Windows installation media into your Chromebook and follow these steps:
- Connect your USB keyboard and mouse to it.
- Turn on your Chromebook, and it should boot directly from the USB flash drive. If it doesn't, press the Esc key when your Chromebook boots. This will allow you to select the USB drive.
- Select your language and region, then click Next.
- Click the Install now button and then choose the "I don't have the product key" option.
- Now, select your preferred version of Windows and choose Custom: Install Windows only (advanced).
- Follow the on-screen prompts to delete all the partitions and finish installing Windows.
Finally, you'll need to install the right drivers so that everything works smoothly without errors. The specific drivers you'll need depend on your Chromebook's hardware, so there's no one right answer. Your best option is to visit CoolStar's website, choose your model, and download the appropriate drivers. Then, go ahead and install them on your device.