DIY Subwoofer Enclosure: Everything You'll Need To Build Your Own
We may receive a commission on purchases made from links.
Most people attempt to build a DIY subwoofer enclosure for one of two reasons. They're either looking for a custom design at an affordable price, or they're trying to get a subwoofer in their car while taking up the least amount of usable space. Before committing to the DIY subwoofer enclosure project, be forewarned that you will need some inexpensive woodworking tools to produce a finished product that you can be proud of. However, if you have, or have access to, a more complete woodworking shop equipped with a table saw, a large workbench, and other accessories you'll need to stay safe, you should use every tool at your disposal.
Once you're sure you have the tools, and DIY skills, to complete the project, you'll need to select a subwoofer that'll deliver the performance you want, while fitting in the space you have available. There are few limitations if you're building an enclosure to house the subwoofer used by your garage band. However, if you're looking to install a 10-inch sub under the passenger seat of your sub-compact sedan, there are some concerns you'll need to consider.
Designing your DIY subwoofer enclosure
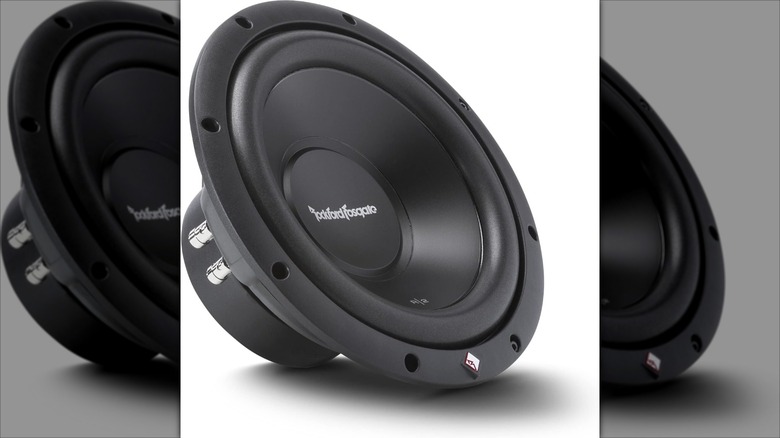
Before you start buying materials for your DIY subwoofer enclosure, you'll need to gather some data. Subwoofer manufacturers often specify a recommended enclosure size for optimum performance whether it's going into an automobile, a home, or a concert venue. For example, a 10-inch Rockford Fosgate R2D2 subwoofer requires an enclosure size of around 0.50- to 0.75-cubic feet. That would be a box with internal dimensions measuring a foot square and five to nine inches deep. Those dimensions can be adjusted to fit your space keeping in mind the 10-inch diameter of the subwoofer and a minimum mounting depth of 4.319 inches for this particular subwoofer. It's also a good idea to add a couple of inches to all the minimums for the best results.
Once you've chosen a subwoofer, its location, and the shape for the enclosure, it's time to start the design. If space is an issue, consider building a prototype out of cardboard and tape to ensure proper fitment before cutting up more expensive materials. Now it's time to take that idea in your head and put it on paper. If you created a cardboard prototype, you could use the pieces as a rough template for your drawing, but if you're making a basic box, you can go straight to paper. This drawing will be your blueprint for cutting the panels that you'll put together to make the enclosure.
Drawing a rough sketch of the DIY subwoofer enclosure

Unless you have access to computer aided drafting (CAD) software, the easiest way to draw a blueprint is using graph paper. Your drawing can be "to scale" (the same size as the enclosure you're creating). It can also be smaller where one square on the graph paper equals one inch in real life. Just make it big enough to allow enough detail but small enough to at least fit each piece of the enclosure on a single sheet of paper in most cases.
Start by drawing the external shape of the enclosure using a straight edge, such as a ruler, and a pencil, and include dimensions for each side to keep everything organized. If space permits on one sheet of paper, draw a view from the front in the center of the page, a top view directly above that, and a left-side view to the left. If it's too big to all fit on one sheet, use three sheets and label them front, left, and top. For a basic box these three views are all you'll need, but if the opposing sides are different, you'll want to draw those too.
Fine tuning the DIY subwoofer enclosure blueprint

Now the tricky part. You'll need to consider the thickness of the material you're using to build the enclosure. A common material for this type of project is ¾-inch MDF or medium density fiberboard, especially if you'll be painting it or covering it with automotive carpet. If you're going to leave a wood finish for staining, you may want to invest in some ¾-inch cabinet-grade plywood instead.
To allow for the material thickness we'll have to deduct two-times the thickness from some of the pieces to build a box with our desired external dimensions. An example should clear up that last sentence.
If we want to build a one-foot square box using ¾-inch (0.75-inch) thick material, we could cut the front and back 12 inches square. The top and bottom panels, however, should be 12 inches by 10.5 inches, the deduction of 1.5-inch allows those pieces to fit "inside" the front and back panels, making the box 12 inches square. The left and right-side panels would be 10.5 inches square to complete the cube measuring 12 inches externally (10.5 inches square on the inside), resulting in an enclosure with roughly 0.67-cubic feet interior volume using the formula length x width x height = volume. You may have to adjust your dimensions to achieve the internal volume recommended by the subwoofer manufacturer.
Cutting the panels and assembling the DIY subwoofer enclosure

Using the final dimensions from your blueprint, start by drawing the panels on your selected material with a pencil using a tape measure, square, and straight edge. If your drawing is to scale you could lay the pages on the material to get an idea of how to cut them out with the least amount of waste, but don't just trace your drawing onto the wood.
A table saw is the best tool for cutting the panels to size and keeping the edges straight. However, a circular saw will get the job done and can be used to rough cut the panels from the material to make it easier to handle on a table saw.
Pro tip: when using a circular saw to make finish cuts, clamping a straight edge to the material for a guide helps to make straighter cuts.
Assemble the enclosure using wood glue along the edges where the panels meet, secured with two-inch long wood screws such as those intended for drywall or decking. For additional strength, insert pieces of 2x2 lumber at the seams where space permits, and/or consider doubling the thickness of the front panel by gluing and screwing on another piece.
Finishing touches for the DIY subwoofer enclosure

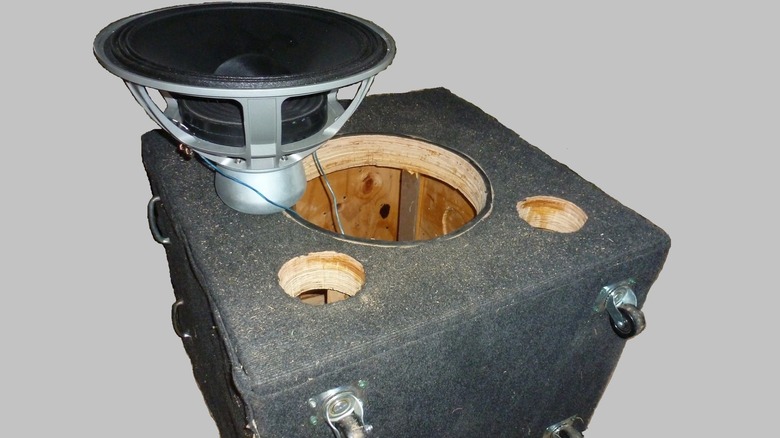
Once the box is assembled, use the template or dimensions included with the subwoofer to layout and cut the hole for the speaker with a jigsaw. Drill a hole large enough to accommodate the jigsaw blade near, but inside of, the line you'll be cutting to get it started.
You'll also need a way to get speaker wires to the subwoofer. While simply drilling a hole to run wires through and sealing it up with caulk is one way, a cleaner installation involves a terminal box or something similar. These come in different shapes but the hole can be cut with a jigsaw, or the correct size hole saw for the round type.
After all the cuts are completed and the edges sanded to remove splinters and sharp edges, it's time to seal all the internal seams with silicone caulking. Let the caulk cure for the recommended time, then either paint, stain, or cover the enclosure with a material of your choice. Don't skimp on this step, you've put a lot of work into this so finish it to meet your aesthetic. Even if you prefer the raw wood look, at least seal it with some polyurethane to protect it from humidity.