How To Upgrade Windows 11 From Home To Pro
Microsoft releases various editions of its Windows operating system to meet consumers' needs and preferences, such as Home, Pro, Enterprise, Education, SE, and more. Each of these is designed for a specific user group to let users choose an OS that best fits their requirements, whether for personal use, professional work, education, or enterprise-level management and security. The tradition continued with Windows 11, too.
Generally, many users begin with the Windows 11 Home edition as it is the most commonly available and used Windows OS edition. However, if you are a power user, you might want some advanced features and more control over your PC with time. That's when upgrading your Windows 11 Home to Pro will help you.
While Windows 11 Home does a fairly good job for a regular user, it lacks some advanced features and built-in settings that only the Pro edition provides. Fret not, it's easier to make a switch from Windows 11 Home to Pro than it seems.
Whether you want to upgrade via Microsoft Store or by manually using a license key, this guide will help you make a smooth transition without troubling your personal files and settings and disturbing your workflow.
Preparation for upgrade

Before attempting to switch to Windows 11 Pro, ensure your PC meets the minimum system requirements for upgrading to Windows 11 Pro. Although the requirements for Pro and Home versions are generally the same, it's wise to review them, especially if you're making other upgrades to your system. If you are able to run Windows 11 Home without any significant issues, this shouldn't be a concern.
Next, back up important data. While upgrading Windows 11 Home to Pro doesn't affect your personal files and settings, it is still good to take a backup of your important documents, files, etc. You can utilize an external hard disk or cloud storage for backup.
Ensure that your system is updated with the latest version of Windows 11 Home, as an updated system will prevent any compatibility issues and make the upgrade to Pro seamless. To update Windows 11, launch the Settings, switch to the Windows Update on the left, and click the Check For Updates button on the right. Install any updates right away and restart your system. You must also check if your Windows 11 Home edition is activated with the correct license.
During the upgrading process, your internet connection shouldn't be interrupted; otherwise, it can lead to upgrade failure or even Windows corruption. So, make sure that the internet always works appropriately during the upgrade.
Finally, purchase a valid license from Microsoft's website or other reputed vendors if you want to upgrade to Pro without Microsoft Store.
Upgrade Windows 11 Home to Pro through Microsoft Store
If you don't have a Windows 11 product key, you can upgrade to Pro through Microsoft Store. It's a straightforward way that is easy to follow. However, remember that you will be purchasing the original equipment manufacturer (OEM) license using this way. That means this license will stick to your current PC and won't be transferable to any other device in the future.
Here are the steps:
- Ensure that you are signed in with your Microsoft Account.
- Launch Settings on your system and switch to the System tab on the left.
- On the right side, scroll down and select the Activation option.
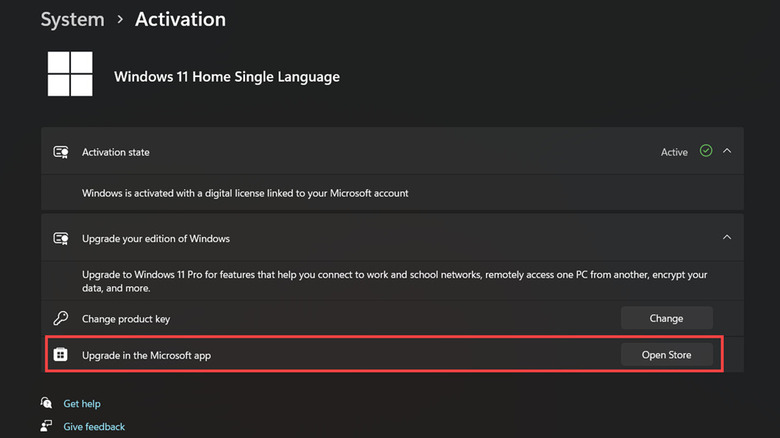
- Next, expand the Upgrade Your Edition of Windows section and click the Open Store button next to Upgrade in the Microsoft App.
- The Microsoft Store app should be launched with the option to install Windows 11 Pro.
- Click the Buy button to purchase the product key. It is currently priced at $99 for US users.
- Follow the on-screen instructions to upgrade your Windows 11 Home to Pro successfully.
- Restart your system so that the changes can be effective.
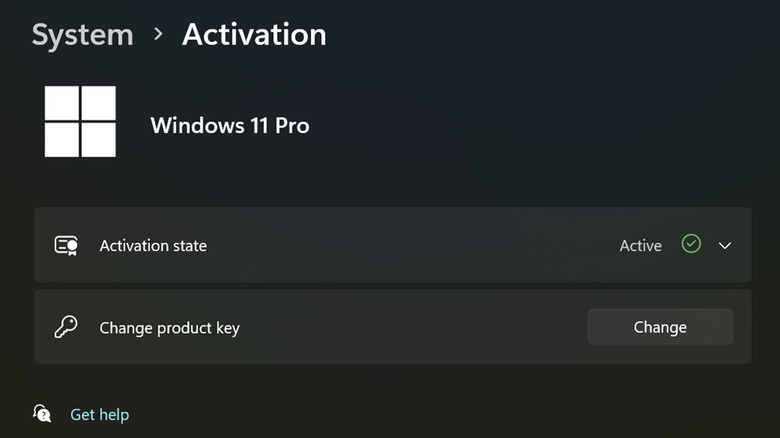
- After restarting, launch the Activation settings and check if your system has been upgraded to Windows 11 Pro.
Upgrade Windows 11 Home to Pro using a product key
If you have purchased a Windows 11 Pro product key or already have it from another device, you can directly use it to upgrade your Home edition. Such activation keys are usually transferable; therefore, upgrading to Pro is beneficial if you use this method.
Follow these instructions:
- Open Windows Settings and click the System tab on the left.
- Scroll down and choose the Activation option on the right.
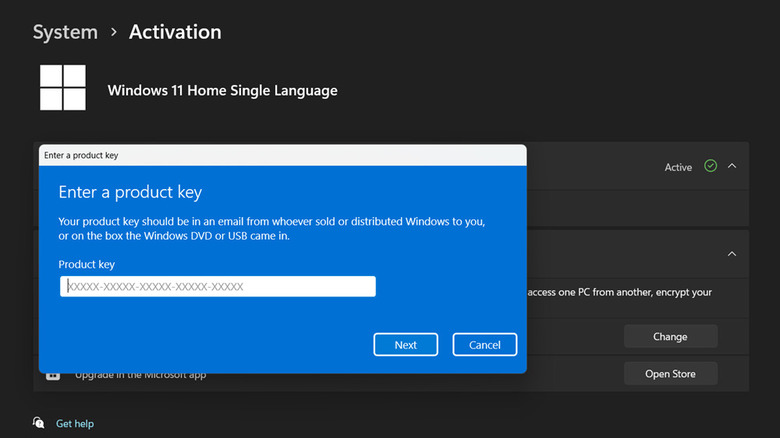
- Expand the Upgrade Your Edition of Windows section and click the Change button next to the Change Product Key.
- After you click the Change button, a window asking you to enter the product key will be opened. Type your genuine 25-character key in the given space and click Next.
- On the next prompt, click the Start button. The upgrade will begin and will take some time to complete.
- If you receive an error prompt that states 'Unable to upgrade your edition,' ignore it and close it.
- Now, restart your PC and keep your system on so that features of Windows 11 Pro can be added to your system.
- On the system restart, open the Activation settings and check if your system is upgraded to Windows 11 Pro.
The benefits of Pro over Home
The first major benefit of the Pro edition is the BitLocker feature. It provides advanced data encryption to protect your hard disks from unauthorized access. It is particularly beneficial if your device contains sensitive data and might get stolen or lost.
With Windows 11 Pro edition, you also get Windows Remote Desktop feature, allowing you to connect and access another device on your computer remotely. It is helpful for professionals and IT administrators who need to manage machines or provide support without being physically present.
Another significant advantage of the Pro edition is the Hyper-V, a virtualization tool that allows you to run multiple virtual machines on your device. This valuable application for someone like a software tester enables you to run applications on different operating systems without dual-booting.
Next, the Group Policy Editor centrally manages Windows settings and helps enforce security policies and configure user settings across all organizations' devices. As an individual, you get more control over your OS settings through this.
With the Pro edition, you also get Windows Sandbox. It's an isolated, temporary desktop environment where you can run untrusted applications without fearing a lasting impact on your device. Any software installed in Windows Sandbox stays within the sandbox and cannot affect your host.
Apart from these, there are other benefits, such as up to 128 CPU cores support, a maximum of 2 CPUs, up to 2TB RAM support, Kiosk Mode, Domain Join and Azure AD Join, and more.