5 Useful Raspberry Pi Projects For Your Backyard
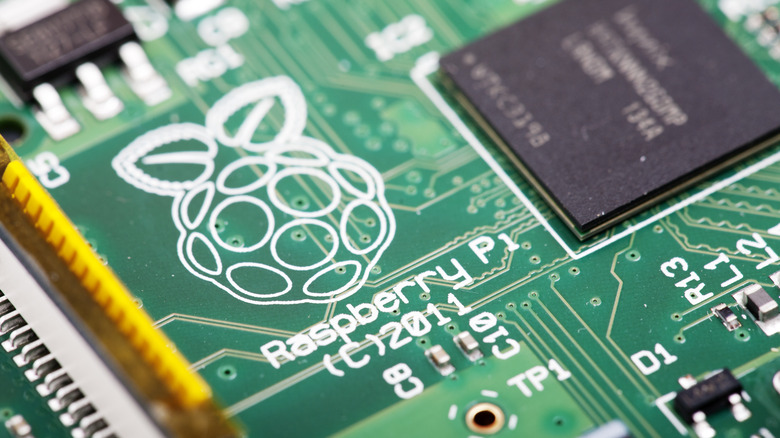
Raspberry Pi makes some incredibly versatile little computers. They have become very popular among makers and DIY enthusiasts for their small size, their affordability, their relatively impressive processing power, and their ability to run all kinds of open-source programs. These creators have found some truly unique ways to use them in simple, affordable projects. There are useful Raspberry Pi projects for your bedroom, projects for your garage, and projects for your hang-out spaces, but you might not have realized that there are some creative ways that these tiny computers can be used outdoors too.
All kinds of Raspberry Pi projects have been designed specifically for you to be able to use them in your own backyard. Some of them might automate or add functionality to fixtures that you already have set up while others might create entirely new features that you can add to your outdoor spaces. There are a lot of these projects out there, however, and it can be irritating to try and comb through them all. One of the best ways to find good Raspberry Pi projects is to take a look at the most popular options on maker and DIY forums and find ones that have been thoroughly tested. Here are some useful Raspberry Pi projects that you can add to your backyard.
Smart gardening with sensors and more
If you have a garden in your yard, then you probably spend a lot of time and energy maintaining it. What if a Raspberry Pi could help? There's no way around some of the labor, so be ready to keep pulling weeds, trimming back overgrown limbs, and harvesting. But did you know that you can use a Raspberry Pi to automate your daily watering?
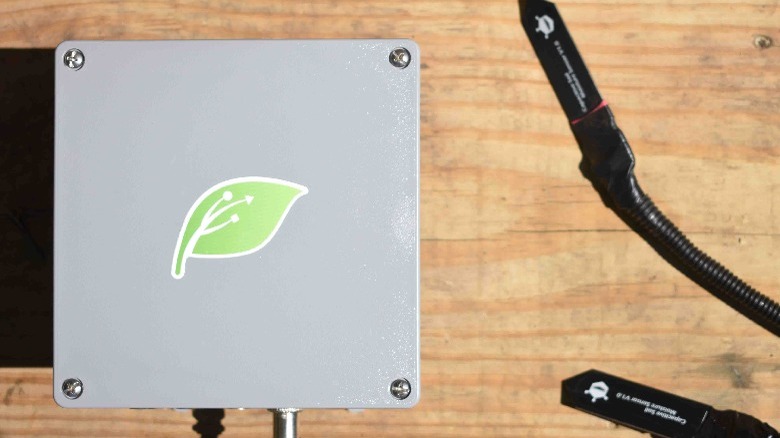
One popular open-source gardening system is called MudPi. This not only allows you to automate hydroponics via remote scheduling controls, but it also opens the door to several other gardening functionalities as well. You can use this Raspberry Pi-powered system to monitor and maintain soil moisture, weather, and light intensity through a series of different sensors. This means that you can digitally monitor the health of your garden while also saving resources by reducing wastewater and giving your plants the appropriate amount of water during the times of the day when they need it most.
This project has grown so popular that MudPi is now able to sell proprietary development boards that allow you to expand the system's capabilities to add more sensors and even things like solar power management. Setting up MudPi isn't exactly plug and play, but there are a number of guides available on the MudPi website, and the creator, Eric Davisson, has even made a video walkthrough for getting started which is available on YouTube.
Make your own security camera
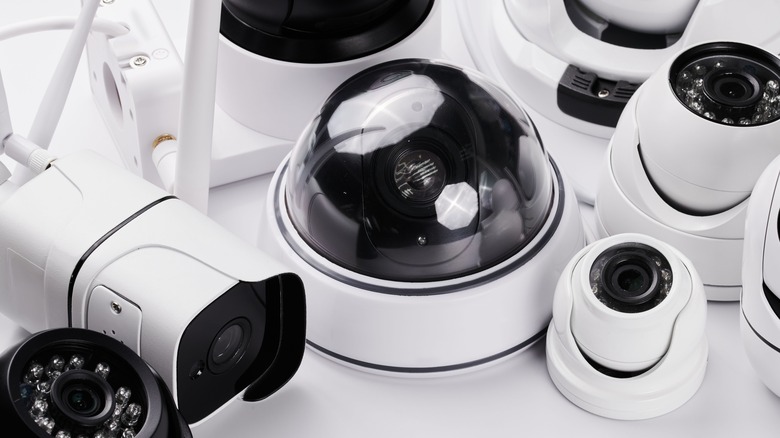
Want to keep an eye on your yard? Setting up a network hub for security cameras is another great use of a Raspberry Pi. One of the more popular methods is to build a simple Raspberry Pi-based home security camera with an additional 8 GB microSD card, a USB camera or Raspberry Pi Camera Module, and a power supply. This is an easy way to set up a camera system at your front or back door. There are outdoor cameras with night vision that can perform well but the Pi itself will either need to be wired to the camera from inside the house or it will need to be kept in a weatherproof enclosure.
The software that makes this project work is called motionEyeOS, which is free to download on GitHub. This allows you to set up a motion-triggered security camera that can take either pictures or video. These can then be viewed on a networked computer or uploaded to the cloud for safekeeping. You can actually connect multiple cameras to a single Raspberry Pi board, but this will take up a lot of the unit's processing power so you may need to invest in one of the more powerful models like the Raspberry Pi 4 instead of the Raspberry Pi 3. Alternatively, you can make multiple cameras using several cheaper Raspberry Pi boards and then network them all to a single server.
BBQ help, a click away

This next project is great for those who enjoy firing up the grill on the weekends and cooking under the open sky. There are a few different Raspberry Pi-based automated BBQ controllers out there. Tempiture and PitmasterPi are both popular options, but one of the more trusted operating systems is called HeaterMeter.
HeaterMeter allows you to monitor and control BBQ smokers and grills on the Raspberry Pi itself, or through web-based automation. HeaterMeter uses a PID algorithm to automatically control pit temperature, adjust blower speed, and monitor up to four probes at the same time. You probably don't need something like this to grill a few burgers and dogs, but it could be a real lifesaver for meals like brisket that can take hours to cook.
The DIY approach to making one of these controllers involves making a 3D-printed enclosure and attaching an LCD display, sensor inputs, power adapter, SD card, wireless USB adapter (if the Pi you have doesn't come with built-in wireless connectivity), a control output, and several other accessories. But those who don't have access to a 3D printer or who simply don't want to build their own from scratch can purchase fully assembled kits too.
Smart bird feeders
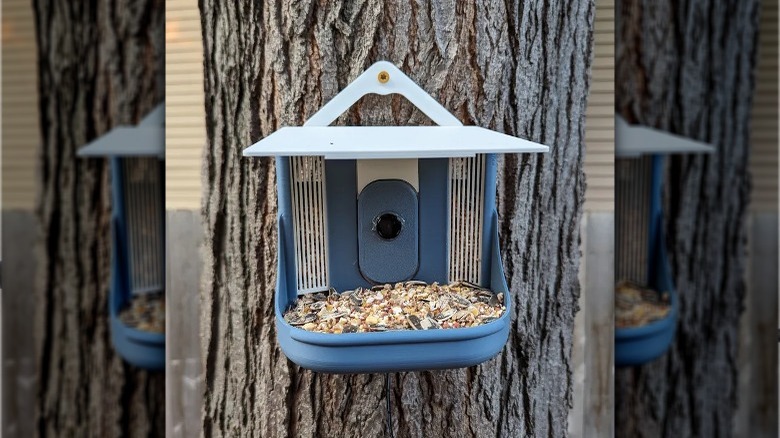
Maybe you'd prefer a project that lets you get a better look at your local wildlife. If so, then you might consider building a smart bird feeder using a Raspberry Pi. These are designed to detect when a bird comes to use a feeder and then capture a picture, so you can see each and every one of your feathered friends who stops by for a visit. There are several different versions of the smart bird feeder. Some use basic motion detection or have a pressure-sensitive sensor on the perch, while others use more advanced techniques like infrared. The MagPi, an official Raspberry Pi magazine, posted about one that detects birds using an ultrasonic range detector.
Those who wish to make a simple version of these bird trackers can do so by following the instructions for the BirdBrain Smart Bird Feeder. Files for the 3D printed components and full instructions for assembly are available on the project's Printables page. The project uses Frigate open-source video software in conjunction with MediaMTX streaming software and WhosAtMyFeeder species recognition software.
Not only do these smart feeders allow you to see all the birds who visited your feeder for a meal, but you can also opt to upload the information to ornithology institutions like The Great Backyard Bird Count, which helps conservationists track bird migrations.
Make your own weather station
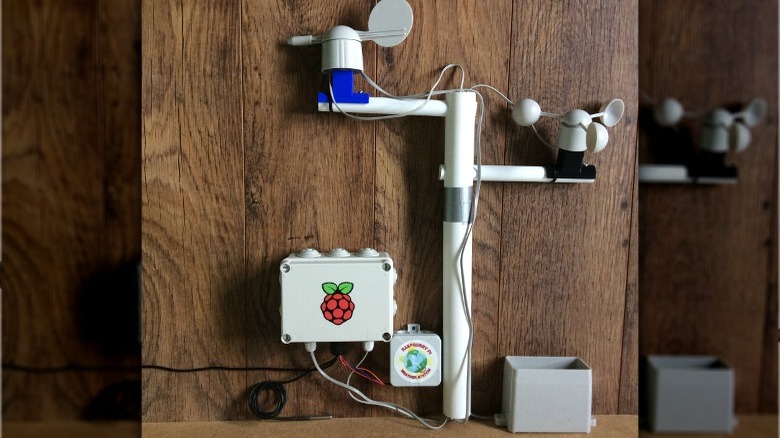
Who needs a weatherperson on the news when you can make your own weather station at home? The official Raspberry Pi Foundation website has a tutorial outlining the entire process from start to finish. Fair warning: This project has many parts and is not for the faint of heart.
To start, you will need a Raspberry Pi with WiFi; a BME280 pressure, temperature, and humidity sensor; a DS18B20 digital thermal probe; two 4.7KOhm resistors; 5mm-pitch PCB mount screw terminal blocks; a breadboard; jumper wires; an anemometer; a wind vane; a rain gauge; two RJ11 breakout boards; an MCP3008 analog-to-digital converter; and several weatherproof enclosures to keep the electrical components safe. There are other sensors available, however, for those who are familiar enough with the hardware that they can confidently make a substitution that won't impede the functionality of the device. Those who are seeking to make their weather vein a permanent fixture will also need soldering equipment, 22 AWG solid core wire, an Adafruit Perma-Proto HAT kit, a 16-pin DIL/DIP IC Socket, two 2-pin male headers, and several 3D printed components for mounting and housing.
On the software side of things, the Foundation recommends taking advantage of the Python-based Oracle Raspberry Pi Weather Station system. The Foundation page states that you don't need to fully install this software, but you'll need to clone some of the programs from its GitHub repository. Terminal commands for this operation are listed on the page.
Our Methodology
To construct this list, we read through several DIY and maker forums in search of some of the most popular outdoor Raspberry Pi projects that a person might want to set up in their backyard. We then searched for the original sources of these projects to get more information about how they worked and to ensure that the software was still available and supported on current-gen hardware. We attempted to only choose projects that were shared by reputable sources and which had received enough continuous support that we could be confident that the project had been adequately tested and the software was stable.