How To Build A Simple Raspberry Pi Home Security Camera
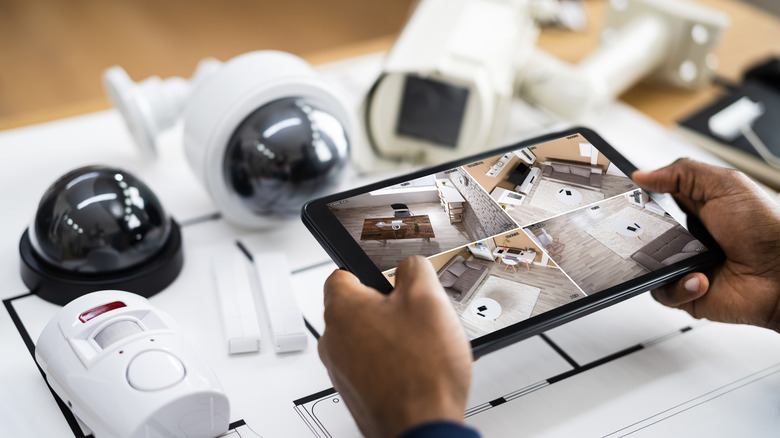
If there's one thing that homeowners should consider, it's security cameras. They're great not only for deterring would-be robbers from breaking into your home but also for checking in on your pets while you're away. And while there's a slew of options on the market nowadays, they can be expensive or invasive of your privacy (some cameras can share photos with third parties).
Fortunately, you don't have to spend a ton of money and compromise your privacy just to keep your home safe. You can simply buy a Raspberry Pi board and create your own security camera from the comfort of your home. This project is easy to set up as it only needs three things: the Raspberry Pi with a microSD card, a camera (which can be an old webcam or the official Raspberry Pi camera), and a power supply. The best part is that you won't need to code anything.
Step 1: Prepare the materials
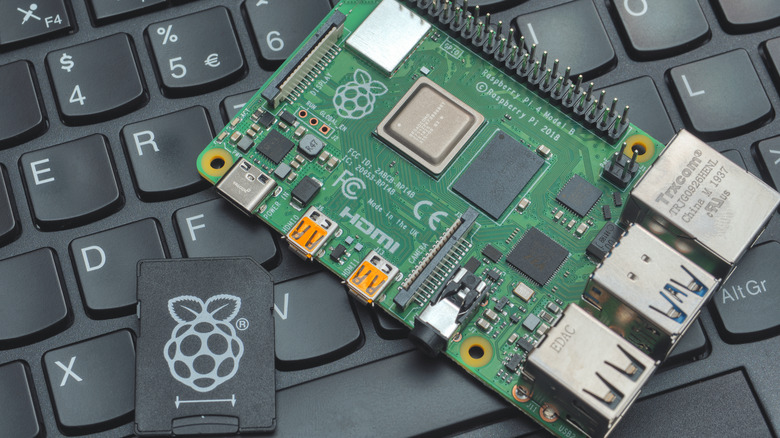
Before diving into the software part, you first have to prepare the materials for this Raspberry Pi project. You will need the following:
- Raspberry Pi board (can be any version)
- at least 8 GB microSD card
- microSD card reader for your computer
- camera (USB webcam or Raspberry Pi camera)
- power supply for the Raspberry Pi
- Windows or Mac computer
After collecting the materials, connect the camera to your board. If you have a Raspberry Pi camera, you need to install it in the ribbon slot between the ethernet and HDMI ports (via Raspberry Pi). Simply pull up both sides of the slot and insert the camera's flex cable. Make sure that the side with the printed words faces the ethernet port. Then, push back the sides of the connector to secure the flex cable.

If you have a USB webcam, you can simply insert this into any of the Raspberry Pi's USB ports.
Step 2: Install the motionEyeOS on the microSD card
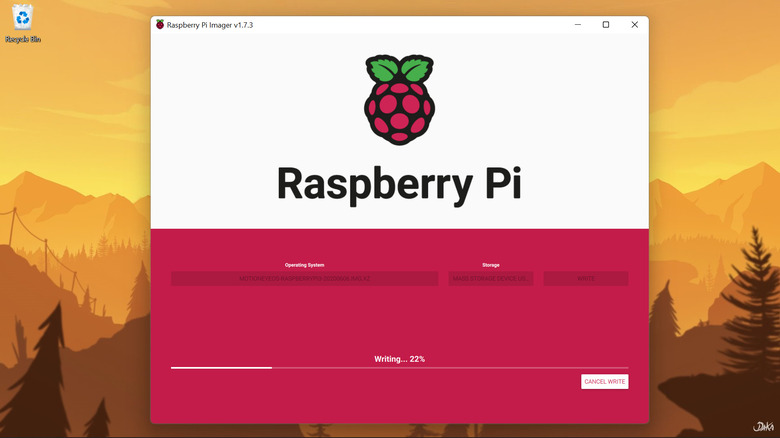
The motionEyeOS is an open-source operating system developed specifically for making a video surveillance system out of single-board computers like the Raspberry Pi (via GitHub). Instead of the normal Raspberry Pi OS, we will use the motionEyeOS for this project. Follow the steps below to install this on your microSD card:
- Download the motionEyeOS from the official GitHub page. There are four versions of the software available for Raspberry Pi, so make sure to download the version specific to your board. If you have a Raspberry Pi 3B+, download the motioneyeos-raspberrypi3-yyyymmdd.img.xz.
- Download and install the Raspberry Pi Imager. You will use this app to install the motionEyeOS on the microSD card.
- Insert the microSD card into your computer.
- Launch the Raspberry Pi Imager.
- Click on "Choose OS."
- Scroll down to the bottom, and select "Use custom."
- Locate the motionEyeOS file you downloaded earlier and select it.
- Click on "Choose Storage."
- Select your microSD card from the pop-up.
- Click on Write.
- In the warning pop-up, select Yes to confirm that you want to erase all existing data on your microSD card.
- Wait for the flashing process to complete.
Step 3: Connect the Raspberry Pi to your Wi-Fi
Once the flashing process finishes, you need to connect your Raspberry Pi to the Wi-Fi network. Insert the microSD card into the computer again, and do the steps below:
1. Download and install Atom. This will be used to create a special file that will automatically connect your Raspberry Pi to the Wi-Fi network.
2. Open Atom.
3. Click on File and select New File.
4. Type the following lines on the new file.
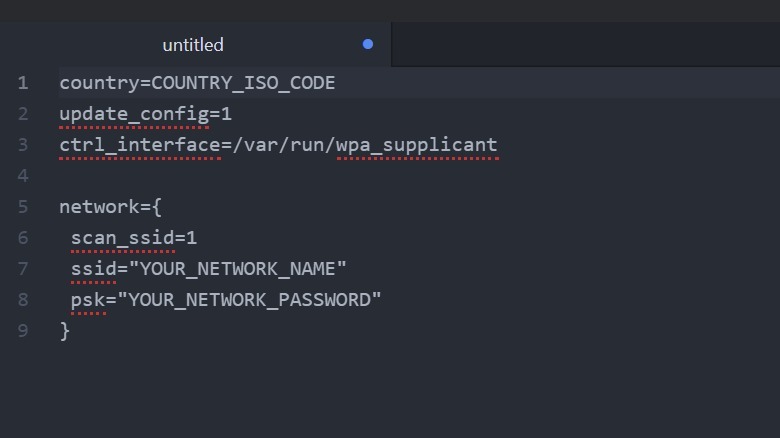 Marinel Sigue/SlashGear
5. Replace "COUNTRY_ISO_CODE" with your country's two-letter ISO code (e.g., us for the United States, ca for Canada).
6. Replace "YOUR_NETWORK_NAME" and "YOUR_NETWORK_PASSWORD" with your network's SSID and password.
7. Save the file to your microSD card as "wpa_supplicant.conf" (without quotes).
8. Eject the microSD card from your computer and insert it into your board.
9. Power up the Raspberry Pi.
10. While the board initializes, download and install Angry IP on your computer. You will use this to know what the Raspberry Pi's IP address is.
11. Open Angry IP.
12. Click on Start.
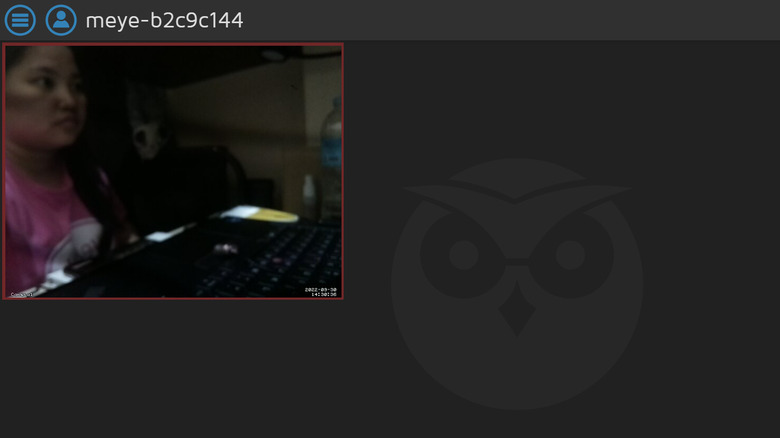
13. Find the IP address with a hostname starting with MEYE.
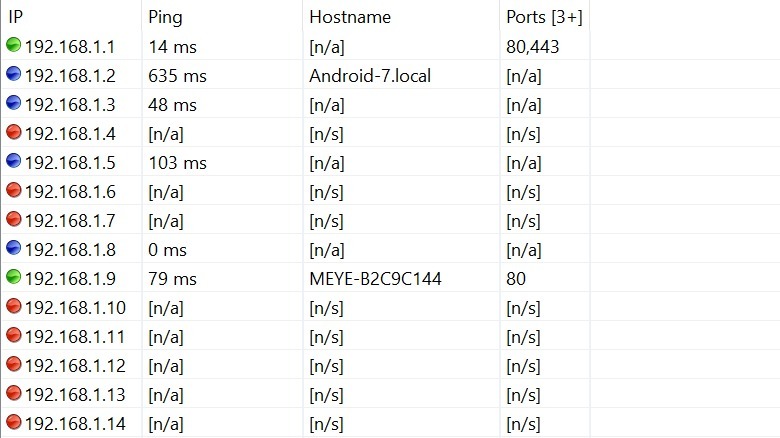 Marinel Sigue/SlashGear
14. Launch your computer browser.
15. Type the board's IP address and hit Enter. It should automatically display the stream from your camera.
If you don't see a video stream, check if the camera is properly connected. If you have the Raspberry Pi camera, it should be firmly seated on the ribbon slot.
Step 4: Change motionEyeOS settings
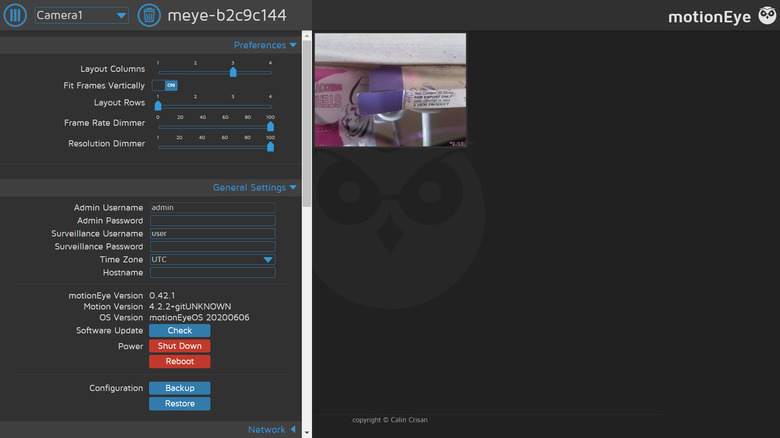
Assuming that the motionEyeOS works as expected, it's time to configure the system to fit your needs (via GitHub).
- Click on the profile icon in the top-left corner of the page.
- Type "admin" (without quotes) in the Username field. Leave the Password field blank.
- Click Login. This will return you to the camera stream.
- Click the hamburger icon next to the profile icon to access the settings.
- Under General Settings, click on the drop-down menu next to "Time Zone" and pick your time zone from the options. This step is important to ensure that the time stamped on every photo and video is accurate.
- Under Video Device, enter your Camera Name. Here, you can also adjust your Video Resolution and Video Rotation.
- Under Still Images, set "Capture Mode" to "Motion Triggered" and "Preserve Pictures" to how long you want your images to be preserved on your microSD card. If you only have 8GB or less, set it to a shorter period like one week.
- Under Movies, set "Recording Mode" to "Motion Triggered" and "Preserve Movies" to your preferred length of time.
- Under Motion Detection, adjust the "Frame Change Threshold" according to your preferences. The lower this setting is, the more sensitive to motion your camera will be.
- Click Apply to save these changes.
- Select Yes to reboot the system.
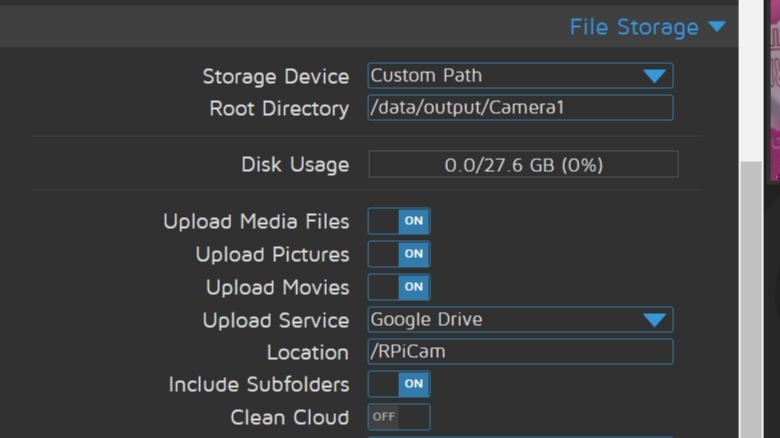
(Optional) Configure motionEyeOS to automatically upload to Google Drive
If you'd like to upload your photos and videos to the cloud for safekeeping and easy access, you can configure the motionEyeOS to do so. Here's how you can enable automatic upload to Google Drive (via GitHub):
1. Open the settings by clicking on the hamburger icon in the top-left corner.
2. Scroll down to File Storage.
3. Turn on Upload Media Files.
4. Under Upload Service, select Google Drive.
5. In the Location text field, type "/" (without quotes) followed by the Google Drive folder you want to use. Make sure this folder already exists in your Google Drive.
 Marinel Sigue/SlashGear
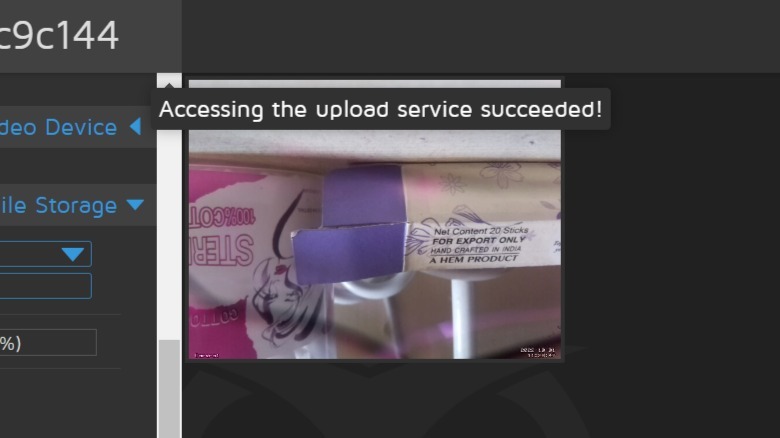
6. Click on Obtain Key.
7. Sign in to the Google account you'd like to use.
8. Select Allow to let motionEye access your Google account.
9. Copy the authorization code given and paste it in the motionEyeOS Authorization Key field.
10. Click on the Apply button at the top of the settings panel.
11. Click the Test Service button to test if the setup was successful. You should see a notification at the top saying "Accessing the upload service succeeded!"
 Marinel Sigue/SlashGear
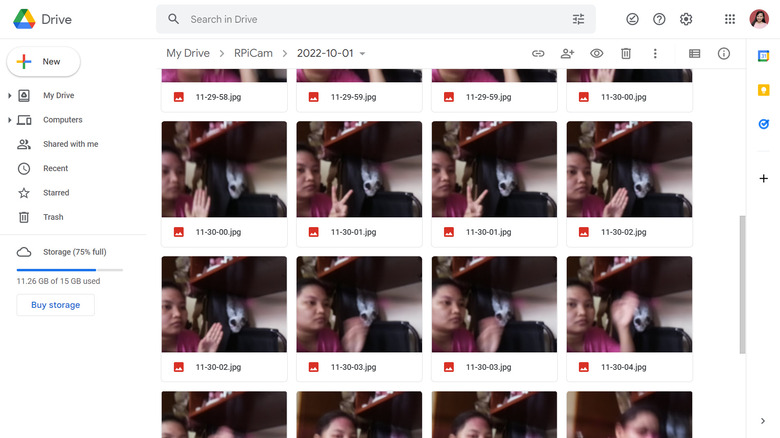
12. Try waving in front of the camera. You should see the photos in your Google Drive folder almost immediately.