6 Raspberry Pi Projects That Won't Break The Bank
We may receive a commission on purchases made from links.
Raspberry Pi is the master of versatility. Whatever you're aiming to do, you'll more than likely find a Raspberry Pi project out there for it. Dreaming of upgrading to a smart home? There's a Pi project that can automate your house. How about a spooky Halloween setup to awe your guests? Yep, there's a Raspberry Pi-powered decoration you can DIY too. Indeed, the Pi's wide array of applications is astounding — pretty much the only limitation is your imagination (and of course, the Pi's computing power).
Browsing through the thousands of Pi projects online, you'll probably notice that several come with a laundry list of components, some of which have hefty price tags. If you're just dipping your toes into the realm of Raspberry Pi and don't want to invest heaps of cash on a trial run, fear not. There's a host of budget-friendly Raspberry Pi projects at your disposal, perfect not only for electronic beginners but also those who want to test out their newly learned programming skills. Here are six of the best ones to get you started.
Wall-Mounted Google Calendar
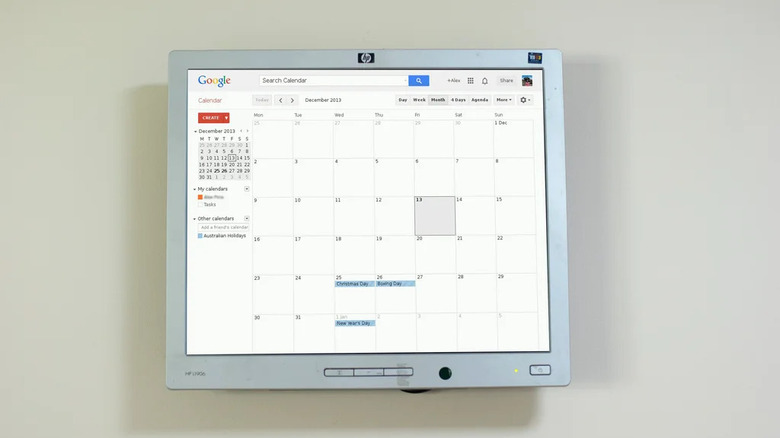
Paper calendars are a thing of the past. In this digital age, platforms like Google Calendar are now your go-to. If you're one of the millions of people who rely on Google Calendar and want to have it displayed on your living room or kitchen wall, you'd be intrigued by this Raspberry Pi-powered wall-mounted Google Calendar. Yes, it's exactly what it sounds like — a dedicated display for your favorite digital calendar that you can place right on your wall. It uses a browser called Iceweasel, which is configured to launch automatically upon bootup and display the Google Calendar site as the start page.
The wall-mounted Google Calendar project leans primarily on working with the command line rather than complex coding, making it the ideal Raspberry Pi project to take up if you're a beginner. The best part is that it can be done for cheap. It only requires a basic Raspberry Pi desktop computer setup with the Pi board, its power adaptor and SD card, any old HDMI monitor with HDMI cable and wall bracket, any USB keyboard and mouse, and if you're using an older Pi model without built-in Wi-Fi, a USB Wi-Fi adapter. Chances are, you already have most, if not all, of these components lying around, so you can get started with the project right away.
Pi Camera Doorbell
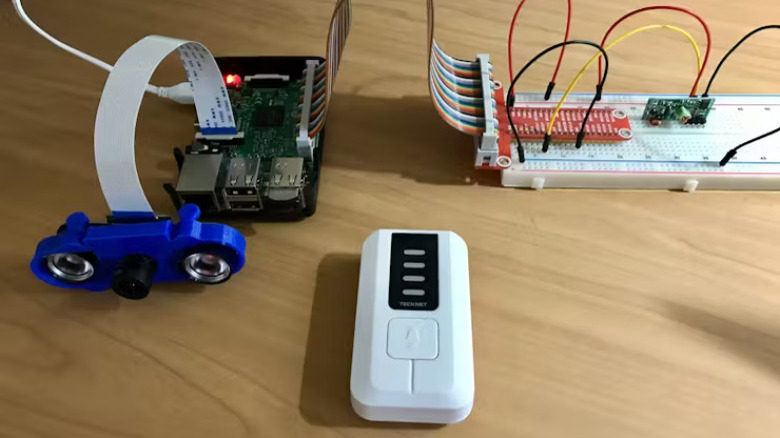
Doorbells with cameras have become quite the rage, not only for security purposes but also for convenience (let's be honest, who wants to get up from their couch just to see who's at the door?). But the sticker shock of smart doorbells — some costing upwards of $100 — can be a buzzkill. If you're up for a bit of DIY and already have a Raspberry Pi and camera (either the official module or some old webcam is fine), you can build your own camera doorbell system for as cheap as $20. You just need to add a wireless RF doorbell and a 433Mhz RF transmitter and receiver kit to your setup.
How the Pi Camera Doorbell project works is pretty straightforward: once the doorbell is pressed, it sends a signal to the RF receiver connected to your Pi board. This action prompts the Pi to activate the camera, snap a photo of the visitor, and then send the image to you via Telegram. If you want to tweak the project further, you have the option to set up an Apache web server for browser access to the images or sync the project up with Home Assistant to mesh seamlessly with your other smart home devices. You need some Python know-how and familiarity with MQTT for this project.
Security System with Motion Detection via Camera
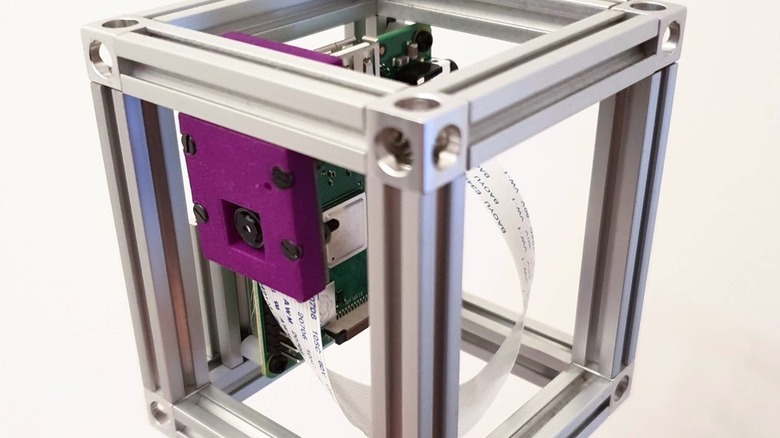
There's a lot you can do with just a Raspberry Pi and a camera, but one of the most practical use cases is a smart security system. However, if you don't want your project to just be another basic surveillance camera, then this Security System with Motion Detection via Camera is worth trying out. Its primary goal is to alert you of the presence of unusual motion while you're out of the house. Using OpenCV, the camera detects the motion, analyzes whether it's something out of the ordinary (a.ka. surpasses a set threshold), and if it is, snaps a photo and sends the image to you via Telegram.
To avoid a barrage of alerts when you're home and moving about, the system automatically disarms itself. It utilizes a USB Wi-Fi adapter with monitor mode (which you can find on Amazon for less than US$20) to recognize the MAC addresses of your mobile phones. If it doesn't detect these addresses for more than ten minutes, it switches to motion detection mode. Once a recognized MAC address is back, it disarms. No manual toggling needed. For an extra layer of convenience, you can control this security system remotely through Telegram. A simple bot command lets you turn the system on or off, check its status, or even command it to take a photo or GIF.
Grandpa Scarer
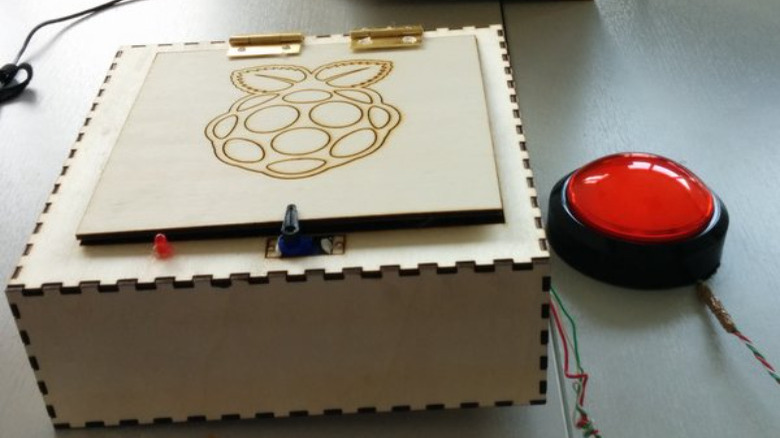
Looking to practice your Python skills but prefer building something simple and easy? Check out this Grandpa Scarer project. This quirky project is purposely designed to hang out on your ceiling, waiting for the perfect prey. Then, at the press of a button, a toy spider drops down from its box as a random spooky sound from your pre-made list plays in the background. It's a classic scare prank, perfect for your unsuspecting grandpa or roommate. For this little project, you just need a few electronic components aside from your fully functional Pi:
- A dome push button (or any other push button, really, but the dome type looks cooler) to trigger the whole shebang.
- A micro servo motor that serves as the lock for the box's lid. When the button is pressed, the servo moves out of the way, the box opens, and down comes the spider, dangling on a string.
- A speaker to bring those creepy sounds to life. The project comes with four random sounds, but you can readily add your own.
- An LED and a 330-ohm resistor to indicate the project activation.
- A box to house all the components. You can go fancy with laser-cut plywood or keep it simple with sturdy cardboard.
All these, except for the Pi which we assume you have on hand, would roughly cost you about $40 or less, especially if you've already got the electronic components from some Raspberry Pi starter kits.
Automated Plant Watering with a Website
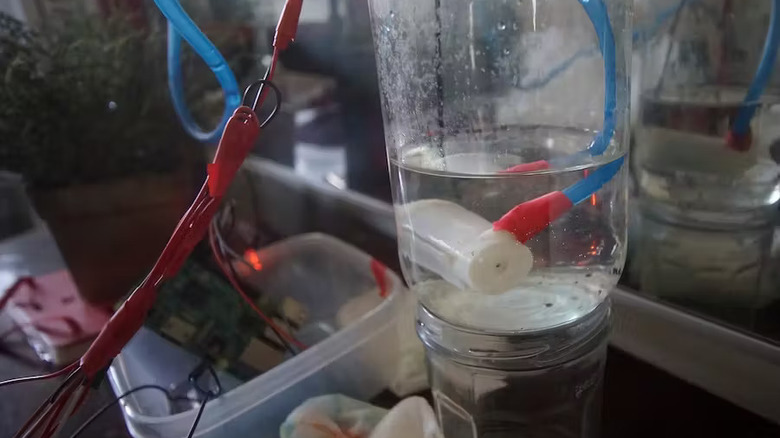
Fed up with your indoor plants dying on you but aren't keen on spending on a fancy automatic watering device? There's actually a budget-friendly way to keep your plants thriving without your constant attention, thanks to the handy-dandy Raspberry Pi. This Automated Plant Watering System takes the task of watering your green friends off your hands by doing it automatically. It makes use of a capacitive soil moisture sensor that's plunged into your plant's soil and constantly checks if it's time for a drink. Once it detects that the soil is dry, the system kicks a submersible pump into gear, drawing water from a container straight to your potted plant.
This DIY project also comes complete with a Flask web server, where you can control the system remotely from a web browser. It offers some nifty control buttons that let you toggle the auto-watering on or off, check the soil status, manually water the plant once, and display the last time the plant was watered. Aside from the Raspberry Pi, each of the components you need for this project only costs $10 or less, amounting to roughly $30.
Two-Player Arcade Coffee Table
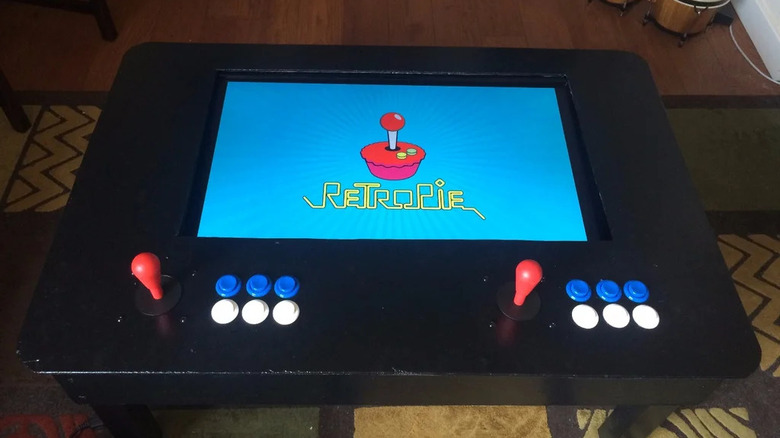
Modern gaming consoles are fun and all, but nothing beats playing a classic game on an arcade machine. Unfortunately, arcade machines can cost a pretty penny, some even as much as US$500. The good news is that with your Raspberry Pi, you won't need to shell out hundreds of bucks just to experience the nostalgia and charm of old-school games. This Two-Player Arcade Coffee Table, explained by a user solargarlic on Instructables, brings the arcade right into your living room for way less (as low as $50). All it requires is a Pi board, monitor, and speakers (which you likely have at home), some pieces of wood (hello, upcycling old furniture), and an arcade DIY kit with a USB encoder (snag one for less than $50 on Amazon!).
The Pi-based arcade coffee table is powered by the RetroPie software that enables you to play a vast variety of games, including those from Playstation, Nintendo (NES), Super Nintendo (SNES), and SEGA (though you'd need to source the games yourself). The project is also designed with two players in mind, so you and your family member or guest can simultaneously enjoy. What's great about this DIY project is that you won't need to be a coding wizard as all you need to do is download and install a pre-made RetroPie image to your board and then load it up with your favorite games (here's a tutorial on how to do that). The real challenge might be building the coffee table and mounting the electronics inside (prepare your woodworking skills).