This Raspberry Pi Project Can Turn Your House Into An Automated Smart Home
We may receive a commission on purchases made from links.
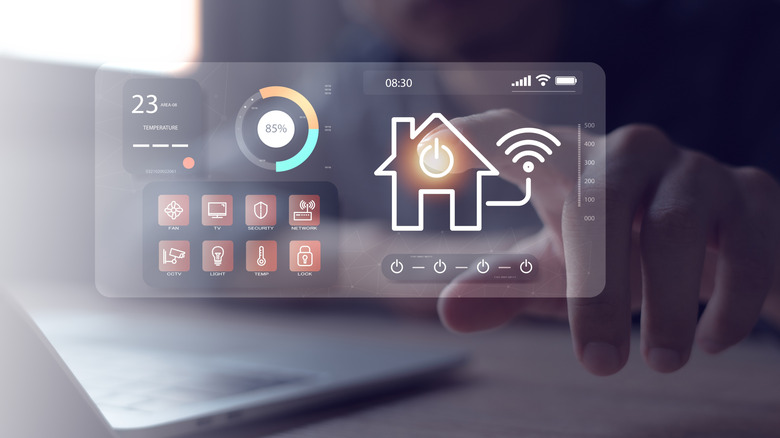
Turning your home into a smart home is extremely popular – so popular, in fact, that it has become a $28 billion industry in America as of 2024, according to Fortune Business Insights. Some people hire a company to install and service a whole system. Others opt for plug-and-play pieces that can be integrated with a smart home app. A next-level solution is to build your own smart house system. If you do it yourself, you can customize the system to your needs instead of the other way around. It's also more secure, as your data stays with you. It can also be significantly less expensive. If you want to monitor doors and windows, know when your dog is barking, or what's happening outside the house, this is one solution.
Projects such as Uber Home Automation W/ Arduino & Pi make all this possible. Building your own smart house system is not a plug-and-play solution, though, and just as you are your own installer, you are also your own service person and code debugger. Some of the hardware is not going to be in pretty boxes. But you will have control over the whole process.
Hardware for the project
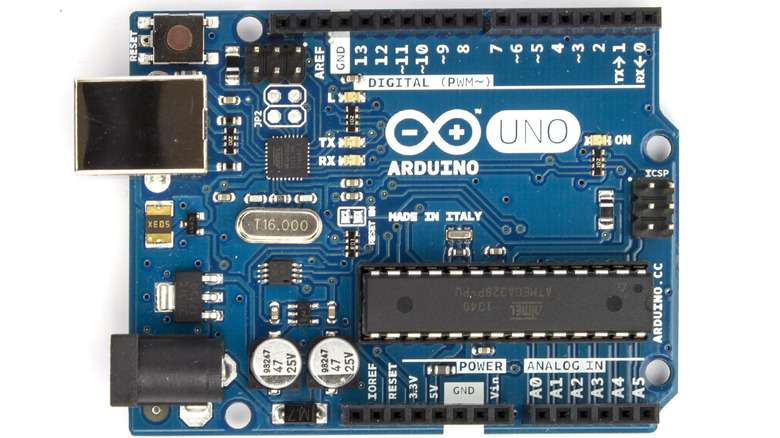
A DIY smart home project, such as the Uber Home Automation W/ Arduino & Pi, uses sensors for everything from detecting noise, detecting light, whether windows or doors are closed or open, or how humid and warm it is. These sensors are connected to a microcontroller board such as the Arduino Uno. Getting started with Arduino Uno isn't complicated. Since the Uno has 14 digital I/O and six analog connections, one Uno board can handle the sensor connections for a whole smart home. When it comes to sensors and the Uno, some soldering might be required.
The Arduino Uno is, in turn, connected to a computer such as a Raspberry Pi. The Uno can be connected to a device running Windows or macOS, but the Raspberry Pi makes for a low-cost data-crunching computer. The machine is designed to run on Linux distributions, and scripts for its operation can be easily found on the internet.
Software for the project
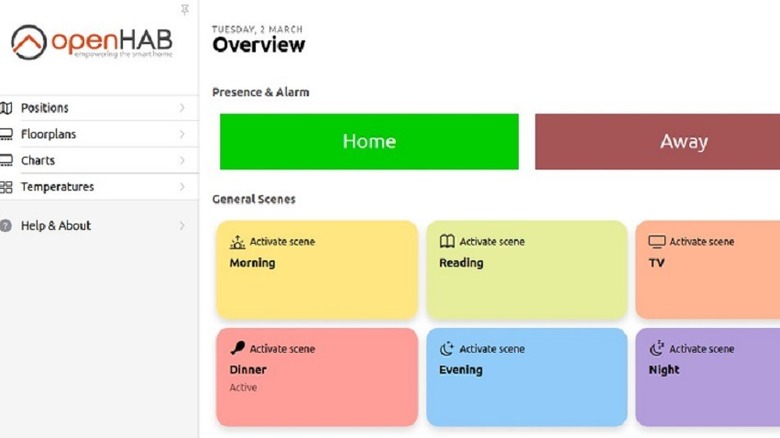
The Uber Home Automation W/ Arduino & Pi project runs on the openHAB platform. This is an open-source platform that can be considered similar to a smart home hub, except that it is software-only and relies on connecting to your phone or other device through the Arduino board. OpenHAB is highly flexible and configurable, allowing users to add new sensors as needed to suit their specific requirements. The openHAB team points out that while the platform is very user-friendly, the setup and configuration require someone with some familiarity with programming. As with the hardware, it's not a plug-and-play approach to building a smart home.
Another thing to remember about openHAB is that it doesn't directly run each sensor, so the setup for the sensors is done independently of openHAB. This means that if you want to replace thermometers or upgrade motion detectors, you get all relevant sensors up and running or shut down, and then add or remove them as needed. It makes troubleshooting and upgrading very flexible.