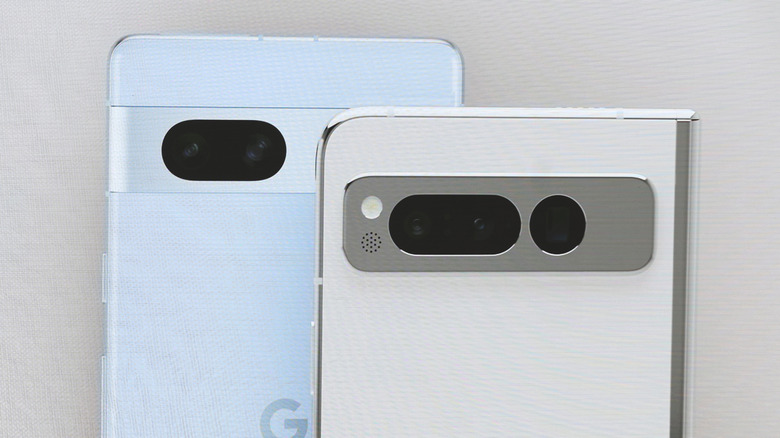
10 Tips And Tricks To Master Your Android Camera In 2024
Anyone who owns a smartphone can now be a budding photographer. With advances in technology and the introduction of new tools, the built-in cameras on phones are capable of producing high-quality photographs that are a good alternative to the images you'd likely get from a professional photographer. The fact that you probably have your smartphone with you wherever you go also makes them far more convenient for capturing spontaneous moments.
But just because your smartphone has a great camera, it doesn't mean you can go out and immediately take amazing photographs. While you don't need a degree in photography to get good results, knowing some basic tips and tricks can really help. Some camera features every Android user should know about will take your photography to new levels, and some settings will make editing your photos after the fact a lot easier.
If you find your images aren't up to scratch, and you want to learn how to get the best from your Android camera, here are some ways to improve. Soon you'll be ready to show off your work on social media and the likes will come rolling in.
Turn on the grid to use the rule of thirds
One of the easiest and quickest ways to improve your photographs is to follow the rule of thirds. This photography technique guides how you frame your images to get the best composition. It isn't a rule that always has to be followed, but it's a good guideline, and it can make a big difference. The principle essentially suggests the photographer split the frame into thirds, both horizontally and vertically.
You can do this by imagining two sets of parallel lines that are an equal distance from each other and the edge of the frame. This will split the shot into nine equally sized rectangles, and guide you when taking a photograph. Positioning the subjects you want to focus on at the intersection points of these lines — the corners of the central square — produces naturally appealing photographs. You can also use the straight lines to know where to angle the lens to position things like the horizon or tall buildings.
Thankfully, you don't have to rely on your imagination for these lines. Almost every smartphone has an option to turn on grid lines. This will add the lines and intersections onto your screen so you can frame a picture perfectly. Users simply have to go to their settings in the camera app and turn on the grid lines. There may even be additional options, like grid lines for the slightly different golden ratio.
Make sure HDR is turned on
High dynamic range (HDR) is a feature associated with brighter and more detailed displays on devices such as televisions and smartphones. Devices that support HDR can add extra metadata to images so that when they are displayed, a screen can correctly calculate how bright each color should be. The general idea is that this will ultimately produce a picture with sharper details and brighter colors, closer to what the human eye can see.
In practical terms, this means photographs taken in extreme lighting conditions — like very bright sunlight or dark environments like a nightclub — will retain details that would otherwise be lost with a standard dynamic range. You'll probably notice more contrast between lighter and darker colors, which makes your images pop more. Of course, not every smartphone can display HDR images. You'll need a display with a brightness rating of 1000 nits, something most modern flagship devices have.
Switching HDR on is a fairly easy process on Android. Users need to open their camera app and then tap the HDR button on the screen or go to settings and turn on HDR Enhance or Auto HDR on certain devices. Samsung HDR10+ is an upgraded version of HDR, like Dolby Vision, available only on select smartphones. To take videos using HDR10+, users simply have to turn on the setting in the camera app's advanced video options menu. This will give you a wider range of colors and more detailed shots.
Launch your camera app from the lock screen

We have probably all had an experience when we wanted to quickly snap a photograph of something, but by the time we got our phone out, fumbled to unlock the screen, and selected the camera app, the moment had passed. Whether your pet is doing something adorable or your friend is stuck in an unfortunate but hilarious situation, being able to quickly get into the camera app to take a photo is essential.
Fortunately for Android users, there is a way to get straight into the camera app without any fuss. The process involves something called gestures, and you can edit them from your phone's settings by navigating to System > Gestures. From here, you can set up several actions to let you speedily access your camera at a moment's notice. The most obvious option is to enable camera quick launch, which involves tapping the power button on your phone twice. This will open the camera app regardless of whether your phone is locked or if you have another app open. You can also set up other shortcuts as well, such as double-tapping the back of compatible smartphones or creating a widget for your lock screen.
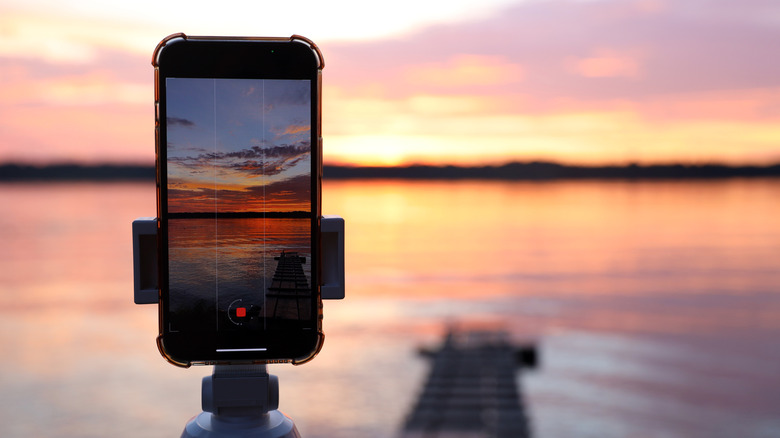
Get a tripod so can keep the photo still
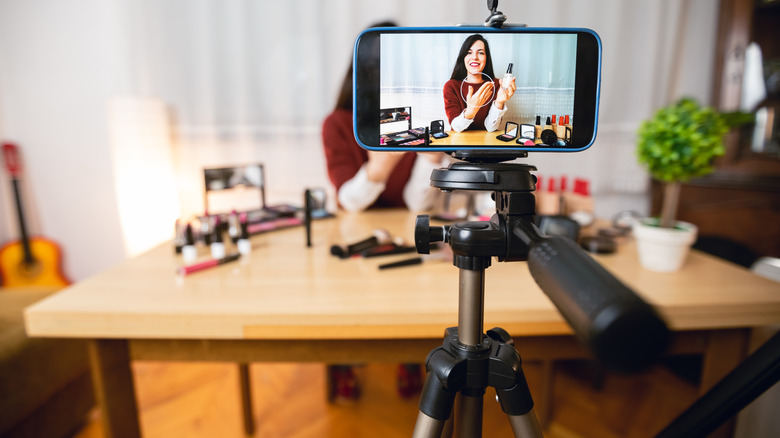
Although smartphones are designed to be portable devices you can take anywhere, that doesn't necessarily mean you can't use a different approach when it comes to taking photographs. Many Android smartphones feature machine learning and AI to help users capture images without any blurring, but using a tripod can help you achieve even better results.
Despite adding some extra bulk to a smartphone and being another thing to carry around, a good tripod can be well worth the investment. After all, it doesn't matter how steady your hand is, it is impossible to keep a smartphone completely still when holding it aloft. Even the slightest movements can affect the quality of an image and stop it from being as clear and sharp as you might want. These tools can be especially useful in situations where you want to take a time-lapse video or engage in some astrophotography, as they will ensure that your phone is kept perfectly still during the entire process
The best Android tripods will safely hold your phone still and make it easy to maintain the best angle for your shots. Many also feature Bluetooth connectivity, providing the ability to use a remote control to activate the shutter rather than having to press it directly on the phone.
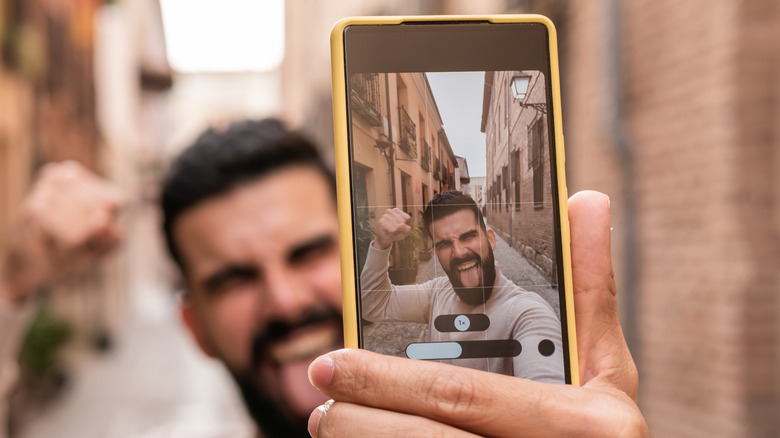
Take selfies and group photos with your palm
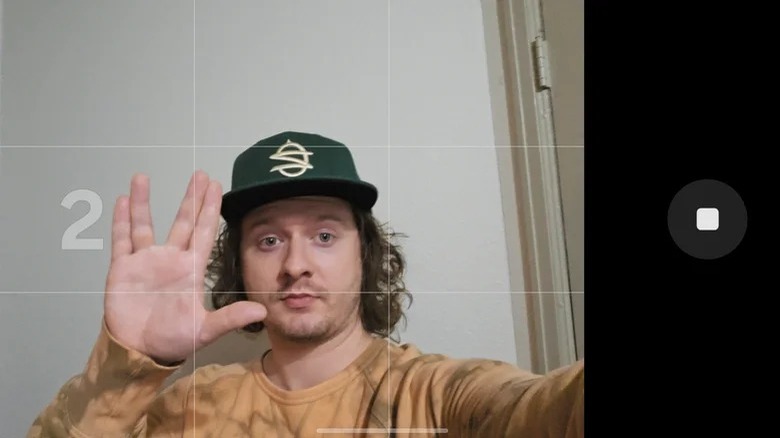
Have you ever tried to take a group photo using the timer function, only to discover people still aren't ready by the time it counts down to zero? Or perhaps you've been in a situation where you want to be in a picture with a famous landmark, but there's no one around to hold your phone and take the photo. In either case, a neat little feature on Android phones can solve this issue.
Many Android phones come equipped with a way to remotely take photos. Known as palm detection, it works by having someone in the frame of the camera holding up their empty hand toward the lens. This then activates a short three-second timer before the phone snaps a picture. It gives you direct control over when the image is captured and comes in very handy for group photos and selfies.
Activating palm detection is a straightforward process. You just need to head to the camera settings and find the option for turning it on. Unfortunately, this only works with front-facing or selfie cameras, so the quality won't be the best.
Switch to night mode for great pictures in the dark
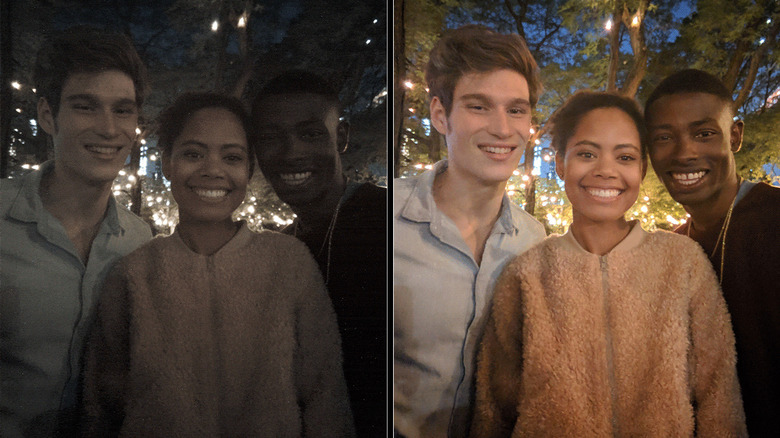
Smartphone cameras have improved a lot in recent years, but they still lag behind many dedicated cameras when it comes to shooting in the dark. With a standard camera mode, pictures in dark environments or at night can be tricky. Images will often lack detail and colors will blend together to create flat, uninspired results with lots of digital noise.
To get around this problem you can use a night mode. By switching the camera to this setting, users will see a noticeable improvement in their photographs. The mode works by essentially capturing as much as possible, taking several photos at the same time with various exposure levels. It then takes elements out of each of the images and stitches them together to create a vibrant picture with far more detail. The only downside is that it can take a bit longer to take a photo when Night Sight or Night Mode is turned on.
As an added benefit, some night modes also offer the ability to take dramatic photos of the night sky and the stars. Google's Astrophotography Mode and Samsung's Astrophoto Mode take a long exposure of the sky. During this process, which can take several minutes and requires the device to be held completely still, the phone will capture many images and blend them together for a more accurate representation of what the sky looks like.
Experiment with time lapse and slow motion
Most modern smartphones come with a variety of modes that can be useful for mixing up how you record videos. A prominent and useful example of this is the slow motion setting on the default Android camera app. This allows you to capture footage at a higher frame rate and play it back at a reduced speed. The default setting is usually to slow down time by four times, although there will likely be other options as well — some Android phones can record slow-motion videos at eight or 16 times slower than real-life footage. Holding the phone steady and ensuring you have a good light source will produce the best slow motion, so you can see things that would be impossible in real time.
Google also offers time-lapse videos, which work in almost the opposite way to slow motion recordings. It is best used for capturing events or moments that take place over a long time, such as a sunset or a long walk through a location, as the playback will be at speeds of anywhere between five and 20 times as fast. That means a video that would normally last 10 minutes will run for anywhere between two minutes and five seconds, depending on your settings.
Use portrait mode to focus on the subject
Portrait mode takes a slightly zoomed-in picture that focuses the attention on the subjects and blurs the background. This creates a visual illusion that draws all of the viewer's attention to the person or item you are photographing. When used correctly, portrait mode can create some impressive images with very dramatic looks, thanks to the depth-of-field effect sharpening the focus on the subject.
Everything from the Pixel 8 Pro to the iPhone 15 Pro has a built-in portrait mode, so you can rest assured you'll be able to take portrait pictures with your smartphone camera. To activate it, there is usually a menu at the bottom of the camera app that users can scroll through to get to the portrait mode option and then the device will work its magic when you take the photograph and provide you with a portrait immediately.
To get the best photographs using portrait mode, you'll want to make sure that you have a good light source and that you can clearly see the subject you want to photograph without too many other items or people nearby. This will allow the phone to produce the most consistent results.
Edit photos with Google's extensive tools
Android users can get access to a wide range of editing tools that Google has specifically developed for its own ecosystem. Although many of Google's features were initially exclusive to the Pixel range, they have since been made available on other Android devices, and users simply have to download the Pixel camera and Google Photos app to access them.
These editing tools are fairly extensive and you should be able to get good results without having to rely on specialist editing software. To get started, users will need to open an image through Google Photos and then click the edit button at the bottom of the screen. This will present a wide array of options, including everything from adding filters to adjusting the contrast and saturation levels. Google Photos will also automatically suggest edits it thinks will work and these can be applied with a single button press.
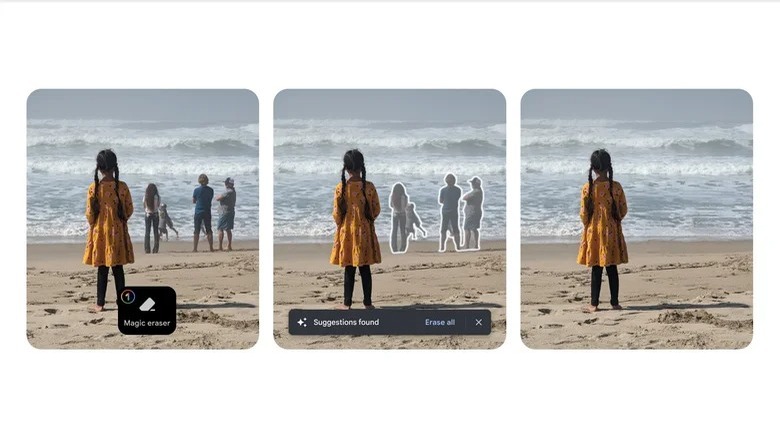
If you are a Google One subscriber, you can use Magic Eraser with your Android phone camera. This handy feature can be a real lifesaver if you notice there's someone or something in your photograph you don't want. Once you select the tool, it is possible to draw around or click on a subject and have it removed. Google's AI and machine learning system will replace it with what it thinks would have otherwise been there.
Enable RAW photos so you can touch them up later
The RAW image format is probably something most people associate with the best DSLR cameras rather than smartphones. However, it is becoming more and more common for recent Android devices to be able to take photographs and save them as RAW files. That's useful for any budding photographer as it means they can have far more control over how they edit images compared to more widely used formats, such as JPEG.
RAW may not be as convenient for most people. It has no compression, so file sizes are typically many times larger than other types, and it is not as universally recognized. You'll generally struggle to upload RAW files to most sites or social media platforms. It also generally has to be converted into another format, like Adobe's DNG, for editing. But it does come with a lot of advantages.
RAW files don't have any compression, so it's possible to change almost every value of the image and save it without any issues or a loss in file quality. That makes it possible to make significant and often dramatic changes to an image by altering the white balance, exposure, or saturation. You can enable RAW image saving in the advanced options on most Android phones, including Samsung devices, and often have the option of saving a photograph in RAW and JPEG formats at the same time.