5 Things You Probably Didn't Realize You Could Do In Adobe Photoshop
If you're not new to Adobe Photoshop, you're likely familiar with some of the most common tools that the software has to offer. This includes the healing brush tool, the eye dropper, and the liquify tools, the latter of which is used for manipulating your image's pixels. With the treasure trove of Photoshop goodies, it makes sense that — for both novice and expert users — there are probably still a handful of tips and tricks that fly under the radar that could be useful.
After all, the image editing tool is constantly evolving with so many updates that it's often hard to keep track of any changes made between different versions of Photoshop. This makes it easy to miss some of the new features that are more conspicuous as well as the older features that received fresh updates that you might have overlooked. These features in particular may not be the most well known, but they can be helpful in a pinch.
Identify any font in an image

As a designer, chances are you may have come across a particular font in an image and wondered what it was. Photoshop's Match Font function — which is to text fonts what Shazam is to music — analyzes the text in an image and deduces the font that is being used. That way, you don't have to manually sift through different typefaces trying to find the right match on your own, since Photoshop will do it for you.
Here's a useful guide on how the function works:
-
Use the marquee tool on the image to select the font you want to identify.
-
From the drop-down menu, go to Type -> Match Font.
-
This will prompt a dialog box to appear.
-
Choose from with the box's list of suggested fonts stored on your computer
-
At the bottom of the dialog box, activate Adobe Typekit to access more matching fonts.
The last step allows you to tap into Adobe's existing font library, which contains thousands of typefaces, increasing the likelihood of finding an exact match (or at least a close resemblance) of the font that you're trying to identify.
Automate repetitive tasks
Whether it's applying similar effects or batch-processing images, many Photoshop users find themselves inundated with repetitive tasks. During these days of automation, however, it's no surprise that Adobe has an answer to this. Adobe Photoshop Actions allows you to create customized shortcuts for complex, time-consuming tasks.
For instance, if you find yourself facing the repeated sequence of cropping an image to a specific size, adding a filter, and then altering the contrast, you can condense these steps into a shortcut so that you don't need to navigate through the motions each time. Now in terms of how this works, here are a few quick steps:
-
Select Actions from the Windows menu to open up the Actions Panel.
-
Think about the task that you want to create a shortcut for, and identify the simplest set of commands.
-
Choose the Create New Action (+) button from the panel on the right side, and select a function key to create a hotkey for your new shortcut.
-
Record the task.
-
Save it to your Actions panel under the hotkey.
Once the shortcut is created in Photoshop, you'll be able to perform that task simply by selecting it from the Actions panel, rather than having to go through the series of steps.
Create symmetrical patterns
Adobe added a paint symmetry tool to Photoshop back in 2018 to reflect (pun intended) current trends, but the feature still sometimes falls through the cracks. The added function allows you to create mirrored, symmetrical patterns using the paint brush, pencil, and eraser tools.
To guide you through using the tool, here are a few quick steps:
-
Select the paint brush, pencil, or eraser tool.
-
Click on the butterfly icon at the top of the screen to access the Paint Symmetry tool.
-
Choose a symmetry plane between Radial and Mandala symmetries.
-
Adjust the symmetry path that now displays over your document.
-
Hit enter to confirm.
Now you can paint symmetrically on the document using the path as a guide. Alternatively, you can change the symmetry path at any time by re-tapping the butterfly icon. From there, matching both sides of symmetry together should be much more convenient and easier to do for designers.
Easily incorporate an oil paint filter
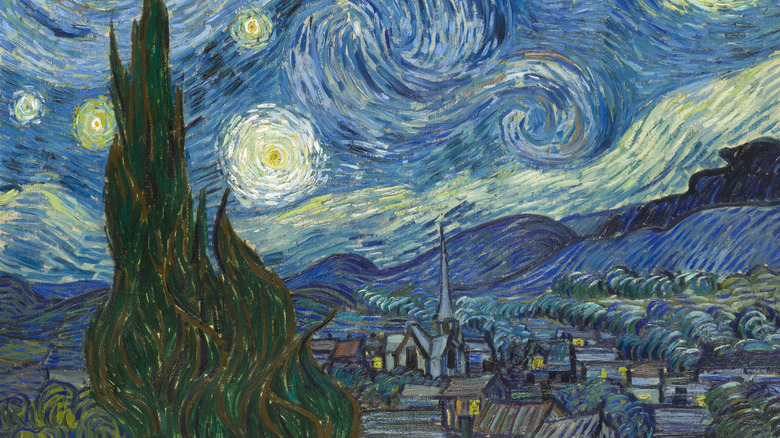
Of course, there are many filters at your disposal, but one of the more overlooked ones is the oil paint filter. This beauty of a function essentially allows you to transform any photo into an image that looks like a classic oil painting that you might find at the Met.
In terms of how the feature works, first you can access the filter by going to Filters -> Stylize -> Oil Paint. From there, you can tinker with the filter's settings to your liking. This includes the following settings:
-
Stylization, which adjusts the styles of the brush strokes.
-
Cleanliness, which modifies the length of the strokes.
-
Scale, which allows you to play around with the thickness of the coat of paint.
-
Bristle detail, which can alter how much of the paintbrush hair is apparently, ranging from soft to strong grooves.
In addition to this, you can also adjust the lighting to meet your preference. Overall, this hidden but masterful feature allows you to give your image a Vincent Van Gogh-style feel to it, turning your visual document into a masterpiece.
Let Photoshop do the math for you
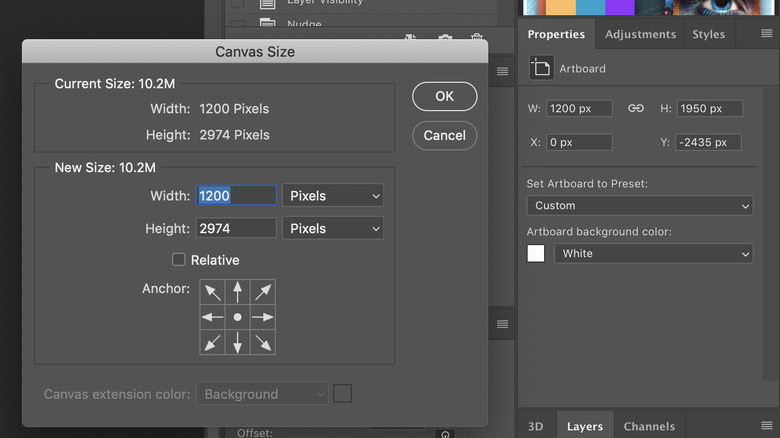
Oftentimes for designers, math is the bane of our existence, but thankfully, you don't need to be a master of calculations and mathematical formulas to use Photoshop's math input boxes. Sometimes, you'll need to put your mathematics hat on when you're adjusting the size of your canvas or resizing a spot of text. But, fortunately, Photoshop will take care of the math for you.
The function allows you to do basic calculations without needing to use a calculator or do the math in your head. It's pretty straightforward to do and it's not a function that many people think of as they finetune their images — but the feature works exactly like Excel. All you have to do is write out your equation in any input box, hit enter and voila! Photoshop has saved you the headache of having to do calculations on the spot by using the inputs themselves.
Photoshop isn't capable of complex calculus, of course. However, for example, if you need to reduce an image to half of its current size, inputting "/2" next to the width or height values (and hitting enter) will divide it in half. It's an easy shortcut to keep handy when adjusting image size or cropping.