How To Use Photoshop's Generative Fill Feature (With Examples)
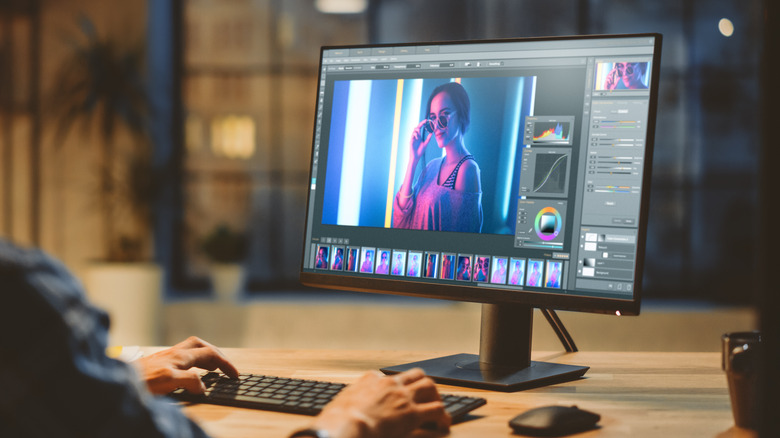
Introduced in May 2023, Adobe Photoshop's Generative Fill feature has been making photography professionals' and hobbyists' lives so much easier. This artificial intelligence tool, driven by Adobe's generative AI model called Firefly, lets you modify your image using only text prompts. You can use Generative Fill to insert a new element (e.g., dog, cloud, building) into the picture, expand the canvas of your picture, remove anything from the photo, and even generate an entirely new image based on your imagination.
If you're looking to try it out, we've got you covered with a tutorial that comes complete with prompt examples for your convenience. However, before you get started, it's important to note that the Generative Fill feature is only available for Photoshop version 24.6 and later. Make sure you have the right one installed. Generative Fill also largely depends on cloud processing, so get your device connected to the internet first.
Adding an object
Generative Fill lets you incorporate new and realistic-looking objects and backgrounds into your photos. Follow these steps to use it:
- Launch your Photoshop app.
- Import your preferred image.
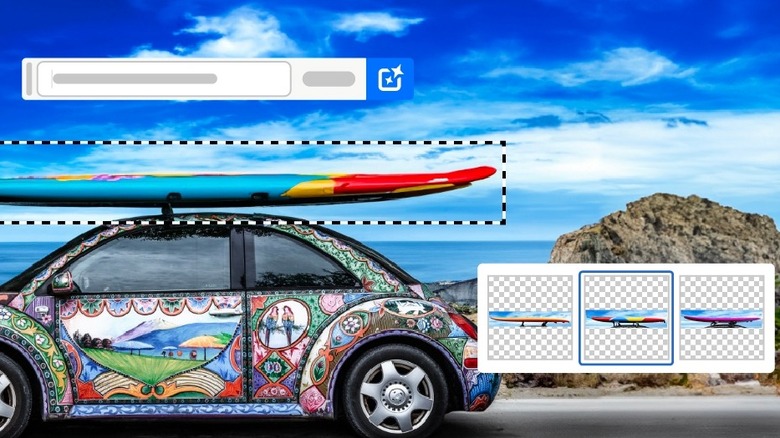
- With any of the selection tools in the left side panel, choose the area of the photo where you want to place your new element. If you want to change the entire background of the photo, hit the "Select subject" button on the contextual taskbar to select the primary subject in your photo. Then, click on the invert icon to select the background.
- Click on Generative Fill. Alternatively, go to Edit > Generative Fill from the menu bar at the top.
- If a legal dialog appears, hit the Agree button.
- In the prompt box, type what you want to add to the photo. Be as specific and descriptive as you can. You don't have to start your prompt with an instruction like "add a balloon" or "create a small campfire here." You just need to input the elements you want Photoshop to generate. Here are a couple of examples to get you started:
- For objects:
- Sitting brown and white corgi with its tongue out
- Opened red wine bottle next to an empty wine glass
- Pink convertible sports car with the roof off
- Long blond and wavy hair with red ribbon
- Wet reflective pathway
- For backgrounds:
- Pyramids in the desert
- Green mountain range with a calm lake
- Tall buildings full of windows
- Arizona's Grand Canyon
- Sunset at the beach
- For objects:
- Choose your preferred variation from the properties window on the right.
- Save your photo.
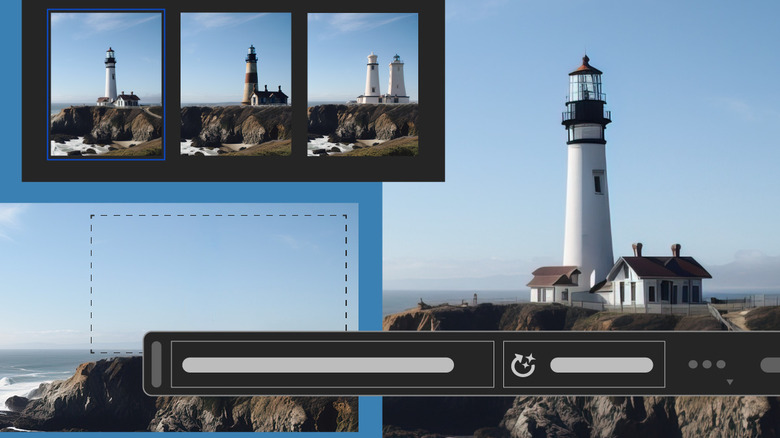
Expanding a photo
When using Photoshop's Generative Fill feature to expand the photo, there's no need to think of prompts, unlike when adding objects. Photoshop will automatically fill the extra canvas with a scene that fits the surroundings of the original photo. Here's how you can extend your picture:
- With your image imported to Photoshop, click on the crop tool in the left side panel.
- Zoom out to give your photo more space on all sides.
- Drag the edge or corners of the photo until you get to your desired size.
- Hit Enter on your keyboard to save the size.
- Click on the Rectangular Marquee tool from the left side panel and select the empty area on your canvas. Alternatively, you can select the image itself and click on the invert icon on the contextual taskbar to inverse the selection and select the empty regions.
- Choose the Generative Fill button on the contextual taskbar.
- Leave the prompt box empty.
- Select your favorite variation. Photoshop offers more than just one result to give you options.
- (Optional) Edit the image as you please.
- Save the photo to your desktop.
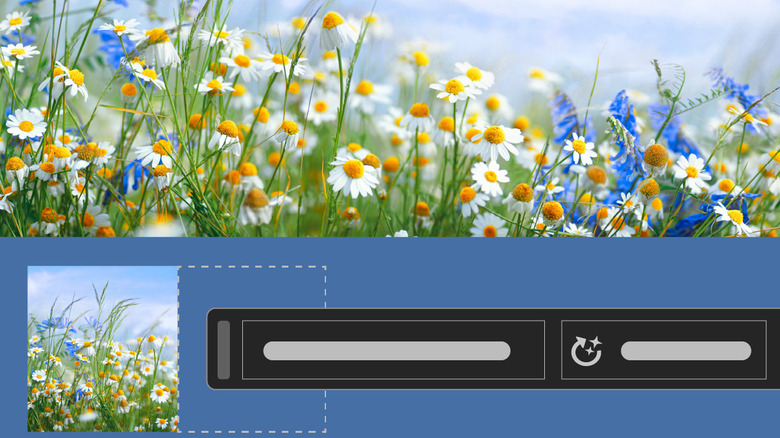
Removing an object
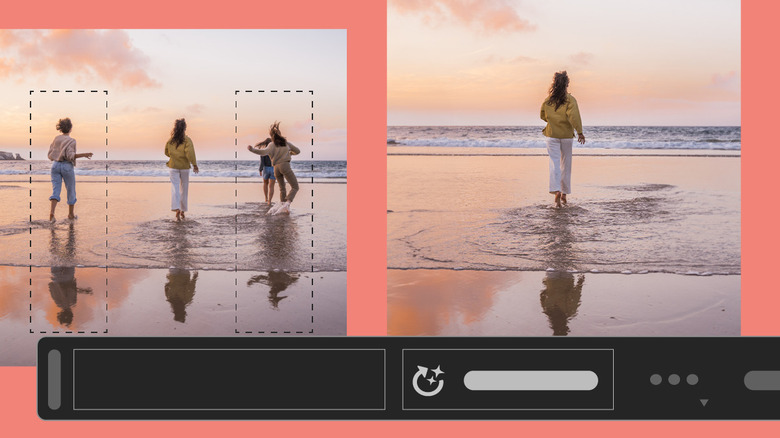
On top of adding new elements to the existing photo, Generative Fill lets you do the opposite and delete any element from the photo too. Here's how:
- Open your photo in Photoshop.
- Click on any of the selection tool icons in the left side panel (or hit a keyboard shortcut for the tool you feel like using). If it's a large object, it's recommended to use the Rectangular Marquee tool, as it avoids overly tight selections that may cause distortion. If, however, you want to remove objects from tight spaces, like a person from a group or an old box in the middle of a flower patch, use the Lasso tool for better accuracy.
- Select the object you want to remove from the photo.
- In the Generative Fill contextual taskbar, click on Generative Fill.
- Don't fill out the prompt box.
- Hit the Generate button to delete the selected object from the photo.
- Under the Variations section in the properties window on the right, pick your preferred edited version.
- Save the edited photo to your local storage.
Creating an image from a blank canvas
Generative Fill can expand an existing photo or incorporate new objects into it. However, the capabilities of this feature don't stop there. You can also use it to make a new picture entirely from scratch.
- Download a plain white image. The size can vary depending on your preferences.
- Open the image in Photoshop.
- Use the Rectangular Marquee selection tool to select an area on the blank image. To make a symmetrical picture, start from the bottom third or half of the canvas.
- Click on Generate Fill.
- Enter your prompt. You can use something like the following:
- White sand beach with small rocks
- Reflective, calm lake
- Wide lavender field with pine trees
- Hit Generate.
- Rinse and repeat for the remaining portions of the canvas. Prompts for the top of the canvas can be something like:
- Eiffel Tower with sunrise
- Clear sky with mountains in the distance
- Colorful northern lights
- Add elements to the new image for an extra oomph. Depending on the scene, it can be something along the lines of:
- Broken-down rusty car
- Coffee shops with customers
- Running Golden Retriever with red collar
- Save your picture.