10 Most Helpful Photoshop Shortcuts

With the rise of photography and imagery, it has become more important than ever to make pictures look as great as possible. This is why the photography industry has seen major advancements in camera technology, on both professional cameras and mobile devices. But even more remarkable are the developments we're enjoying on the software side, in terms of editing and processing images. This is where Adobe Photoshop comes in. It is one of the most versatile software used today to push photo editing to its limits and create amazing results for its users.
Anyone who has used Photoshop knows how packed it is with features. From the editing tools on the left panel to the color and swatch options on the right, these features are such that it can be easy to forget where they are located and how to use some of them. Fortunately, keyboard shortcuts provide a great solution. They not only ease the experience of photo editing but also help get work done faster. These keyboard shortcuts can improve your creative process, reduce your output time, and help you get ahead of the competition.
We've selected a small fraction of widely applicable Photoshop shortcuts below. Regardless of the use case, we're certain that you will find them immensely useful in your practice.
Basic Photoshop Shortcuts
The "Photoshop" moniker has now become synonymous with modified graphic content, and it certainly did not get to this level without building upon basic keyboard shortcuts. Similar to those used in other software like Microsoft Word and Excel, Photoshop allows for the use of basic shortcuts in working with the application window. And it's worth noting that these and other shortcuts are based on some important keys, such as the Control (Ctrl), Alternate (Alt), Shift, and Function (Fn) keys on Windows-based devices as well as the Command (Cmd), Option, Shift, Fn, and Return keys on macOS-based computers.
Thus, you might already have guessed that in Photoshop you can create a new preset (Ctrl + N on Windows and Cmd + N on macOS), open an existing picture (Ctrl + O on Windows and Cmd + O on macOS), save a project (Ctrl + S on Windows and Cmd + S on macOS), save in a different file format (Ctrl + Shift + S on Windows and Cmd + Shift + S on macOS), and print a document (Ctrl + P on Windows and Cmd + P on macOS). But it doesn't end there, as there are several other shortcuts exclusive to Photoshop and similar Adobe software. You can browse for media in Adobe Bridge, if installed on your computer (Ctrl + Alt + O on Windows and Cmd + Option + O on macOS), close the Photoshop window currently on screen (Ctrl + W on Windows and Cmd + W on macOS), or close all Photoshop windows (Ctrl + Alt + W on Windows and Cmd + Option + W on macOS).
Tool Selection Shortcuts

The keyboard shortcuts for using editing tools in Photoshop, located on a strip on the left of the Photoshop window by default, are perhaps the easiest to use and remember — as many of them involve only one key. Even if they're forgotten, the best part is that moving the cursor over a tool reveals the corresponding keyboard shortcut letter. The same letters apply on Windows and macOS devices, and it's possible to use a tool temporarily by holding down the letter and leaving it to return to the previous tool.
These tool selection shortcuts include Move (V), Lasso (L), Marquee (M), Frame (K), Pen (P), Quick Selection (W), Crop (C), Brush (B), Spot Healing Brush (J), Eyedropper (I), Eraser (E), Clone Stamp (S), and Gradient (G). Other tool shortcuts that are available include Zoom (Z), Rectangle (U), Hand (H), Type (T), Path Selection (A), Dodge (O), and History Brush (Y). Any or all of these tools may be useful, depending on the use case and editing preferences of the editor.
Interestingly, some of these tools also house several variations and options of use. For instance, the Eyedropper tool has such variations as the Color Sampler, the 3D Material Eyedropper, the Ruler, the Note, and the Count tool — all for specific purposes. You can thus toggle between these options by pressing the shortcut letter key (in this case, "I") repeatedly.
Edit Shortcuts
Edit shortcuts help you to set up objects — images, layers, etc. — where you would like them to be on the project, while also giving you control over what remains in the final product. Just like the basic Photoshop shortcuts, a few of these also work on other platforms and thus might be immediately recognizable. For example, you can cut an object (Ctrl + X on Windows and Cmd + X on macOS), copy an object (Ctrl + C on Windows and Ctrl + V on macOS), paste what you have copied (Ctrl + V on Windows), undo a move (Ctrl + Z on Windows and Cmd + Z on macOS), or redo a move (Ctrl + Shift + Z on Windows and Cmd + Shift + Z on macOS). Special variants of these shortcuts applicable to Photoshop include those to move back to the last state (Ctrl + Alt + Z on Windows and Cmd + Option Z on macOS), copy merged selections or layers (Ctrl + Shift + C on Windows and Cmd + Shift + C on macOS), paste objects in place (Ctrl + Shift + V on Windows and Cmd + Shift + V on macOS), and paste objects into a selection (Ctrl + Alt + Shift + V on Windows and Cmd + Option + Shift + V on macOS).
A few other keyboard shortcuts may be found useful in editing objects in Photoshop or setting up the objects to be further edited; two worth remembering are the free transform (Ctrl + T on Windows and Cmd + T on macOS) and transform again shortcuts (Ctrl + Shift + T on Windows and Cmd + Shift + T on macOS).
Project View Shortcuts

While working on a project in Photoshop, you might need to focus on different parts of the image or change its size and scale in order to apply your edits. When working with such views generally, keyboard shortcuts help keep you on track. At a simple level, you can zoom in (Ctrl + Plus on Windows and Cmd + Plus on macOS), zoom out (Ctrl + – or on Windows and Cmd + – on macOS), fit the image to fill the screen (Ctrl + 0 on Windows and Cmd + 0 on macOS), or zoom to exactly 100% (Ctrl + 1 on Windows and Cmd + 1 on macOS) to work on an image. But with respect to changing sizes, you can alter the size of the image itself (Ctrl + Alt + I on Windows and Cmd + Option + I on macOS), or change the size of the canvas holding the image (Ctrl + Alt + C on Windows and Cmd + Option + C on macOS).
If you have opened an image in Photoshop without previously setting up the canvas, the software intelligently sets up a canvas with the same dimensions of width and height as the opened image. Moreover, when you increase or decrease the canvas sizethe image is aligned in the center by default. Other project view shortcuts include using rulers (Ctrl + R on Windows and Cmd + R on macOS), showing guides (Ctrl + ; on Windows and Cmd + ; on macOS), and toggling grids (Ctrl + ' on Windows and Cmd + ' on macOS).
Layer Manipulation Shortcuts
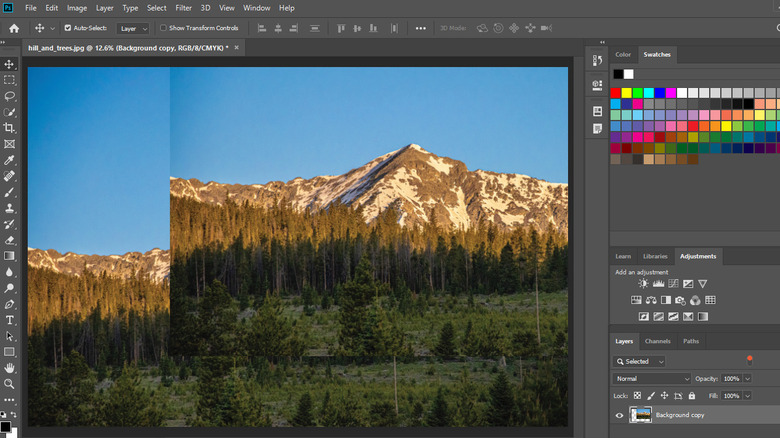
Layers in Photoshop are at the core of its image editing process. As a means of holding objects and editing elements separately in the same window, layers are extremely important, especially at the advanced level. It's only right that there are shortcuts for working with them too. To add a new layer to the project, you have the option of creating a new layer normally (Ctrl + Shift + N on Windows and Cmd + Shift + N on macOS), creating a layer by copying an already existing layer (Ctrl + J on Windows and Cmd + J on macOS), or creating a new layer by cutting an already existing layer (Ctrl + Shift + J on Windows and Cmd + Shift + J on macOS). You can also merge the visible layers (Ctrl + Shift + E on Windows and Cmd + Shift + E on macOS), group a selection of layers (Ctrl + G on Windows and Cmd + G on macOS), or ungroup a layer group (Ctrl + Shift + G on Windows and Cmd + Shift + G on macOS).
There are also multiple options on how to select layers before using them. You can select all layers (Ctrl + Alt + A on Windows and Cmd + Option + A on macOS), select the top layer (Alt + . on Windows and Option + . on macOS), select the bottom layer (Alt + , on Windows and Option + , on macOS), select the layer just above the current selection (Alt + ] on Windows and Option + ] on macOS), or select the layer just below the current selection (Alt + [ on Windows and Option + [ on macOS).
Blend Mode Shortcuts
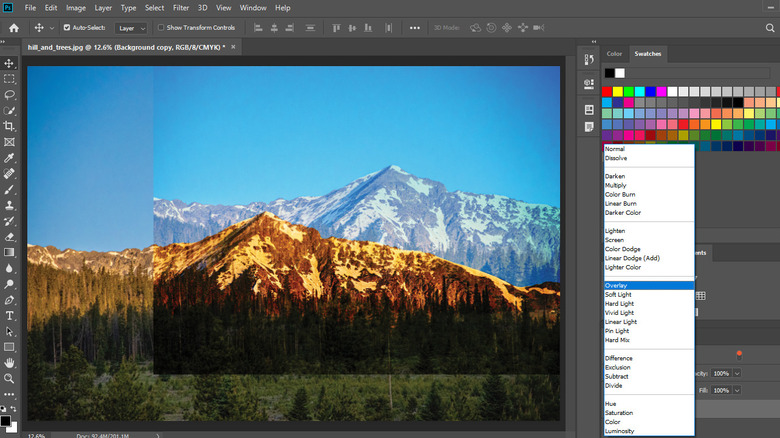
Blend modes on Photoshop are a great way to add effects to an image without changing the image too much. The key difference between blend modes on Photoshop and the regular effects on other apps, though, is that blend modes work with layers to achieve their output. That is, every blend mode is achieved by combining pixels from the top layer and base layer in a different way, based on algorithms that determine the final color combination of each of these pixels. Just as you can work with layers using keyboard shortcuts, you can also set up your preferred blend modes with a few keys.
The popular blend modes with shortcuts in photoshop include Darken (Alt + Shift + K on Windows and Option + Shift + K on macOS), Lighten (Alt + Shift + G on Windows and Option + Shift + G on macOS), Dissolve (Alt + Shift + I on Windows and Option + Shift + I on macOS), Overlay (Alt + Shift + O on Windows and Option + Shift + O on macOS), Multiply (Alt + Shift + M on Windows and Option + Shift + M on macOS), Hue (Alt + Shift + U on Windows and Option + Shift + U on macOS), Luminosity (Alt + Shift + Y on Windows and Option + Shift + Y on macOS), Saturation (Alt + Shift + T on Windows and Option + Shift + T on macOS), Exclusion (Alt + Shift + X on Windows and Option + Shift + X on macOS), Difference (Alt + Shift + E on Windows and Option + Shift + E on macOS), and Normal mode (Alt + Shift + N on Windows and Option + Shift + N on macOS).
Image Manipulation Shortcuts
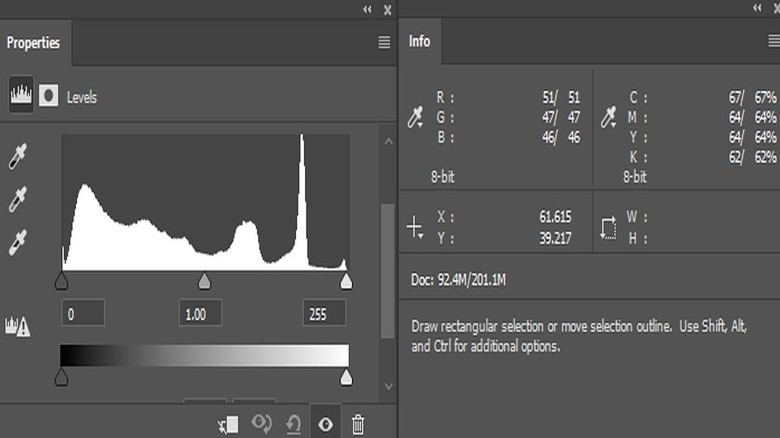
In some cases, you have to edit the images in detail by changing one or more specific properties — brightness, contrast, saturation, etc. — until the image fits your desired outcome. Photoshop has shortcuts for opening and using these "Adjustments", as they are called in the software. Worthy of note is the fact that Photoshop creates layers to implement these effects, rather than directly editing the image itself. This is so that you can still return to the original image you wish, or see the effect of using one adjustment over another, by simply toggling the layers to show or hide.
Not all adjustments in Photoshop have corresponding keyboard shortcuts, but those that do include Levels (Ctrl + L on Windows and Cmd + L on macOS), Curves (Ctrl + M on Windows and Cmd + M on macOS), Color Balance (Ctrl + B on Windows and Cmd + B on macOS), Hue/Saturation (Ctrl + U on Windows and Cmd + U on macOS), Desaturation (Ctrl + Shift + U on Windows and Cmd + Shift + U on macOS), Black and White (Ctrl + Alt + Shift + B on Windows and Cmd + Option + Shift + B on macOS), and Color Invert (Ctrl + I on Windows and Cmd + I on macOS). You could also try out the Auto Tone (Ctrl + Shift + L on Windows and Cmd + Shift + L on macOS), Auto Contrast (Ctrl + Alt + Shift + L on Windows and Cmd + Option + Shift + L on macOS), and Auto Color (Ctrl + Shift + B on Windows and Cmd + Shift + B on macOS), to have Photoshop figure it out.
Function Key Shortcuts
Almost every function key has a corresponding shortcut in Photoshop. Though simple and straightforward, these shortcuts might come in handy at different points while working on a project. Some of them may also perform the same function as another shortcut: for instance, you can use Fn + F2 to cut, Fn + F3 to copy, and Fn + F4 to paste. As suggested by these instances, the function key shortcuts have to be accompanied by the Fn key to replace their designated functions on some devices, such as increasing and reducing brightness or audio volume.
The other function key shortcuts are as follows: Fn + F5 to hide or show the Brush Settings and Brushes panels, Fn + F6 to hide or show the Color panel, Fn + F7 to hide or show the Layers panel, Fn + F8 to hide or show the Info panel, Fn + F12 to revert to the original image and undo all edits, Shift + F5 to fill a shape with color, Shift + F6 is to activate feather selection, and Shift + F7 to activate the inverse selection.
All of the above shortcuts work with the same keys on both Windows and macOS devices. The exceptions to them are Fn + F1 on Windows to open Adobe Help, Fn + F1 on macOS to undo or redo, Fn + F9 on Windows to hide or show the Actions panel, and Option + F9 on macOS to toggle the same Actions panel. In any case, it's pretty easy to get used to Fn shortcuts and, perhaps, prefer them over the alternatives.
Marquee and Brush Tool Shortcuts
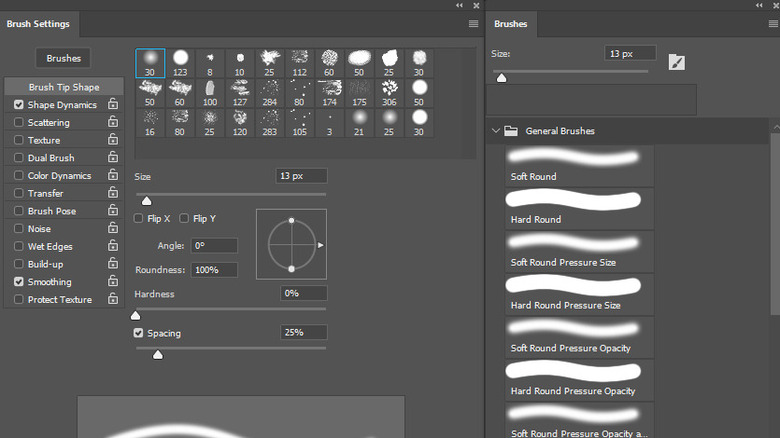
Some frequently used editing tools in Photoshop, like the Marquee and Brush tools, have a lot of functionality and options in their usage. The Marquee tool lets you make selections from the current project based on different shapes, and the brush tool lets you paint with brushes of varying textures, weights, and thicknesses. Cycling between two or more options while using these tools is likely to occur at some point in the creative process, and shortcuts make the job a lot easier.
With respect to the Marquee tool, you can choose to make a square slice from the edge (Shift + Click and Drag on both Windows and macOS), make a square slice from the center (Alt + Shift + Click and Drag on Windows and Option + Shift + Click and Drag on macOS), or make a free-form rectangular slice from the center (Alt + Click and Drag on Windows and Option + Click and Drag on macOS). These apply if the Rectangular Marquee tool is selected. If you would instead prefer to use the Elliptical Marquee tool (by pressing M twice), then these shortcuts would respectively make a circular slide from the edge, make a circular slice from the center, and make a free-form elliptical slice from the center. With respect to the Brush tool, you can choose the previous brush style (,) choose the next brush style (.) choose the first brush style (Shift + ,), choose the last brush style (Shift + .), or use the airbrush feature (Alt + Shift + P on Windows and Option + Shift + P on macOS).
Camera RAW Shortcuts
If you're ready to take your work on Photoshop to the highest level, then you might need the Camera RAW filter. This is a more advanced filter option in Photoshop that provides more accuracy and precision in working with adjustments on an image. While using Camera RAW, you still have access to some of the basic editing tools in Photoshop. But there are several new options, many of which come with corresponding keyboard shortcuts.
You can open different Camera RAW panels using shortcuts for Tone Curve (Ctrl + Alt + 2 on Windows and Cmd + Option + 2 on macOS), Detail (Ctrl + Alt + 3 on Windows and Cmd + Option + 3 on macOS), Grayscale (Ctrl + Alt + 4 on Windows and Cmd + Option + 4 on macOS), Split Toning (Ctrl + Alt + 5 on Windows and Cmd + Option + 5 on macOS), Lens Corrections (Ctrl + Alt + 6 on Windows and Cmd + Option + 6 on macOS), Camera Calibration (Ctrl + Alt + 7 on Windows and Cmd + Option + 7 on macOS), Presets (Ctrl + Alt + 9 on Windows and Cmd + Option + 9 on macOS), and back to the Basic panel (Ctrl + Alt + 1 on Windows and Cmd + Option + 1 on macOS).
Other shortcuts that are used specifically in Camera RAW include tools like Red Eye Removal (E), Spot Removal (B), Straighten (A), White Balance (I), Graduated Filter (G), Targeted Adjustment (T), and Adjustment Brush (K) — all of which apply to both Windows and macOS computers.
Other Helpful Shortcuts
There are many other keyboard shortcuts available in Photoshop, depending on what project you're working on or which features you wish to use. For instance, you can directly save a project for web and software devices (Ctrl + Alt + Shift + S on Windows and Cmd + Option + Shift + S on macOS). Or, to make minute changes to brush texture, you can increase a brush size (]), decrease brush size ([), increase the brush hardness (}), or decrease the brush hardness ({). These brush shortcuts work the same way on Windows and macOS devices
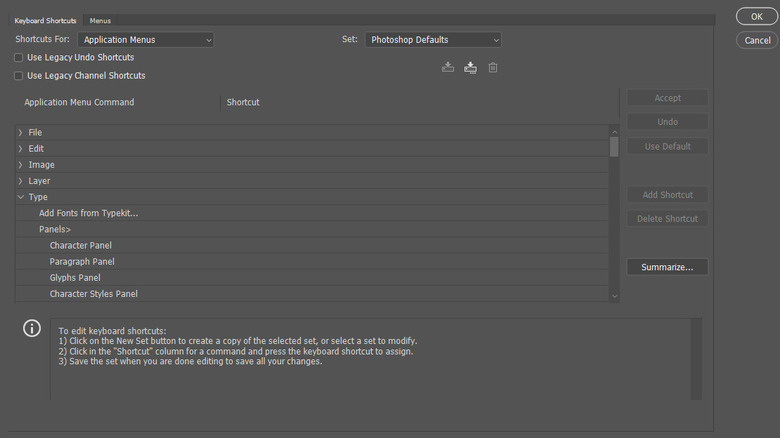
Finally, you can create and edit your own shortcuts in Photoshop. This is one of the best features of Photoshop, and it's why a lot of shortcut enthusiasts would always pick the software over several others.
First, open the "Keyboard Shortcuts and Menus" option (Ctrl + Alt + Shift + K on Windows and Cmd + Option + Shift + K on macOS). Here you'll find a list of Photoshop functions and their corresponding shortcuts — or, for those without default shortcuts, you'll find an empty space. To edit the preset shortcuts, click on the shortcut and type your preferred shortcut combination accurately into the text box. To include new shortcuts, also click on the function and a text box will appear, within which you can type your shortcut.
Now that you know you could do almost everything on Photoshop using keyboard shortcuts, consider trying them out and watch your design process evolve to the next level.