How To Factory Reset Your iPhone And Wipe All Its Data
Perhaps you're getting ready to sell, trade in, or gift your iPhone to a friend or family member. Maybe your home screen has been overrun with apps and you're looking for a quick fix to get a fresh start. Or maybe iOS has gotten slow and buggy and you hope starting over will restore its once-lickety-split performance. Whatever your reason for wanting to factory reset your iPhone and wipe all its data, you want to make sure you do it correctly and completely. There are several different reset options available on your iPhone, but only one of them offers the kind of thermonuclear clearing of cobwebs you'll need if you'll be handing your phone off to someone else. Likewise, for the most complete restoration of appearance and performance, you'll want to skip the more lightweight options and go for a full reset.
There are also a few additional steps you may want to take if you want to transfer the data and settings you're about to wipe either to a new iPhone or the same one, or if you simply want to preserve the data in case you accidentally wipe out something you didn't mean to lose track of. Whatever your objective, we'll help you get it right. Note that you'll need to be connected to either Wi-Fi or cellular data throughout this entire process.
How to navigate the Settings menu to reset all settings and erase all the data on your iPhone
Once upon a time in iOS, the settings for resetting your iPhone were available under a submenu called, simply, Reset. Presumably, after realizing that iPhone owners frequently reset their phones prior to selling or giving them away, Apple changed the name to Transfer or Reset iPhone. Here's how to get there, and what to do once you're in:
1. Open the Settings app.
2. Scroll down and tap General.
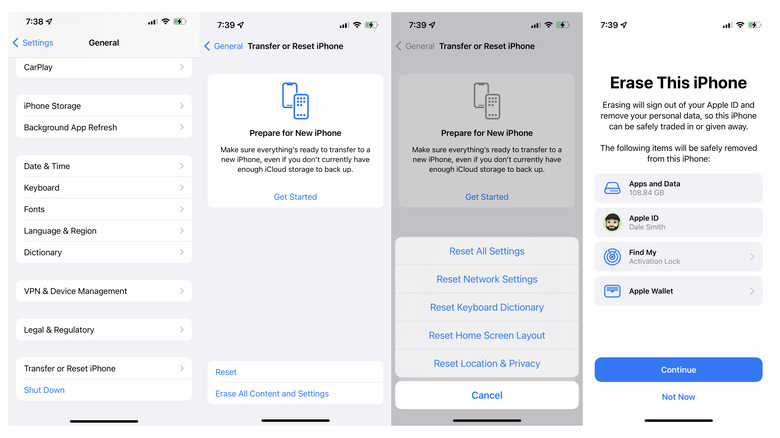
3. Scroll all the way to the bottom and tap Transfer or Reset iPhone.
4. If you'd like to preserve all your apps, data, and settings, tap Get Started at the top beneath Prepare for New iPhone. You'll be returned to this settings page when the process is complete.
5. To simply reset either all settings or a limited group of settings (network, keyboard, homescreen layout and location and privacy are your options), you'd tap Reset; for the full wipe-out, skip past that and tap Erase All Content and Settings.
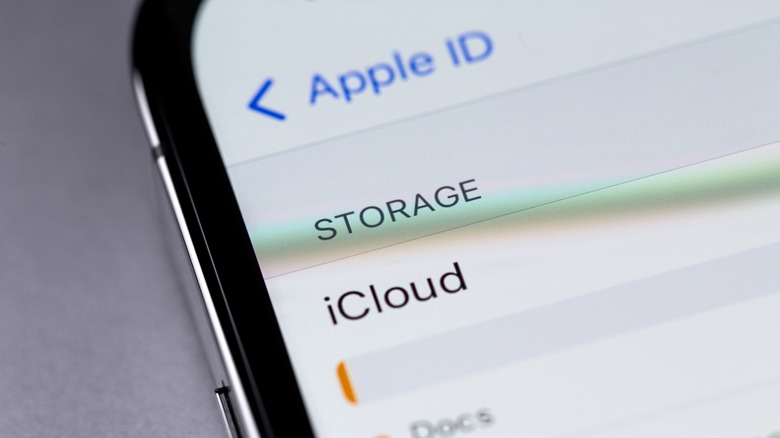
Next, you'll have to authenticate your account on both your iPhone (using your passcode) and in iCloud (with your Apple ID password) to continue.
The Last Few Steps: Have Your Passcode and Apple ID Password Ready
Once you've navigated this far, a screen titled Erase this Phone will appear, letting you know what exactly you're about to delete: Apps and data, Apple ID, Find My settings, and Apple Wallet, specifically. Here's what to do next:
1. Tap Continue (or tap Not Now to back out).
2. On the next screen, you'll be asked to input your iPhone's passcode (Face ID does not work in this scenario). Enter it, then tap Continue. If you don't know it, you can reset your iPhone's passcode using a slightly different process.
3. Next, you'll land on a page letting you know your iPhone is uploading data to iCloud, with a progress bar giving you an estimate for how long that process will take. You can choose to Skip Backup by tapping those words at the bottom (but you may lose track of your most recent data if you do).
4. Next, you'll turn off Find My by entering the password for your Apple ID. If your Apple ID password is stored in iCloud Keychain, you can tap Passwords (beside the key icon) just above the onscreen keyboard to pull it up.
5. Once your password is filled in, tap Turn Off in the upper right corner.
6. After all your iCloud services have been disabled, you'll be given one last chance to back out. Two options will pop up from the bottom of your screen: Tap Erase iPhone to go through with it or Cancel to back out.
If you back out before fully resetting your iPhone, you may have to reconnect some services
Resetting your iPhone and erasing all your data is not a process for the weak-kneed — at certain stages, if you back out and change your mind, you may have to go back in and reconnect to a few Apple services, specifically Find My and Apple Wallet. If, however, you proceed with the reset and data wipe then restore from an iCloud backup, those services will be restored as well. If you'd rather wait to reset your iPhone and wipe all its data until you've exhausted all other options, you can try clearing your iPhone's cache, fixing the "Apple ID Verification Failed" error, or try these steps to fix an iPhone stuck on "Preparing to Update."
Once you've followed these instructions, your iPhone will be as new as the day you took it out of the box and you'll be able to sell, gift, or donate it in confidence, knowing your data has been erased.