5 Simple Table Saw Jigs Any DIY Woodworker Can Use
We may receive a commission on purchases made from links.
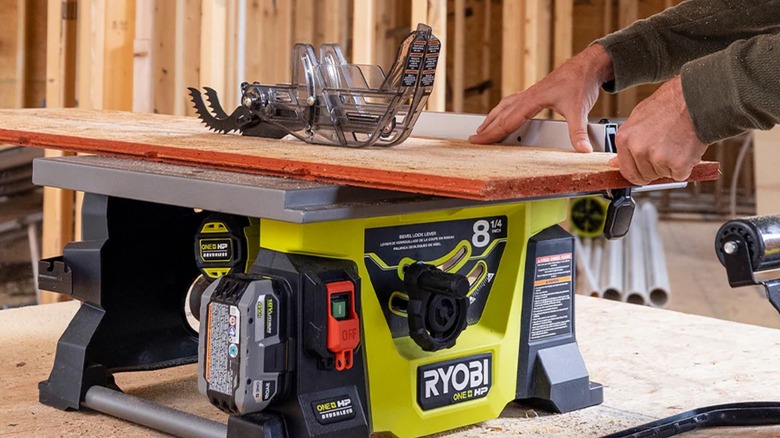
A good table saw is an essential tool for fine woodworking. It's one of the only saws that can perform rip cuts, cross cuts, miter cuts, bevel cuts, and compound cuts, as well as the various types of more delicate cuts required for joinery techniques. Having a fixed blade with fences, miter gauges, and other accessories helps achieve smooth, accurate cuts that would be far harder with a handheld power tool.
A table saw provides a stable foundation to add all kinds of wooden jigs that can take the tool's versatility even further. Some of these jigs allow you to make unique cuts that you wouldn't have been able to make with the standard accessories alone, while others can add a higher degree of precision than what you'd get with a standard miter gauge, or else take complicated cuts that would take a long time to set up and make them easily repeatable.
Some jigs can be quite complex, involving serious geometry to get them just right. Many others are fairly simple. What's more, these can often be made using bits of scrap wood, so the cost of production is next to nothing. In any case, it's worth investing in a good table saw from a major brand.
Miter sled

There are a lot of clever DIY jigs that can expand what your tools can do out there, but arguably the most useful and versatile is the miter sled. This is a flat piece of plywood with runners on the bottom that are made to fit in your saw's tracks and a solid wooden back that serves as a stop for the pieces that you're looking to cut. As a rule, miter sleds tend to be much more accurate than miter gauges for basic cross cuts. They are more stable and keep the piece being cut on a fixed surface with support on both sides, rather than trying to pin and slide the piece across the tabletop. You also have the option to attach additional holders to the sled that can allow for repeatable, complex cutting angles.
There are several different miter sled designs out there that require varying levels of complexity to create. Some, like the model designed by How I Do Things Woodworking, are a little more complex in their initial design, but the result is a modular sled system with swappable jigs that can be used to make all kinds of different cuts. Others, like the one designed by Casual DIY, are simpler in their overall utility, but are much easier for beginners to make. In fact, this model is designed to work in concert with the miter gauge that came with your table saw, saving you from many of the complexities that come with creating a perfectly square stop wall.
If you're willing to spend a bit of money, you can also upgrade many of these DIY designs with metal runner slide bars, T tracks, and flip stops.
Jointer jig
Wood doesn't always want to be as straight and even as we'd prefer. Even boards that started straight can bend and warp over time, especially when exposed to moisture. One of the main tools used for getting these boards nice and straight again is called a woodworking jointer. Unfortunately, they can be quite expensive, such as a jointer jig. These allow you to straighten a live or crooked edge on your table saw, even if it won't sit flush against a fence. Then, once you have one straight edge, you can use the table saw's regular fence to clean up the other side.
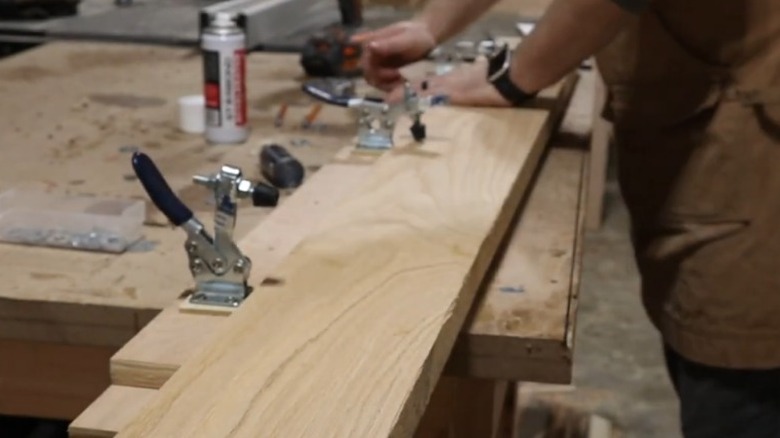
You don't have to buy a jointer jig — you can make one with two pieces of plywood. One serves as a base, and the other as a back fence. You simply glue and screw the back fence to one edge of the larger board and then attach hold-down clamps to the fence to pin your piece to the base. This can then be run along your table saw's fence with the live or warped edge hanging just off the edge of the base.
Sawdust and Stuff made a design for one of these and noted that you want to make sure the back fence is tall enough that the levers for the hold-down clamps can depress without hitting the table saw's fence. You'll also want to ensure that the grips on the clamps you purchase for the jig are adjustable, so that they can clamp down with full force on boards of various thicknesses.
Tapering jig
Tapering cuts are difficult to perform safely on a table saw. This is when you cut an angle along the length of a board, like you would to make a furniture leg. It's a long, narrow cut that would be extremely dangerous to attempt freehand. That's where a tapering jig comes in.
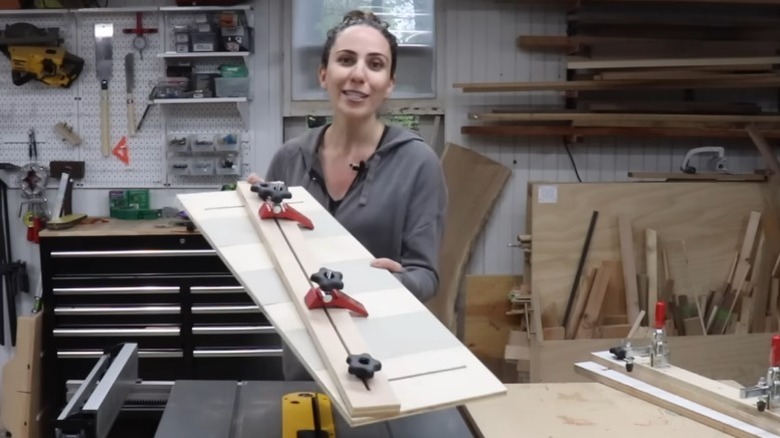
A tapering jig is constructed from two pieces of plywood with routed slots. A wider piece serves as the base, while a narrower piece can be adjusted along the routed tracks with bolts to make a custom angled fence that holds your piece in place while the jig moves along next to the saw. You can also add fixed hold-down clamps that will help hold the piece to the jig during the cut. This can be designed to slide against your table saw's fence, but a better solution is to add a runner to the base, as you would with the sled. But the best thing about any sort of tapering jig is that it keeps your fingers far away from the saw blade.
Fanger Woodworking has a beginner-friendly version of this that requires a table saw and a router to make. Not everyone has a router table, however, and some people are uncomfortable using routers in general. That's okay, though. Tamar from 3x3 Custom designed a similar model, and also showcased how you can make the channels using a drill and a jigsaw rather than a router. It's not quite as clean and requires you to attach a little more material on the outside of the board to create the bolt groove, but it's a good workaround nonetheless.
Box joint jig
Joinery is the cornerstone of fine woodworking, and one of the first joints people learn after a basic butt joint is a box joint (also called a finger joint). This doesn't involve complex mitered or compound cuts, so it's fairly beginner-friendly. You simply cut out a series of 'boxes,' leaving interlocking 'fingers' that can slot into an opposing pattern on a connecting board. It might not be the most complicated joinery method, but it's very sturdy and adds an element of style to a piece, particularly when you choose to interlock boards with two different kinds of wood.
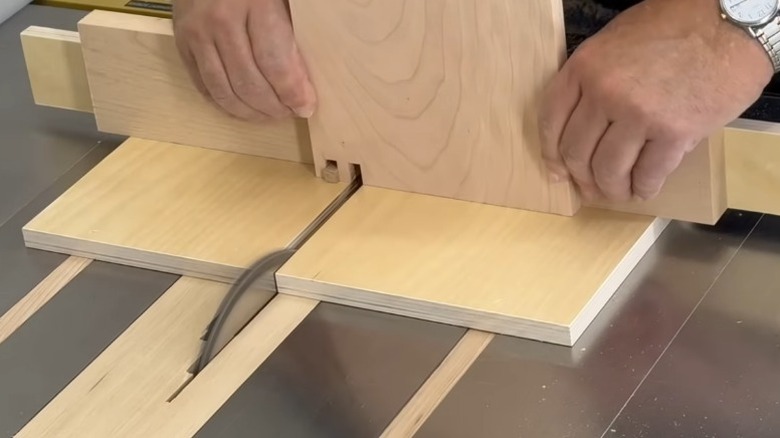
Making a box joint jig for your table saw is pretty easy. You simply need to cut a plywood platform to serve as the base with two runners for your table saw tracks that go on the bottom, and a pair of fence boards that go at the back (one behind the base that is of equal length and a longer one that goes on top of it for setting clamps). You then attach the fences, set the jig in the tracks, double-check that everything is square, and run the entire jig across a set of dado blades to make the preliminary cut.
Woodworking with Wes has an excellent video demonstrating how to construct one of these. He also showcased how to make a backstop with a space built-in so that it's easy to get perfectly spaced box joints every time. He also demonstrates how to cut the joints into interlocking pieces of wood and assemble the boards once they're done.
Thin rip cutting jig

Cutting thin strips of wood on your table saw can be useful for several different projects. You can use them to serve as dividers in a jewelry box, design custom lattices, and make your own shims and edge banding for plywood. Unfortunately, trying to cut these with just a fence can very easily cause kickback, which will damage the piece. What's more, the gap around the blade is often wide enough that slender strips of wood can fall inside. A thin rip cutting jig makes this significantly easier and safer. There are a few premade thin rip cutting jigs available online, but you can also make one yourself.
There are several designs available. Fanger Woodworking has one that functions as a sliding pointed outer fence, for instance. But one of the simplest and most effective models that we've found was designed by Paw Paw's WorkShop.
He started by cutting a wide piece of plywood that serves as the base that fits over the blade, and drew a line down the middle. He made a taper (using a tapering jig like the one we looked at earlier) and glued it on one side of the line. He also attached a wooden fence to one side of the base so that the jig could be clamped to the table saw's fence and locked in place. He also created an adjustable fence that attaches to the jig's base to guide the workpiece along. In practice, thin strips of wood can be shaved off the side of a straight board and then peeled away from the blade by the taper.