5 Hidden Features In Everyday Tools You Might Not Know Exist
We may receive a commission on purchases made from links.
Ever wondered what the notch on the Swiss Army Knife bottle opener is for? Surprisingly, it's a wire stripper. It seems like most tools out there have a hidden feature or two that completely changes the game once you find out about it. That's certainly how I felt when I learned that double-clicking highlights a whole word, and ever since, I've probably cumulatively saved hours of time. Most everyday tools have at least one of these lesser-known functions, but for whatever reason, they're not advertised and people don't share them enough to be common knowledge. That's what we're here for today.
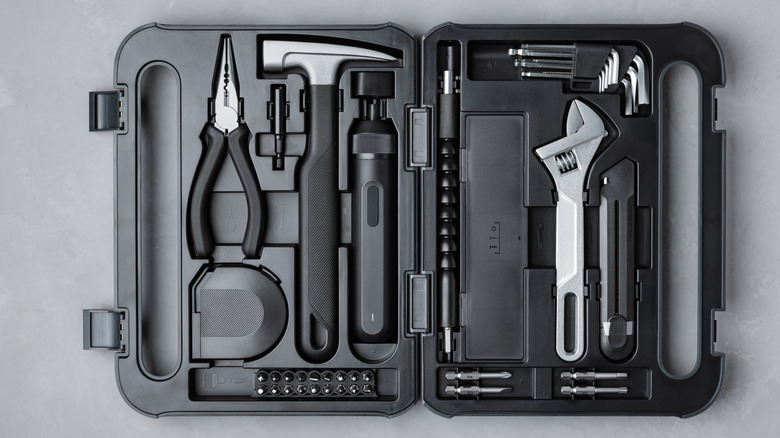
Bear in mind that when we say "everyday tools," we are casting a broader net than just your garage toolbox. "Tools," in a general sense, around the house is what we're going for, and this list is by no means comprehensive. Chances are you have every single item on this list and, if we're lucky, you didn't know about these hidden features. Try these five things.
Start nails one-handed with a hammer's claw
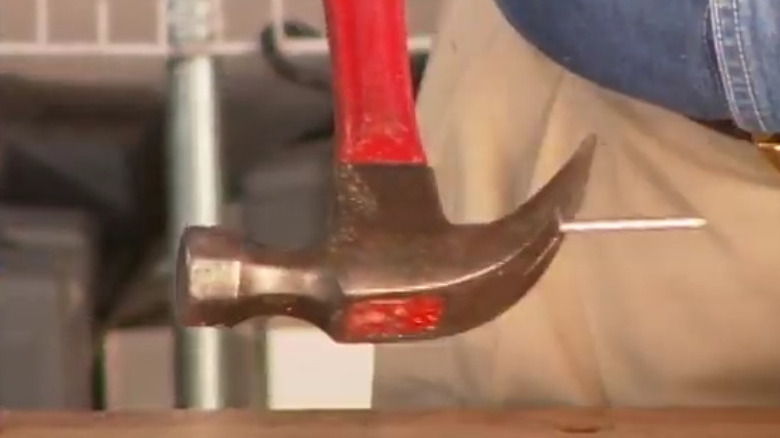
It's an unspoken rite of passage to hit your thumb instead of the nail while hammering. You'll find dozens of tips online on the best way to start a nail, but there's one method that allows you to do so one-handed. You'll need a standard claw hammer specifically, so this tip may not work with other kinds. Secure the nail between the claws so its head rests facing the handle and it's pointed in the opposite direction of the hammer head. Now, swing the hammer backwards at your target. Just a bit of force will be all it takes to get the nail to stick fast, enough to continue hammering it as you normally would. Roll credits, and no innocent thumbs were harmed in the making of this film.
Of course, this solution has its limits. You'll need good hand-eye coordination, and landing the nail in the wrong spot has a higher likelihood of happening. You'll ideally need a project where the nails don't have to be in precise spots. It may be easier to just buy a hammer with a notch on top built for one-handed nail driving.
For DIY solutions, you could attach a disc magnet to the hammerhead so nails stick to it, similar to a magnetic screwdriver head, or you could cut a notch into a thin shim to hold the nail, similar to a Thumb Saver. There's an entire category online of tools to hold nails for hammering, like this nail holder. Otherwise, changing up your technique just a bit requires no extra tool at all. Most would recommend gently tapping the nail to set it and then bringing in the heavier, harder swings to send it home. Whichever option you choose, your thumb will thank you.
Turn screwdrivers more easily with wrenches
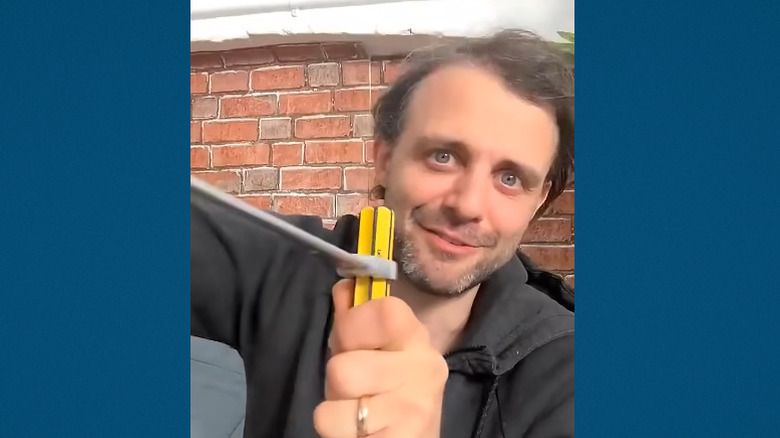
Have you ever noticed how a lot of screwdrivers have flat-sided handles? That's not just a design flourish or something to help you get a better grip. Your screwdriver handle may have a hidden feature that makes it ten times easier to tighten or loosen stubborn screws with the help of a hex socket wrench. Get the correct hex measurement, and it should slide onto the handle perfectly. Now all you have to do is stabilize the screwdriver with one hand and turn with the other, giving yourself, in Steve Mould's words, a ton of extra mechanical advantage.
This hidden feature is more for when you don't have anything else on hand, not necessarily the go-to method; perhaps you left the drill somewhere else, but you only need to quickly break loose a screw. An electric screwdriver with good torque or an impact driver will be far superior. I've tried this method a couple of times, and it works well enough in a pinch.
Also, this tip works best for those classic black-and-yellow handled screwdrivers or anything with a similar hexagonal handle. A lot of screwdrivers these days have handles that won't fit a wrench in this fashion. In those cases, you may be able to clamp down on it with a pair of pliers, though it may be a suboptimal grip and could damage the screwdriver's grip covering. Regardless, the point is that screwdriver handles fit more than just hands.
Use the tape measure tab right
Your tape measure's metal tab may seem to have a singular, straightforward task: grabbing onto an edge while you pull and measure. In reality, the tape measure tab has a bunch of hidden functions. These depend on what the tab on your particular tape measure looks like. Some have a little hole at the end that can grab the head of a nail and hold it for normal measurements, or to draw perfect circles. That means you could, if you really needed to, drive a nail where you want to start the measurement and have a very secure way to hold the tape, allowing it to change angle more easily while measuring.
Tabs also may have a "serrated" edge to them, but even if they don't, many are sharp enough to score a mark into soft surfaces like wood. This isn't a perfect marking method, of course. You might throw off the measurement by a small amount, and the marking often won't be as visible as pencil graphite. For situations where loose measurements are okay and you don't have a pencil, though, this is a great tip to keep on the back burner when the situation demands it.
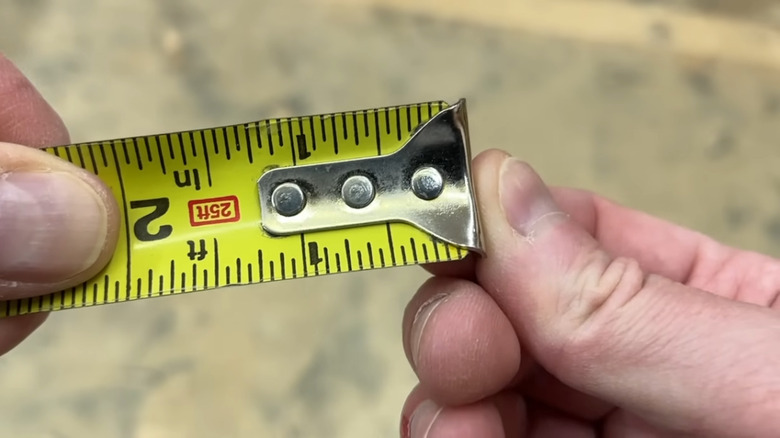
Finally, you may notice how the tab slides out by a tiny margin. This isn't a result of cheap manufacturing; it's actually called tab travel by professionals. Basically, it adds a sixteenth of an inch when collapsed, and subtracts a sixteenth when extended. Do be aware that the thickness of the tab itself is factored into these measurements. Also, if you listen carefully, you'll likely hear a little "click" when that tab has collapsed after pressing against a surface, ensuring an accurate measurement even when the end of the tape is further away.
Remove the entire lid with your can opener
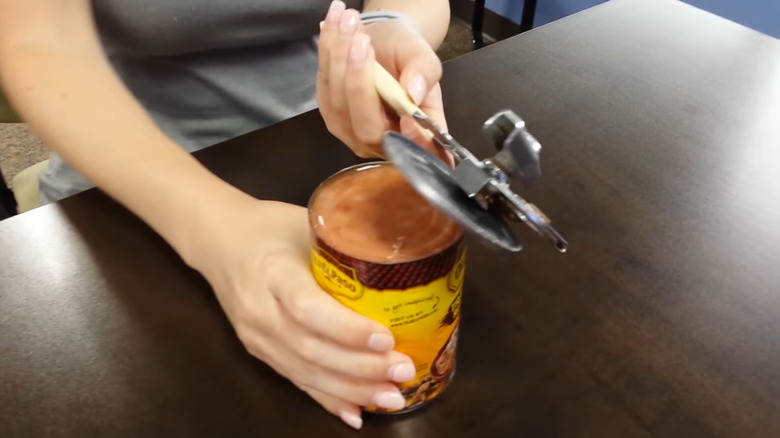
Most people (we assume) open cans by placing the cutter wheel of the can opener vertically, so it cuts down and removes a circle from the lid that you then have to fish out. Touching that lid's now razor edge often feels like you're flirting dangerously close with tetanus. It's not that far off from using your Swiss Army knife can opener out in the woods. However, your can opener may actually be able to remove the entire lid easily and safely, without you having to risk your fingers when prying out a jagged piece of metal.
Try turning your can opener so it rests horizontally and positioning the cutter around the lid's outer edge. It should lock on snugly, and then you turn and open as you normally would. Now the lid should come right off as you lift up. No more lid, no more jagged edges, no more problem. As you can see from the image, this should work with standard can openers, like the one that's been in your kitchen drawer for a dozen generations.
To be fair, many modern can openers only remove the lid in this fashion. The Good Cook Can Opener is an example of this. And if you open a lot of cans, you might as well just invest in an automatic can opener to make the process even more convenient. The Cuisinart Deluxe Electric Can Opener sets you back just under $30 and spares your wrists a bit of strain in the process. But if you're happy with your can opener, this method should work and effectively upgrades your tool for free.
Use your pot handle as a spoon holder
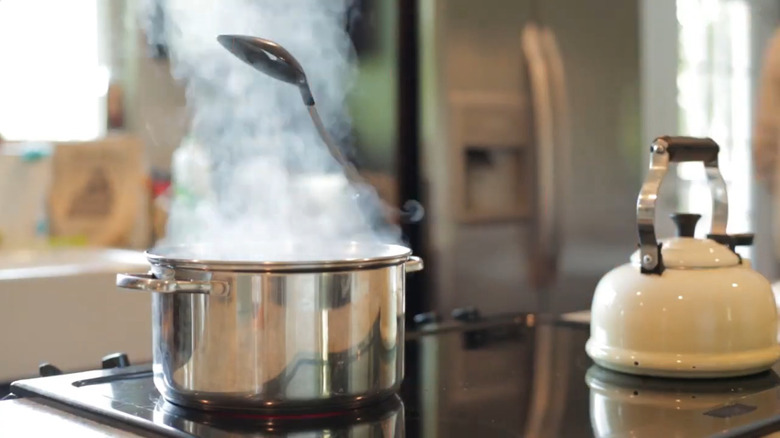
Arguably one of the worst parts of cooking is all the dishes that you have to do afterwards, so anything that can reduce the amount of dishes is worth a shot. One extra dish that may be superfluous is the spoon holder that you place next to the stove to hold the stirring spoon and keep drips off the counter.
Next time you cook with a pot and a big wooden or silicone spoon, tap off the excess liquid, then insert the spoon's handle into the handle of the pot and let it rest at a 45-degree angle, with the spoon over the mouth of the pot. The friction should hold it securely enough for you to leave it while the food cooks and go work on the next part of the recipe.
We admit that this hidden feature may not have been intentional, but it should work for most spoons and most pots that don't have a solid handle. Of course, it may not be the ideal solution if you've got a runny soup that would drip down the spoon onto the handle. This will also heat up the spoon handle a bit, perhaps too much if you're cooking at a higher temperature. It may be more ideal for when the spoon holder isn't immediately within reach and you just need a quick way to set the spoon down while you do something else. In my experience, though, it's been a great life hack that keeps me from constantly washing the spoon holder.