How To Turn Off Instagram Map, The Social Network's New Location Tracker Feature
A new feature that Meta recently added to Instagram has been causing some to panic. The photo-sharing app has had mapping features for many years now, but it recently added the Instagram Map, which allows users to share their live location. It landed badly for many and quickly became another unsettling reason to avoid Instagram, with users worried that the feature might have doxxed them to their followers. Thankfully, the location sharing can be disabled easily — but the uproar over its addition comes as no surprise.
It's strange that Instagram has added a feature focused on sharing private information with close friends. For years, Meta has been steering the platform away from interpersonal relationships, with Instagram making unpopular changes to promote algorithmic discovery on the home page. That means users are now seeing fewer posts from their real-life friends and following more total strangers than ever before. No wonder users are concerned that those total strangers will now be able to see where they live.
Thankfully, the Instagram Map is turned off by default, and users must enable it to be visible. So if you're just finding out about this feature and are concerned you've been unknowingly broadcasting your whereabouts to the world, there's no need to panic — you don't need to turn it off. And, if you turn it on, you can configure the privacy settings to determine who can see your location. Here's how to enable or disable the Instagram Map and set it up to suit your preferences.
How to find Instagram's Map feature
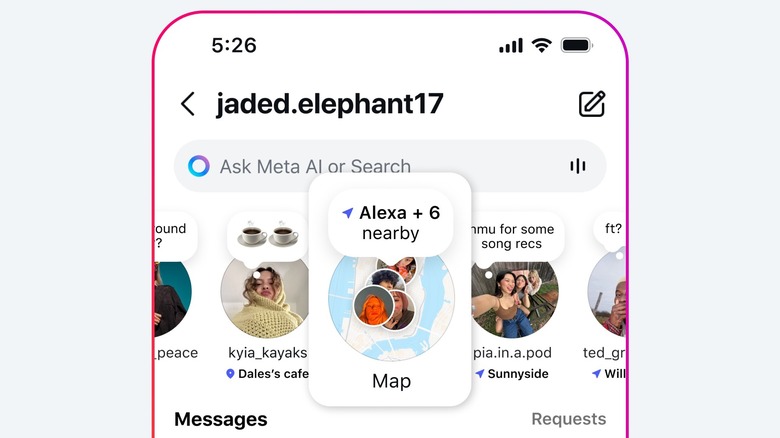
Instagram Map is opt-in by default. Other users cannot see your location until you turn it on, but it may be an Instagram setting you want to change, regardless. To access the Instagram Map, open Instagram and navigate to the home tab represented by the house icon in the bottom left of the screen. From the home tab, open the Direct Messenger by tapping on the chat icon in the top right, or by swiping left. The Instagram Map shortcut is somewhat confusingly located in the notes area of the interface — the row of enlarged profile pictures with small bits of shared text located underneath the search bar. You may need to scroll to the end to find it if many of the accounts you follow are currently sharing notes.
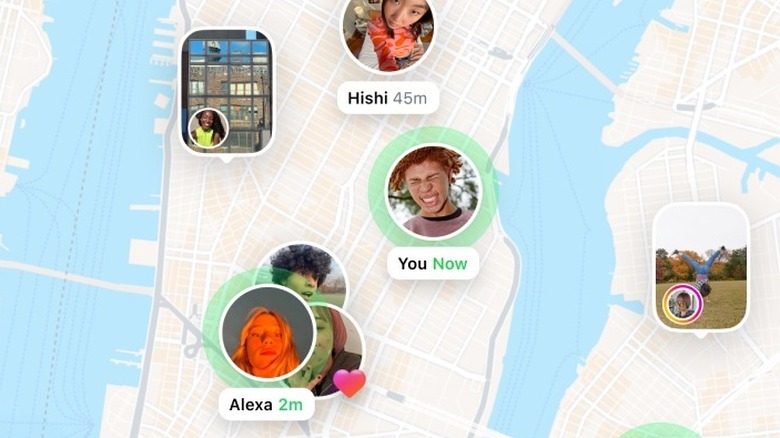
You'll see a circular, zoomed-out view of your location with the word "Map" underneath, along with your sharing status. If location sharing is disabled, you'll see the words, "Not sharing." Tap on the shortcut to open the Map, and you'll see the location of anyone who has chosen to share theirs. If anyone you're following has tagged their location in a recent post or Story, you'll see that media pinned to the map, too, whether or not they're sharing their live location with you. This will also apply to things you post; however, to be clear, your posting location will remain private unless you manually add a location tag.
Configuring, enabling, and disabling Instagram Map

If you wish to share your location on the Instagram Map, navigate to the map using the above instructions, then tap the gear icon in the top left of the screen. You can choose to share your location with your Friends — people you follow and who follow you back — or with your Close Friends. There's also an option to share with specific people. To set this up, tap "Only these friends," then tap the smaller Choose People button underneath. You'll enter a screen where you can choose who can see your location. To disable sharing entirely, choose "No one."
You can also hide your location from specific people and set up geofenced locations where you won't be visible. These options let you maintain strategic privacy even if you're sharing your location. To set up either, tap the gear icon in the top left of the Instagram Map, then tap the three horizontal dots at the top right of the Who Can See Your Location menu.
Tap "Hide From" to create a list of people to block. These users will only be blocked from seeing your location on Instagram Map, but will otherwise be able to interact with you. To set up geofenced privacy areas, tap "Hide Places." Drag the map to place a pin on the area you want to geofence, then drag the slider to adjust the radius. Tap next, then give the place a name (for example, "home"), then tap Done. You can set up additional hidden places by tapping the Add button in the top right.