How To Insert A Checkbox In Microsoft Word

A lot of people use apps like Microsoft Word to create documents with interactive checkboxes. For instance, you'd need to insert checkboxes if you're putting together a to-do list (and don't want to use a dedicated to-do list app) or a terms and conditions document. After all, there are few things more satisfying than checking off tasks as you go and feeling that sense of accomplishment build. With Google Docs, you can add a single checkbox just by typing two square brackets ( [] ) and hitting the spacebar. Similarly, you can also click the "Checklist" button in the toolbar, and an interactive checkbox appears instantly. On the other hand, if you'd like to add a checkbox in Apple Notes, all you need to do is click the "Checklist" button.
Naturally, you'd think Microsoft Word offers a similar one-click solution. Strangely enough, making a checklist in the web version of Word is extremely simple. You can insert a checklist from either the ribbon or using a simple keyboard shortcut. If you go the former route, head to the "Home" tab, navigate to the "Paragraph' group, and click the "Checklist" button. If you prefer keyboard shortcuts, just press Ctrl/Cmd + , (comma), and a checkbox will be added instantly.
The desktop app on both Windows and macOS, however, makes you jump through a few hoops to insert a proper interactive checkbox. Ultimately, the process isn't as simple on the app as it is on the web version. Fortunately, once you know where to look, inserting a checkbox in Microsoft Word isn't too difficult. Whether you want a printable checkbox or an interactive one you can tick off digitally, Word gives you both options.
How to insert an interactive checkbox in Microsoft Word on Windows or macOS
The interactive checkbox option is hidden within the Developer tab on both Windows and macOS. Strangely, the tab itself isn't displayed by default. So, the first thing you'll need to do once you've opened the Microsoft Word application on your device is add the Developer tab to the ribbon.
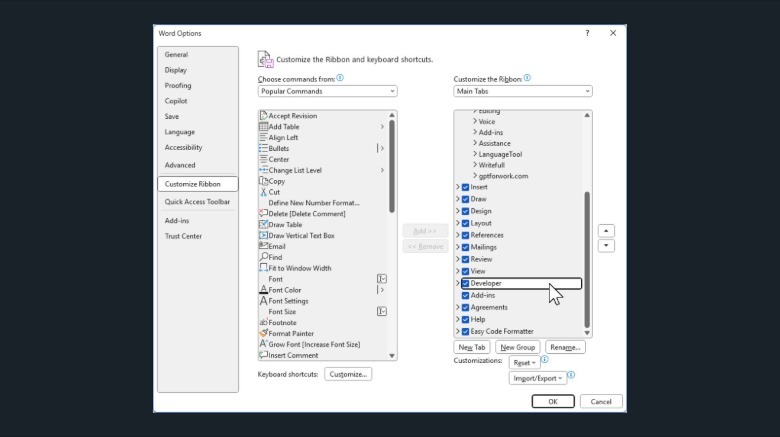
On Windows, open a Word document, then click the "File" tab at the top-left corner. Select "Options" from the drop-down menu that appears, and click "Customize Ribbon" from the sidebar on the left. You'll notice a dropdown menu under the "Customize the Ribbon" section. Select "Main Tabs" in the dropdown (if it isn't already selected), then check the box for "Developer." Finally, click "OK", and you'll now see a Developer tab in the top ribbon.
 Mahnoor Faisal/SlashGear
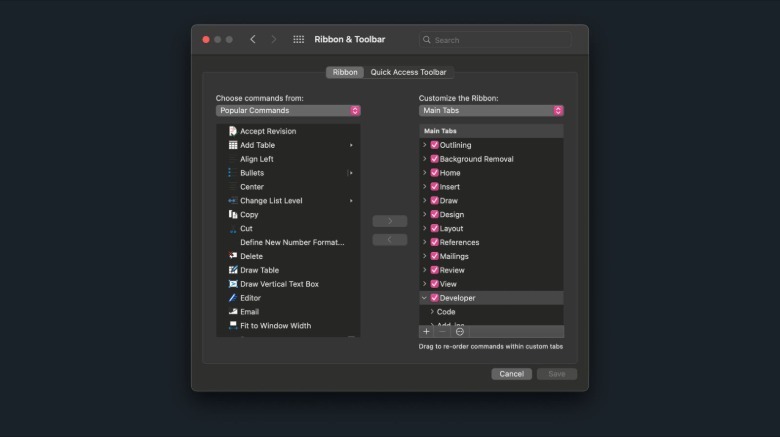
On macOS, click "Word" in the top menu bar (next to the Apple logo), and select "Preferences...". In the Word Preferences window, select "Ribbon & Toolbar" under the Authoring and Proofing Tools header. Expand the dropdown under "Customize the Ribbon" if it's not already set to Main Tabs, then check the box next to "Developer." Click "Save", and you'll now see the Developer tab in the ribbon at the top of Word.
 Mahnoor Faisal/SlashGear
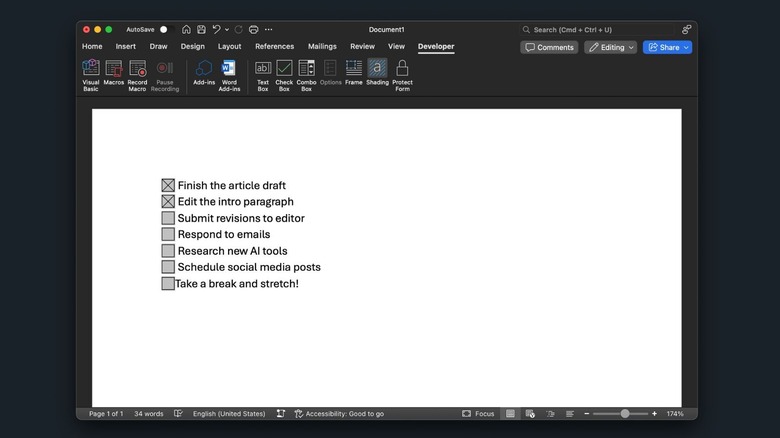
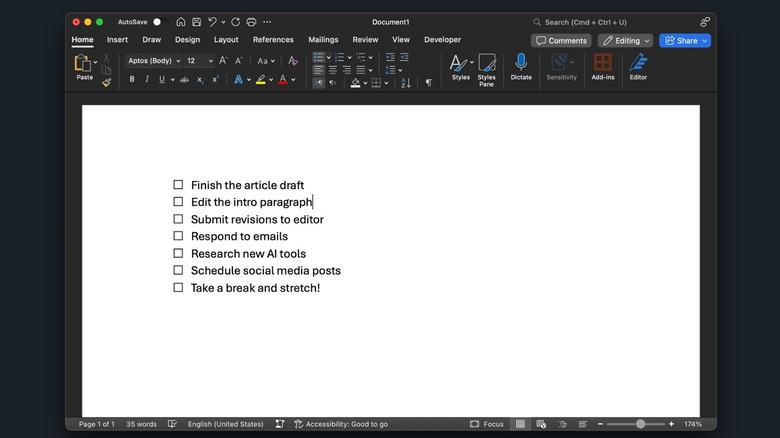
Though the process of enabling the Developer tab is slightly different on Windows and macOS, what comes next is essentially the same. Once the Developer tab is visible, place your cursor where you'd like to insert a checkbox, and switch to the "Developer" tab in the ribbon. Then, click the "Check Box Content Control" button (denoted by a small box with a checkmark inside). This will insert an interactive checkbox at the cursor's position.
How to insert a printable checkbox in Microsoft Word on Windows or macOS
If you're creating a printable document that you'd like to add checkboxes to, like a physical survey form or a checklist you plan to fill out by hand, using Microsoft's bullet list feature instead of the interactive checkboxes is likely a better idea. Doing so will save you the hassle of messing around with the Developer tab, and still give you a neat-looking checklist that'll look good on paper.
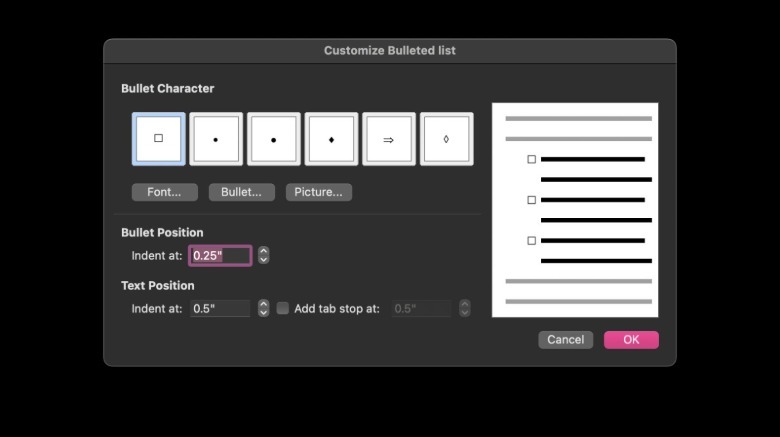
To do so, switch to the "Home" tab and expand the dropdown next to the Bullets button. Now, select "Define New Bullet." On macOS, click the "Bullet" button under the "Bullet Character" header.
 Mahnoor Faisal/SlashGear
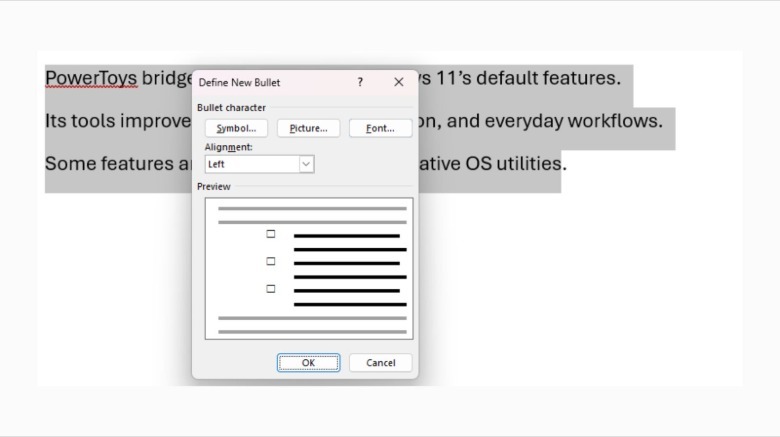
On Windows, click the "Symbol" button under the "Bullet Character" header.
 Mahnoor Faisal/SlashGear
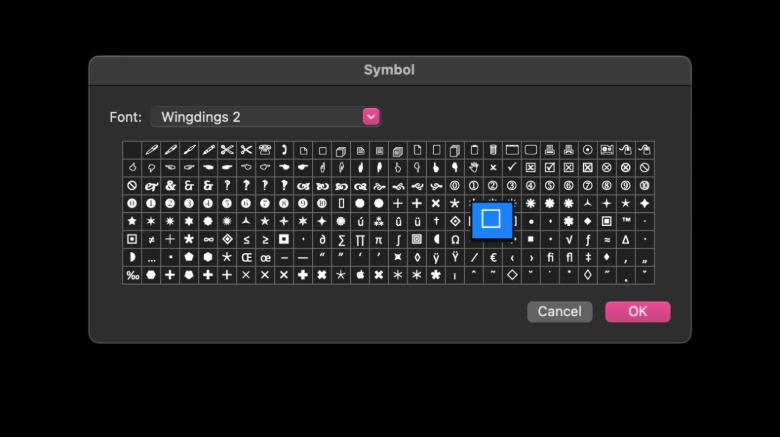
Once the "Define New Bullet" window appears, expand the dropdown next to Font and select "Wingdings 2." Now, all you need to do is go through the options and find the empty square symbol. I found it in the fifth row on macOS.
 Mahnoor Faisal/SlashGear
Once you've found it, select it, click "OK", and then "OK" again to confirm the bullet style. Now, every time you'd like to create a printable checklist, all you need to do is hit the bullet list button, and Word will automatically apply your custom checkbox style.
Once you've set it up, you won't have to go through the entire process again. The checkbox will stay saved as your default bullet style until you change it. Keep in mind that these checklists are purely visual. They aren't interactive, meaning you won't be able to tick them off digitally. But if you're printing a document or just need a clean checkbox-style layout to make your Word document look even better, this method works perfectly.