7 Photography Techniques For Mastering Iconic Film Looks Using Digital Gear
We may receive a commission on purchases made from links.
With smartphones and advanced digital cameras, it's absurdly easy these days to just point and click and capture a perfectly sharp, vibrant image. However, that simplicity means that standing out as a photographer is now more difficult than in the past, when the barrier to entry was lower. Good composition may still remain a powerful tool for those with a good eye, but it certainly helps to have some tricks in your camera bag to set yourself apart from the masses and their low-effort snapshots.
There's a lot to be said for the unique and nostalgic look inherent to different filmstocks, or for the visual impact of an extremely large image sensor, an optically flawed lens, or even just keeping your shutter open for as long as possible to capture motion over time. There are many ways to achieve creative and old-timey effects, from specialized filters and lenses, to simple tricks you can pull off with a little ingenuity and basic photo editing software.
PolarPro provided a number of products to test for the purposes of this article.
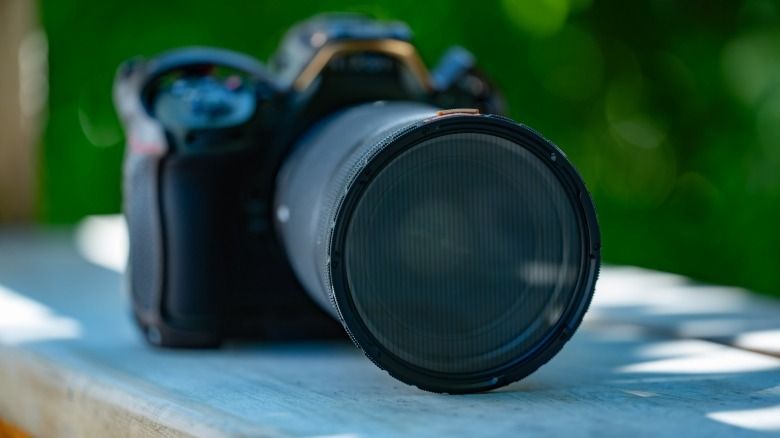
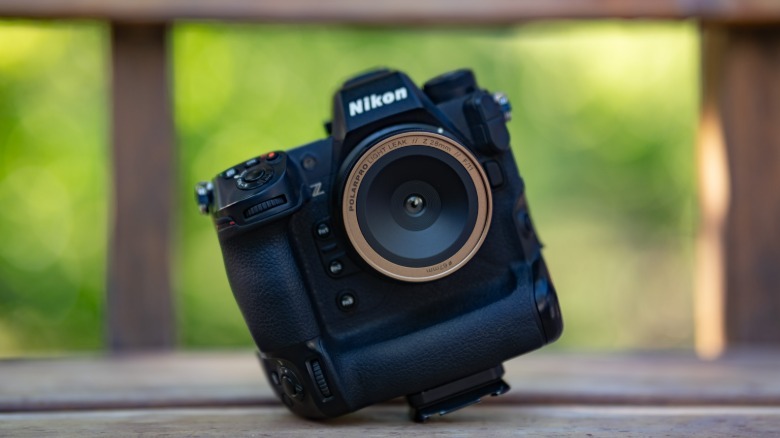
PolarPro CineGold Filter
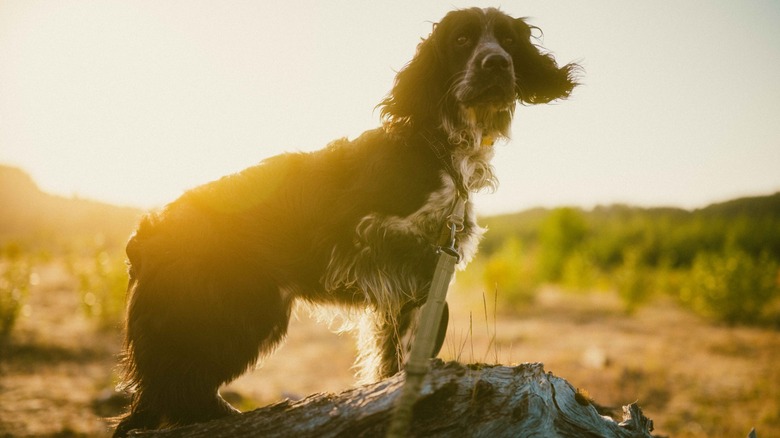
This new filter from PolarPro is essentially a ½ strength gold mist filter that mimics the effect of Kodak Portra 400 film, with the help of additional digital presets which are applied in post processing. This makes it something of an interesting hybrid of optical and digital technology that I haven't seen before, and it delivers striking results.
 Andy Zahn/SlashGear
The filter itself sparkles when you angle it into a light source, and delivers an effect which softens the image slightly and produces a golden glow. This is very subtle, and it produces a pleasing and distinct effect without severely impacting image quality. However, that's just the first part of using this filter, as the next step begins when you get home to edit your footage on a computer.
 Andy Zahn/SlashGear
The presets for Adobe Lightroom and Premiere Pro are easy to install and deliver distinct looks. The Portra 400 Cine filter is striking and bold, whereas Golden Hour delivers a more mild flavor of the same filter, and Gold Fade is a flatter, more faded look (as the name implies). The Dream Chrome preset brings a very different look with cooler temperatures overall, which really serves to isolate golden highlights so that they stand out in the picture.
 Andy Zahn/SlashGear
Overall, this filter can be used to deliver a striking filmlike effect when used in combination with the included presets, or on its own to add a really pleasing subtle look to your images. I particularly enjoyed the effect produced by shooting with it into a strong backlight.
 Andy Zahn/SlashGear
The CineGold filter is available in a number of different screw-in filter sizes, as well as 4X5, and in PolarPro's magnetic-locking Helix filter system. They are available starting at $69.99 from PolarPro's online store.
Black mist offers an alternative effect for film emulation

Where gold mist filters such as the CineGold create a warm glow, black mist offers a more color-neutral softening and glow effect that retains the darkness of shadows better. I used the McKinnon 135 series black mist filter to set the groundwork to later fine tune with film emulation presets in Lightroom. I'm really happy with the results I achieved in a similar fashion to utilizing the presets provided by PolarPro to use with the CineGold filter.
 Andy Zahn/SlashGear
 Andy Zahn/SlashGear
 Andy Zahn/SlashGear
The 135 series, which is available starting at $99.99 on B&H Photo Video are basic screw mount filters, meaning that you won't be using it with the more versatile (but more expensive) Helix filter system. The 135 black mist filter I tested provided excellent results, and it ships with a filter canister system with front and rear caps that screw onto the filter. Once attached to my lens, I just used my usual Nikon lens cap.
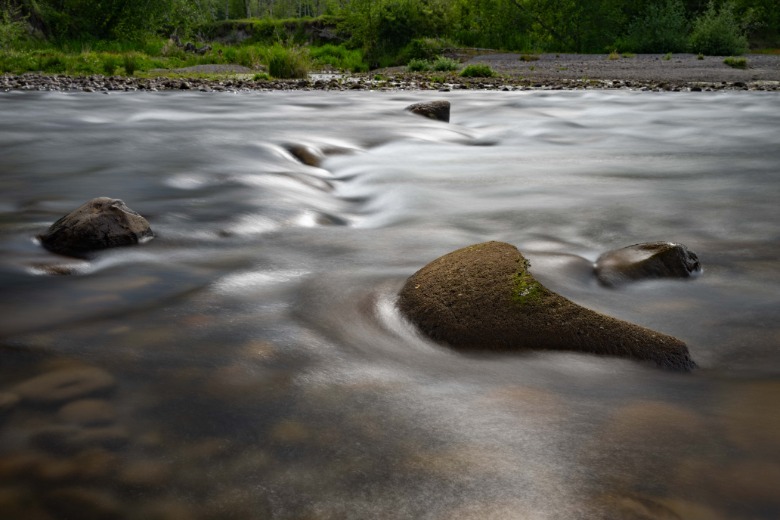
Long exposure photography
Photography is the action of catching light, and one way to control how much light enters your sensor is how long the shutter is open. However, the length of your exposure also has significant impacts on the look and feel of your image, in addition to the techniques necessary to capture that image. When it comes to long exposures, achieving the associated effects often becomes a problem of choosing how to stop light from reaching the sensor. The first step is to stop your aperture way down and reduce your ISO to the absolute minimum. After that, it's time to get creative.
 Andy Zahn/SlashGear
The traditional way to do this is by using a Neutral Density (ND) filter, which is intended to block light without otherwise impacting the image. While these often add only a 2 to 10 stops, I personally prefer extremely dark filters such as the PolarPro ND64, or ND1000PL, which adds on a polarizing filter. One great thing about these filters is that they don't seriously impact the image with aggressive tinting or reduced sharpness, which is something you need to watch out for with ND filters.
The other method of producing long exposure effects is by using an in-camera digital ND filter such as is found in the OM System OM-3 and OM-1 Mark II, which emulates the effect of an ND filter through clever software processing. Yet another technique can be done after the fact using any camera, and involves capturing numerous short exposures and combining them together in advanced photo editing software. While these digital tools can be effective, they aren't as reliable as a real ND filter.
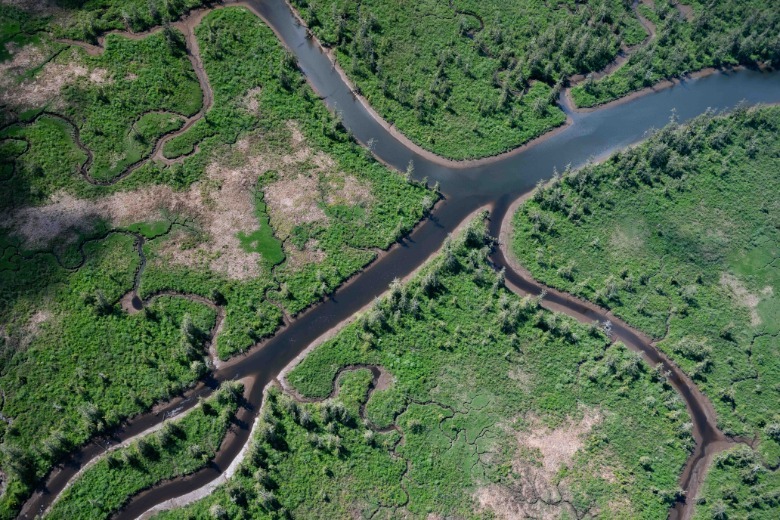
Cutting through the haze

When planning for a volunteer project with LightHawk and the Legacy Forest Defense Coalition to document forest practices here in Western Washington using aerial photography, I knew I'd need to deal with the challenges of shooting through the windows of a small airplane and cutting through atmospheric haze and distortion. To accomplish this, I chose to use a PolarPro circular polarizing filter.
 Andy Zahn/SlashGear
Polarizing filters work to cut down on glare and reflections, as well as to reduce haze and darken blue skies. Using this, I was able to record much higher quality imagery straight out of the camera than I would have been able to achieve with greater difficulty in the challenging conditions of a small plane.
 Andy Zahn/SlashGear
However, further editing is still necessary in post-processing to achieve the final result, and here the dehaze slider in Adobe Lightroom is definitely your friend. This is my absolute favorite single tool in post-processing software, though I should caution that you should be sure to use it in moderation. Often only a touch of it is necessary to achieve the desired effect. I then go in and tweak exposure sliders and curves to dial in a clear, natural effect.
 Andy Zahn/SlashGear
As with the two-step film emulation using physical filters and digital presets which we have discussed, using a polarizing filter and then enhancing it with digital editing techniques often delivers a particularly striking final product. With that said, there are arguments for using a polarizing filter and getting the shot entirely in-camera, and also for going minimalist with your setup and more heavily relying on post-processing.
Chasing that cinematic look
So far we've mostly talked about mist filters as they pertain to still photography and emulating classic 35mm film types. However, mist filters are also key to creating a softened cinematic look for videomakers. The CineGold filter is a legitimate option for videography, as is the McKinnon 135 series black mist filter, but what I would actually recommend is one of PolarPro's variable ND filters which are available in hybrid versions that integrate black mist.
This combination delivers two characteristics which benefit filmmakers. With the PolarPro Helix 3-5 stop or 6-9 stop VND/mist filters, you get that softened film look from the mist, combined with the vital exposure control of a variable neutral density filter. Keeping your exposure correct while recording video is important.
 Andy Zahn/SlashGear
As a general rule, you want to keep your exposure at precisely double your shutter speed. This means if you're recording at 24fps you want an exposure of 1/48, or at 30fps you'd want a 1/60 exposure, and so on. The tricky part comes if you also want to use a wide aperture in bright conditions. A neutral density filter adds another level of exposure control so that you can achieve the correct exposure while simultaneously choosing a brighter aperture. For example, I love filming with my Nikon Z 35mm f/1.2 S lens wide open, but if I want to do that during daylight and retain a good framerate, then a strong ND filter is pretty much required unless I'm good with an unnatural looking high framerate. Using a variable ND filter enables even greater control over exposure than a static ND filter.
Anamorphic effects without anamorphic lenses
I've reviewed anamorphic lenses before here on SlashGear, and they deliver a distinct and highly desirable look to the images and video they produce. However, I don't personally own one because of the high cost associated with these complex optics. If you're like me and can't quite justify shelling out for a pro grade anamorphic lens, there are filters capable of emulating certain elements which typify anamorphic lenses.
 Andy Zahn/SlashGear
 Andy Zahn/SlashGear
Goldmorphic and Bluemorphic filters from PolarPro are designed to provide that classic horizontal lens flare with either a gold or blue tint. Now, you're not getting the full anamorphic look with a filter, as the other optical effects associated with these lenses are not replicated by the filter, but if what you're looking for is that prized lens flare, then this is an affordable, easy way to achieve it. It is important to note that the effect is much more amplified than you would expect from a real anamorphic lens, so be prepared for significant flaring, and that there is an impact on the appearance of bokeh if you look closely.
Introducing light leaks into your photos

There's something about a photo captured with an old, cheap, low-quality camera that evokes a nostalgic feel. It's as if such flaws mirror the haziness of distant memory, so our mind finds some nostalgic comfort in the familiarity. It is also influenced by the fact that practically everyone has old faded photos framed or stored away from years long gone, and many of us grew up with inexpensive cameras delivering flawed, yet meaningful imagery. You can of course use old gear to achieve this, which is why there's a market for old digital cameras, but if you want a similar look using modern tools, there are products available for this purpose.
 Andy Zahn/SlashGear
PolarPro's Light Leak lenses do quite a good job of allowing your multi-thousand-dollar full frame digital camera to capture photos that look like they were shot on a camera you might have purchased from the grocery store in the 90s. Available in 16mm, 28mm, and 50mm variants, the mechanism employed here is really quite interesting. There is no focus ring or adjustable aperture; everything is in focus from 1 meter to infinity. The ring around the lens actually controls the angle and volume of light entering the lens from the side. Push it out to increase the light leak, and turn it to control where the light is leaking. This produces a number of somewhat unpredictable results, all of which would be normally undesirable, but here are intentional.
 Andy Zahn/SlashGear
Ultimately, these are relatively inexpensive ($129 on Amazon) and fun lenses that are a great tool for anyone wanting to recreate the look of retro gear on a limited budget using modern photographic tools. They're also really small and compact.
Emulating large format on a full frame sensor
One of my favorite things to do is to push the boundaries of what a smaller sensor can achieve. Specifically, I use various tricks to achieve a look similar to medium and large format sensor cameras using full frame or even smaller sensor sizes. The easiest, most straightforward way to achieve this is to use a lens with a really bright aperture that can create extraordinarily shallow depth of field on a relatively small sensor. However, these are often very expensive, and there are limitations to what is physically achievable using optics alone.
 Andy Zahn/SlashGear
This is where digital trickery comes in. To start with, you will need photo editing software capable of automatically aligning and stitching photos together seamlessly. Personally, I use Adobe Photoshop to do this, in combination with Lightroom. Next, you need the right lens, as, while any will do (including a zoom lens on a point-and-shoot camera) using an optimal lens will make this easier and provide better results.
In general, the brighter the aperture, the better, but great optical performance with minimal distortion and vignetting is also advantageous. It's worth stepping down your aperture a bit to achieve a higher quality image. I also prefer moderate focal ranges for such tasks — between 35mm and 85mm is ideal. Take a series of photos with overlapping edges, like a panorama, but rather than aiming for a wide, short, panoramic format, you want to end up with something resembling a standard format image, but composed of many images. Just merge them together in photoshop as you would a panorama, and voila, you have an image which has the look of medium or large format. Note that this doesn't work with moving subjects.
Conclusion

The tools and techniques described here offer exciting ways to push your creative boundaries and create photographs that stand out from the crowd, something which is increasingly difficult nowadays. Once you have mastered the basics of composition and exposure, it's important to continue learning and mastering photography while developing your own unique flare.
Much with the stubborn, niche popularity of film photography, achieving filmic looks using both physical accessories and digital tools is all about the process. It causes you to think more about the shot you're taking and how you want it to turn out. When testing the CineGold filter, I found myself looking for strong backlit situations, which I would normally have avoided. Utilizing the filter, Lightroom presets, and tweaking the exposure a bit, I ended up with one of my all time favorite images. Similarly, with the Goldmorphic filter I sought out subjects I might never have thought to capture.
That same boundary-pushing quality is what serves to recommend all the gadgets and digital tricks we've discussed here. The worlds of analog and digital tools need not be at war with each other. They are complementary forces when utilized as a medium through which to hone your own creativity and skill as a photographer.