What It Means If Your Raspberry Pi Won't Boot Up (And Some Ways To Troubleshoot)
We may receive a commission on purchases made from links.
Raspberry Pi is a tinkerer's dream. The tiny computer is a DIY project that can become virtually anything you can think up, from a retro gaming console to its original intended use as a mini programming PC. Tiny and simple looking, the single-board computer is a versatile unit where the only limitation is your imagination. Or if it just stops powering on altogether., of course.
Seeing as the Raspberry Pi isn't some elaborate PC, you may think it easy to troubleshoot when it's not booting up. While it is a tiny piece of hardware, there are still multiple components to the Raspberry Pi that can fail. If you're struggling to bring your miniature PC back to life, whether you've converted it into a media center or use it as a filer server, there are a few things we can look at to get you booted up and running again.
As at least one fix may require you to touch the hardware physically, be sure to have a clean, static-free space readily available.
Faulty or incompatible power supply

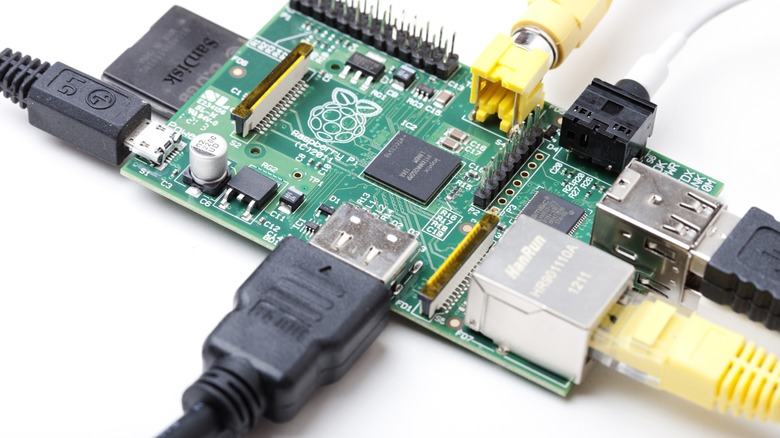
This is maybe the easiest error to fix. If your Raspberry PI isn't turning on, chances are your power supply isn't working. All you have to do here to rectify the issue is break out a different power supply. However, there are power requirements for each model of Raspberry Pi.
How you approach replacing the power supply will be based on the version of Raspberry Pi you're working with. For example, the Raspberry Pi 4 won't work with a supply from a Raspberry Pi 3. The Pi 4 introduced a USB-C input with a 5V 3A minimum requirement. Conversely, the Pi 3 had a micro-USB port with a 5V 2.5A requirement. However, the Pi 5 will work with a Pi 4 power supply, despite having a 5V 5A requirement. It just won't run optimally.
If you're handy and don't want to have to plug your Raspberry Pi in, you can rig a LiPo battery as an alternate power source. It's far from an official fix, and, as YouTuber Antalz shows in their how-to video, it can get a little complicated. Then again, the steps needed to convert your Pi into a more mobile unit may be worth it, depending on the application.
Sticking with conventional power supplies, though, you have options like with GeeekPi's 27W, 5.1V 5A adapter.
Raspberry Pi does have a red PWR LED indicator, which provides the following basic indicators:
- Consistent: Powered and operating
- Blinking: Voltage below 4.64V
- Off: Insufficient power to turn on
Display or HDMI issues
Not every boot issue is an actual boot issue. If your unit powers on but you're not getting any visuals, you may have a display error. The fix can be as simple as checking that the HDMI cable is properly plugged in. The Raspberry Pi 4 has two HDMI ports, and the one marked "HDMI0" requires a cable for the unit to project properly. On the Raspberry Pi 5, just resecure the table so it's fully inserted into the port.
If the display is still malfunctioning, consider a new HDMI cable. You don't need to buy anything fancy, just an Amazon Basics 4K HDMI cable will work. Unfortunately, if none of this solves your problem, you'll need to look at the display inputs to ensure they're functioning. Simply plug the monitor into another HDMI-compatible device and see if you get an image. If not, then you know the monitor is the problem.
If so, you can try forcing the display by:
- Insert the Pi's SD card into another computer and open "boot/config.txt" file
- Find either "#hdmi_force_hotplug=1" or "#hdmi_drive=2"
- Remove the # symbol
- Save the file and remove the SD card
- Plug the card back into the Pi
This should fix your display, but there's no guarantee. Since it requires you to alter a system file, this should be your last resort when all other methods fail.
Outdated operating system

With newer versions of the Raspberry Pi like the Pi 4 and Pi 5, you need to be running your device on the latest operating system. Whenever Raspberry PI OS is updated, you'll want to ensure you're running the most recent version. This allows you to keep up with software changes so your hardware runs optimally. Most importantly, it can also keep you from running into boot errors.
The PiHut sells convenient SD cards with Raspberry Pi pre-installed, but you can also use any SD card from around your house. To easily install the latest Raspberry Pi OS:
- Insert your SD card into your PC
- Download the Raspberry Pi Imager from the official Raspberry Pi site to your PC
- Run the Imager
With the Imager running, you will then:
- Choose the appropriate Raspberry Pi device
- Select the version of Raspberry Pi OS you need
- Select the SD card as the storage device
- Follow the prompts to write the new OS
- Eject the SD card from your PC
- Mount it onto your Raspberry Pi device
To install the new OS, navigate to the Terminal window and input "sudo apt install rpi-image." This should help boot your Raspberry Pi.
Low-quality or corrupted SD card
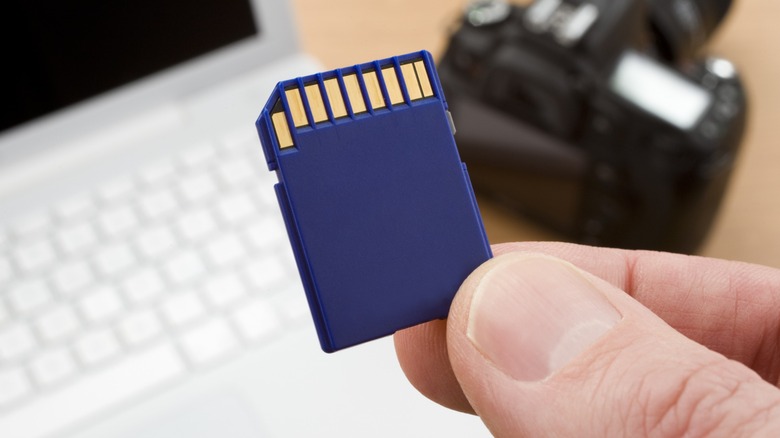
As you may have noticed, the SD card is a pretty important component of your Raspberry Pi. It's like the hard drive on any computer, housing the important programs and files that help run your device. If it's corrupted or of a low quality, chances are your Pi won't boot up.
If you suspect it's an SD card issue, the first thing to try is to re-mount it. Power off your Raspberry Pi, remove the card from its slot, push it back in ensuring it's completely installed, and power the device back on.
Alternatively, you may have a low-quality SD card. When shopping with a third-party retailer like Temu, you may be purchasing counterfeit cards. For example, the card may be labeled as 1TB, but it's 32GB on the inside. You should only purchase SD cards from verified sellers or directly from the manufacturer. There's no real fix if your card is counterfeit or low quality. You'll need to purchase a new one.
Finally, your SD card may be corrupted. Somewhere along the line of writing and reading files, it became unusable. Unfortunately, this can happen on a whim with no known cause. Thankfully, you may be able to fix the corruption with the Raspberry Pi Imager by following the same steps above or by formatting the card via your computer. Otherwise, a new card may be needed.
What do Raspberry Pi ACT LED indicators tell me?
In Raspberry Pi 4, there's an LED indicator labeled ACT to help guide you through the troubleshooting process. If none of the above fixes rectify your boot error, check the status of the LED lights. Chances are, they're flashing. The question is, how many flashes are you seeing?
The number of flashes coordinates with an error in the Raspberry Pi. There are 14 combinations of flashes to watch for, as they can come in a series of long and short bursts. Below is a complete list of known LED warning codes, with the first number being the number of long flashes and the second representing the number of short flashes:
- 0,3: Generic failure to boot
- 0,4: start*.elf not found
- 0,7: Kernel image not found
- 0,8: SDRAM failure
- 0,9: Insufficient SDRAM
- 0,10: In HALT state
- 2,1: Partition not FAT
- 2,2: Failed to read from partition
- 2,3: Extended partition not FAT
- 2,4: File signature/hash mismatch (Pi 4 only)
- 4,4: Unsupported board type
- 4,5: Fatal firmware error
- 4,6: Power failure type A
- 4,7: Power failure type B
For Pi 1, 2, and 3, the ACT only has one flash length. Its indicators are:
- 1 flash: Failed to find start.elf on boot device
- 4 flashes: Found start.elf but could not launch
- 7 flashes: Unable to find kernel.img on boot device
- 8 flashes: SDRAM not recognized