6 Android Developer Settings For Tech-Savvy Users To Tweak
Android has always offered users far greater control over the software experience, whether in the form of baked-in features or additions through third-party apps available on the Play Store. Things like changing icon packs, using live wallpapers, and floating windows all add to the fun of using an Android smartphone — but this is just the tip of the iceberg.
Even if you are moderately enthusiastic about technology, you'd be well aware of the prowess of Android's development community. One can replace their phone's entire operating system for a different flavor or tweak its kernel for optimal performance. While these power-user modifications are great, they do come with the risk of unlocking your phone's bootloader and thereby tampering with its warranty.
Fortunately, Android has a hidden compartment of goodies that offer some very interesting options to play around with. Aptly named Developer Options, this tab is home to experimental features, largely to be used by app and software developers to see how the system reacts in different scenarios. However, that doesn't stop us from enjoying the benefits these options bring.
How to enable Developer options on Android
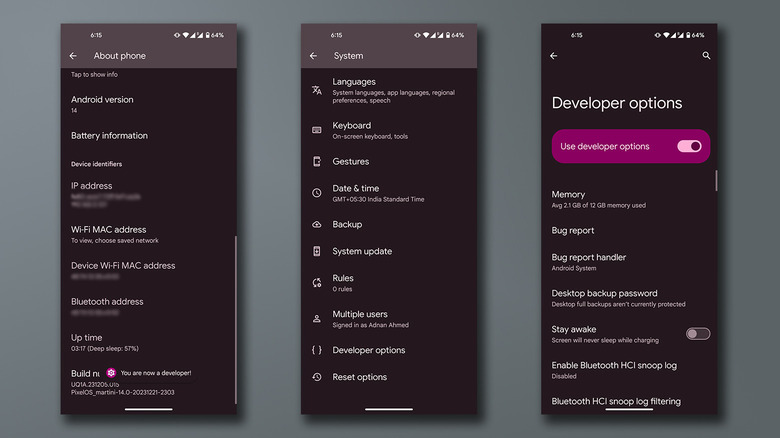
Enabling the Developer options menu is as fun as it is tricky. Navigate to Settings > About Phone, scroll down, and tap the Build Number label seven times. When prompted, enter your PIN or password, and you should see the exciting "You are now a developer!" toast — if only it were that simple, though. Different Android skins have the Build Number section tucked away in different menus, so be sure to dig around in your phone's About menu if you cannot find this label at first.
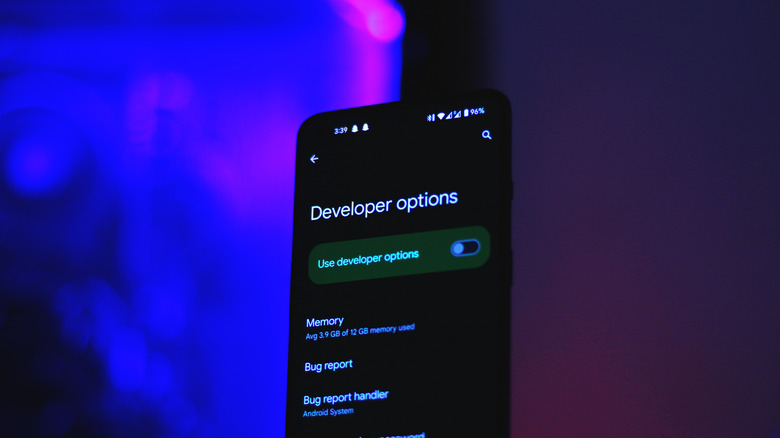
The freshly available Developer options menu can be found by navigating to Settings > System and scrolling all the way down. You'll notice this menu has more toggles and sub-menus than any other section of the Settings app on your phone. While none of these flags will cause irreversible harm to your Android device, staying away from the options you don't fully understand is recommended, or at the very least, reset them back to their original state after you've done exploring. You can rehide this Pandora box of experimental features by simply turning the User developer options toggle off as pictured above.
RAM usage stats for the nerds

The very first sub-menu within the Developer Options settings you see is the Memory tab. At a glance, it displays the average amount of RAM your phone has used in the past three hours. You can also see memory usage for the past six, 12, and 24 hours. The basic stats include your phone's total memory, the percentage that it has been using, and how much of your RAM is left.
Upon entering the Memory used by apps section, you get to see the average RAM usage by every app on your phone. This is a good way to find and dispose of memory-hungry apps that you don't use much. Tap the three-dotted menu and select Sort by max usage to see which apps use the most RAM on your phone — we're willing to bet it's Google Chrome.
You can also view currently running apps and services by navigating back to Developer Options and tapping the Running services sub-menu. This is Android's version of a task manager, where you can stop or report the apps running in the background. If your phone has been performing suspiciously slow, this tab is a good place to snoop around in and remove malware from your Android phone.
Enable USB debugging
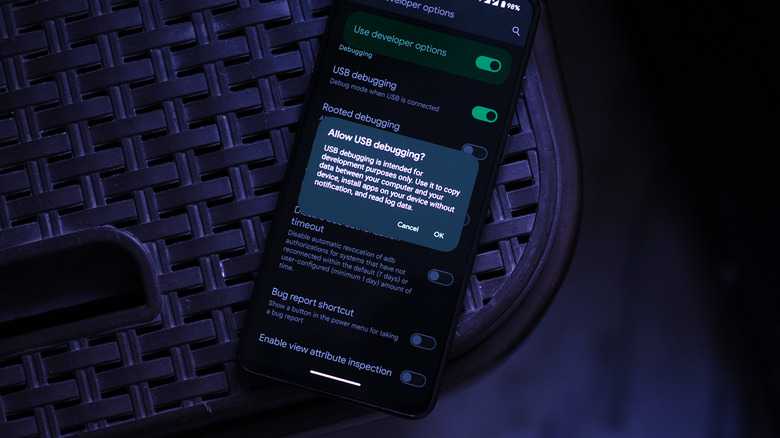
The USB debugging toggle is perhaps the most-used option and the reason why many people enable Developer options in the first place. For the uninitiated, USB debugging allows your phone and computer to talk to each other — but with greater permissions to alter the apps and services on your device. It is the first step in unlocking your phone's bootloader, which further unlatches a whole bunch of power-user features.
Apart from experiencing the many pros and cons of using a custom ROM on your phone, enabling USB debugging allows for other less invasive tweaks. These include making system-level changes using ADB commands without rooting your phone, removing bloatware, or sideloading multiple APK files at once.
Enabling the USB debugging Mode on your Android phone may make it susceptible to privacy and security risks. It is one of those settings you should leave turned off unless you plan on actively using the functionality it unlocks.
Speed up or slow down animations
Animations are what bind the user experience together while performing the most basic of actions like opening and closing apps or switching between them. Another thing these transitions accomplish is the illusion of zero load times. Depending on your phone's hardware, though, you might want to spruce these animations up to allow for an even snappier experience.
After a few scrolls down in the Developer options menu, under the Drawing section, you'll find three animation scale options:
- Window animation scale changes how quickly different app windows open and close.
- Transition animation scale is responsible for handling the speed between various actions such as swiping between screens and switching between apps.
- Lastly, the Animator duration scale controls the overall animation speed throughout the user interface.
By default, all three of these options are set to 1x scale. Lowering them to 0.5x will speed things up while using the higher scaling options will slow things down. You can play around with different combinations to find your sweet spot.
Change default USB behavior
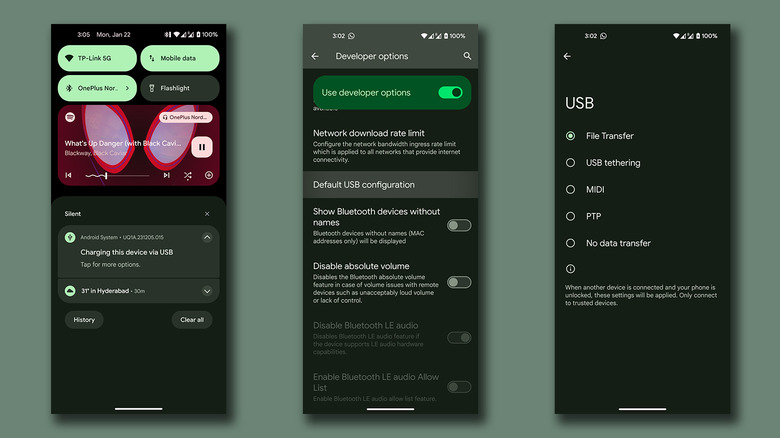
Nothing is more annoying than connecting your Android phone to your computer specifically to transfer files, only to start charging at a whopping 0.5 amperes. Upon connecting your device, you are required to swipe down to access your notifications, tap the prompt that shows up, and choose from a list of USB configurations to switch to the file transfer mode. Thankfully, in the depths of the Developer options menu, there is a way to change this behavior.
- Open the Settings app and navigate to System > Developer options.
- Scroll down to the Networking section and tap the Default USB configuration option.
- Select File Transfer.
Now, whenever you connect your phone to your PC or laptop, you'll be ready to transfer files immediately. If you usually use your Android phone as a hotspot, you can even set the default USB configuration to trigger tethering instead of media transfer.
Add an FPS counter
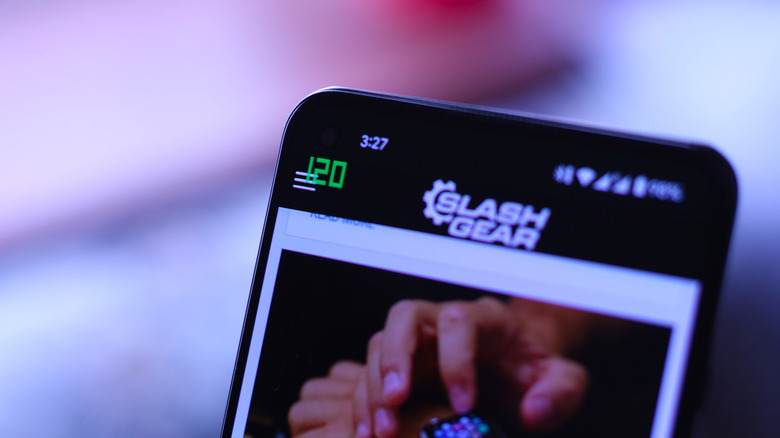
Smartphone displays are getting increasingly more impressive by the day. The introduction of butter-smooth 120, 144, and even 165 Hz displays has made traversing around the UI a pleasure. First-person shooter games for Android have been a huge success, and these high refresh rate screens enable competitive play on handhelds. But not every game supports the sky-high numbers to match your display — and even if they do, your phone's hardware might not be able to power all those frames.
When enabled, the Show refresh rate toggle in Developer options displays a sticky FPS counter at the top-left of your screen. Depending on your phone's specifications, you might see this number plummet as you scroll through heavy apps or play games. Do note that not every game can transfer this information correctly, so while the counter might still display 120, the actual frame rate might be different. Still, this is the quickest way to check whether an app or game is switching to the slower 60 Hz refresh rate setting.
Certain phones also have the option to force peak refresh rate in the developer options, if not in the display settings. Be cautious, though, since enabling this will almost definitely take a hit on your phone's battery life.
A rapidfire of riveting options
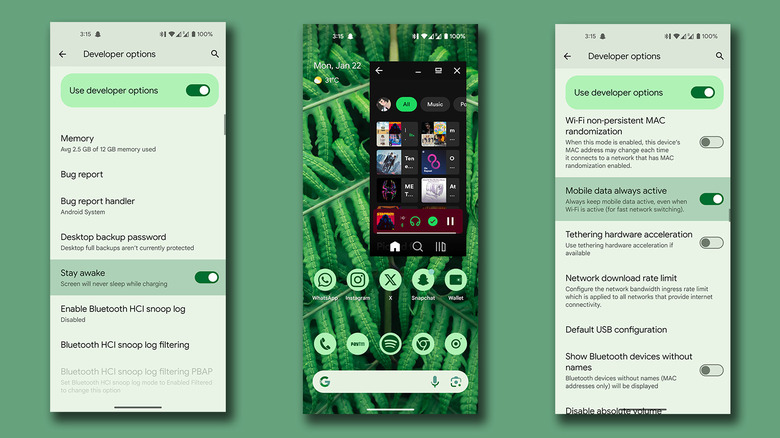
There are about a gazillion other things you can do using the tweaks and toggles found in the Developer options menu — some more interesting and useful than others. While it would take ages to cover all of them in detail, here are a few goodies worth exploring:
- Maybe you have a purpose for a smart digital clock that's always on, and you just so happen to have an old Android phone lying around — in this case, Stay awake is a great way to force your phone's display on while it's charging. But be wary when using this on a phone with an AMOLED display since prolonged use will cause burn-in.
- Forcing your cellular data to be always on is also worth trying. While this won't use your mobile data and your Wi-Fi at the same time, switching between one or the other is almost instantaneous. It's no surprise, though, that this will cause your battery to drain quicker.
- Starting Android 10, you can turn the Enable freeform windows toggle in developer options. This allows you to resize and position app windows anywhere on the screen on a few supported apps.
- As a harmless prank, try toggling the Show surface updates option on one of your friend's phones and see their heart miss a beat.
If you've cluttered the screen with too many options, don't worry — flicking the master Use developer options toggle off will reset all changes.