5 Of The Best Raspberry Pi Projects For Beginner Coders
We may receive a commission on purchases made from links.
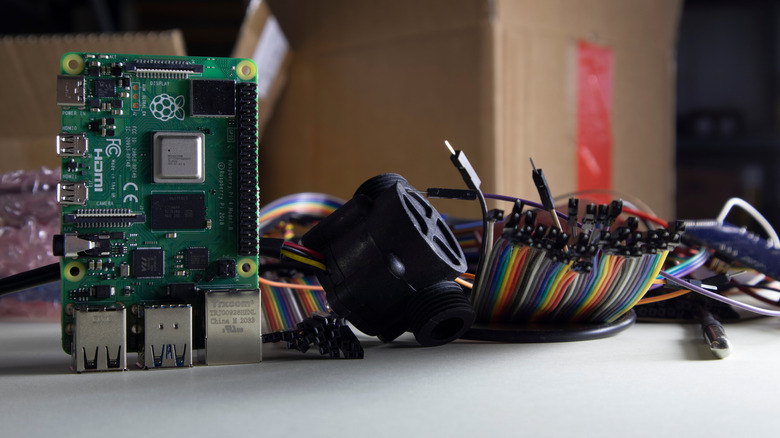
Even if you're new to the electronics and programming world, you've definitely heard of the Raspberry Pi and how it's used for a host of complicated and mind-boggling projects, from the multi-board 3D Scanner to the photo booth that only takes a picture when you look scared.
However, while the power of the Raspberry Pi can indeed handle most of the complex and high-level projects you can think of, it's worth noting that it isn't exclusively made for intricate applications. This single-board computer also offers the perfect opportunity for beginner enthusiasts to delve into practical coding and electronics.
It's an excellent starting point for those new to coding, as you can find an abundance of official tutorials and third-party projects online. If you're on the lookout for fun and beginner-friendly Raspberry Pi projects with some degree of coding required, these are five of the things you can try making at home.
Mood Indicator
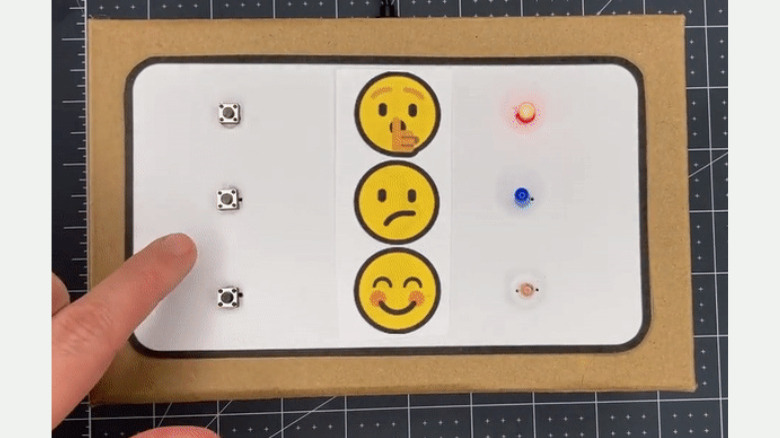
If you're looking for a Raspberry Pi Pico project that's easy to build and easy to code, you can't go wrong with the Mood Indicator. It's a fun way to dip your toes into Raspberry Pi programming without feeling too overwhelmed. What this project does is indicate your current mood using LEDs and buttons, two of the most readily accessible and easy-to-use components out there. There's flexibility in how you can set up the project — you can opt to use either multiple single-color LEDs or an RGB LED and either a single button, multiple buttons, a potentiometer, a crafted switch made out of kitchen foil and cardboard, or multiple crafted switches.
If you're after the shortest code, however, the best combination is an RGB LED and multiple buttons, which will only use about 20 lines. The coding part of the Mood Indicator itself is pretty straightforward. You just need to install the Picozero package from the Raspberry Pi Pico Tools app. Then, you can dive into writing some simple Python code that will change the color of the LED depending on which button is pressed. The code employs basic programming concepts like while loops and if statements, so it's easy to understand and edit if needed.
On the hardware side, the requirements are also simple. Get yourself a Raspberry Pi Pico, an RGB LED, your choice of switch (button, potentiometer, or crafted switch), jump wires, resistors, and something to house your project (could be a cup with a translucent mylar sheet or a simple cardboard box).
Indoor Automated Gardener
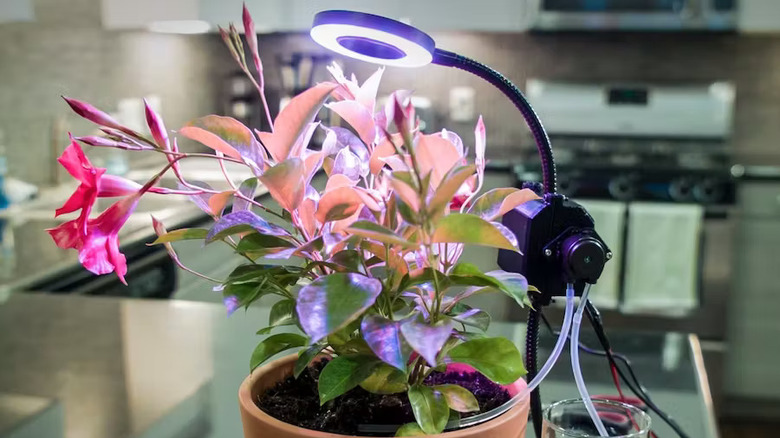
Want to practice your coding skills but need something more functional for your home? Then, you might want to check out this Indoor Automated Gardener. This project relieves you of plant care duty as it's designed to automatically water your plants and provide them with artificial sunlight, ensuring your green friends stay healthy without troubling you too much.
At the heart of the Indoor Automated Gardener are only three primary components: a Raspberry Pi Zero for controlling the system, a 12V peristaltic pump for the watering function, and a 5V grow light for simulating sunlight. Software-wise, this project is driven by less than 100 lines of basic Python code, which makes it somewhat challenging but still manageable for beginners. The primary goal of the code is to set a schedule for when the pump and light turn on and for how long. You'll be able to practice your knowledge of GPIO control, threading, scheduling, and function creation.
What's great about the code is its flexibility — you can edit the watering and light schedules to fit your needs and preferences. There are also a few schedule samples (like activating the components every hour or on a specific time or day) included in the given code that you can use as a reference. If you want to take the project a step further, you can incorporate a moisture sensor that activates the water pump once it detects the soil's moisture level is below a certain threshold.
Simple Home Security Camera
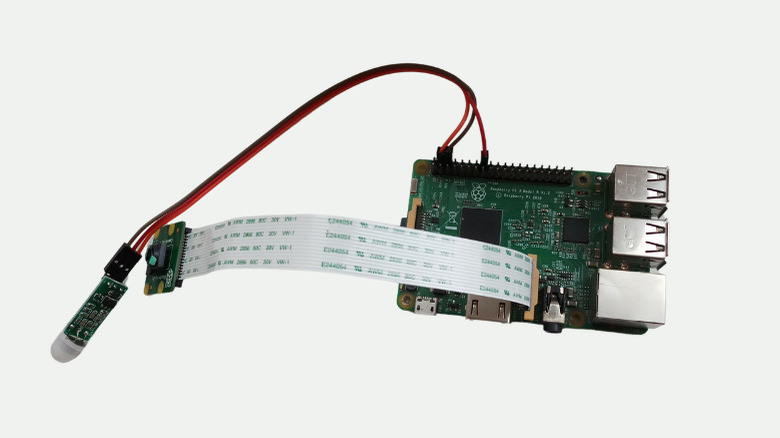
Everybody needs smart home security cameras nowadays, but with them costing upwards of $170 each, they're not exactly budget-friendly for many people. A more economical alternative is this Simple Home Security Camera, which you can make for around $70 (or less if you already have the materials sitting in your workshop). This DIY system calls for connecting a camera to a Raspberry Pi and adding a Passive Infrared (PIR) motion sensor to the circuit.
The system operates by detecting motion within the PIR sensor's range, typically up to 10 meters, with a 120 to 180-degree field of view. Upon detecting motion, the sensor sends the signal to the Raspberry Pi, which then triggers the camera to snap a photo of the scene, essentially capturing the intruder in action. This image is subsequently sent to your Gmail inbox to alert you of the potential threat. Aside from the necessary hardware materials, you'll need to configure two email accounts to set this project up: one that the system will use to send out the image and one on your phone where you'll receive the alert.
The Simple Home Security Camera project is powered by a concise and beginner-friendly Python script consisting of just 45 lines. Although it uses seven different packages, most of them are already pre-installed with Python, so you won't need to worry about complex installation processes on your Raspberry Pi. The entire code is also relatively easy to understand and can be deployed with minimal edits.
Motivational Quote Bot Display
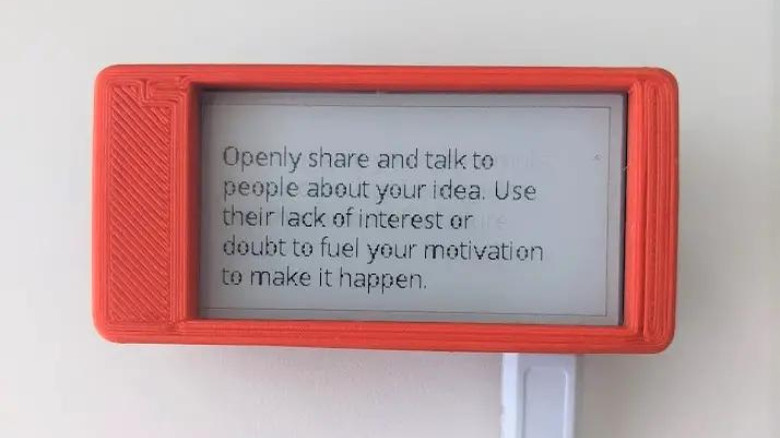
We've all been there — it's just 10 a.m., but you're already at the end of your energy battery. Yes, getting through your workday can feel like a struggle sometimes, and in such instances, you might be on the lookout for some motivation boost. If you're the type who finds inspiration in short, powerful messages, this Motivational Quote Bot Display is the perfect beginner-friendly Raspberry Pi project for you. The premise of the project is simple: display a random quote for every hour of the day. It uses a Raspberry Pi Zero W, paired with a Waveshare 2.13-inch e-paper display, keeping the hardware minimal and compact.
When it comes to the software, the system is run by Python code that primarily revolves around fetching a random quote from a JSON file, displaying it on the Waveshare, and updating the quote every 60 minutes. A significant portion of the script interacts with the Waveshare library, providing an excellent opportunity to learn about working with external libraries in Python. Additionally, you can try your hand at writing in JSON format, which is particularly useful for web applications and other projects using JavaScript programs. Writing the JSON file yourself means customizing the quotes to your liking, such as adding your own sayings, favorite celebrity quotes, or uplifting personal messages from your mom, best friend, or significant other.
Environmental Monitoring System

The Pi-Sense is a great entry-level Raspberry Pi project you can easily put together over the weekend. It was originally designed as a handy tool for scientists who need to monitor the environment where their experiments are done. However, it's also an excellent project to simply test out your Python skills and hardware knowledge.
The Pi-Sense monitors various environmental factors, including temperature, humidity, rain, flame, and even motion, which will then be displayed on an LCD screen for easy viewing. There's also a buzzer connected to the system to indicate the presence of rain, motion, and flame. With just this basic functionality, the Python code for this project is as short as 39 lines. This makes it easy to study for beginners, quick to implement, and readily scalable to more components if you please.
However, if you find this setup too basic and want to up the challenge, the project's developer also made two other versions: one with a computer interface and another using a web interface. The computer interface, powered by Tkinter, is essentially a desktop app. It shows the status of all five conditions (temperature, humidity, motion, rain, and flame), along with a graph of the temperature changes over time. This version has a slightly longer code, about 100 lines, but is explained by the developer line by line, so you can easily follow along. The web interface, on the other hand, uses the Flask framework, offering you the opportunity to dabble not only with Python but also with HTML.