How To Use Google's AI-Powered Magic Editor On Your Pixel 8
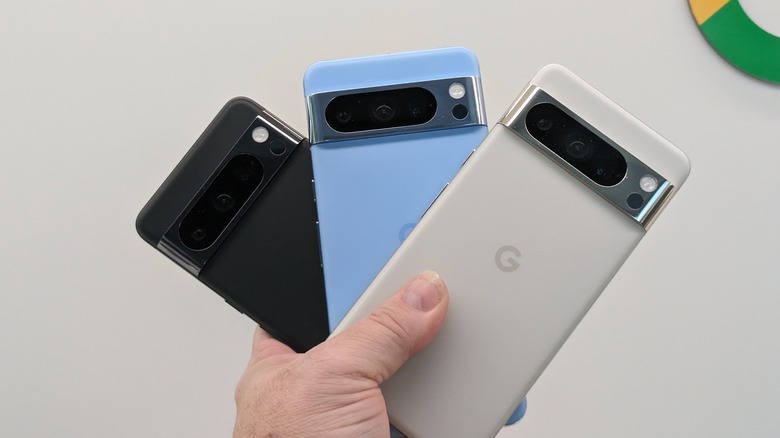
When Google launched the Pixel 8 and Pixel 8 Pro, it came with some pretty nice AI-powered features designed to help you capture your best memories. Among them was the Magic Editor. This feature uses onboard AI to help you manipulate the subjects in your photo to create the best memory possible. Not just the boring, old "this is what actually happened" that you get from a photograph.
With Magic Editor, you can separate subjects from the background, move them around, and make them larger or smaller, and when you're done, the Pixel 8 will use AI to fill in any gaps left behind. You can also use a magic eraser to remove unwanted subjects from the photo, such as people, animals, signs, etc. Magic Editor will remove those objects and use AI to fill in what it thinks will make the gap. You can adjust the sky by changing the light or adding or removing clouds. There's also a "stylized" which can turn your photo into a ... more interpretive work of art.
Basically, this is like a poor man's Photoshop on your phone. It can enhance your photographs to make them more ideal for what you'd like to remember rather than what happened. Possibly the most interesting part about this is you don't have to have taken the photo with the Pixel 8 or Pixel 8 Pro. You can use Magic Editor on photos taken years ago with an iPhone if you want. Of course, what you can do with a photo depends on the photo you take. Here's how to do it.
How to use Magic Editor
First, all photos that you want to edit need to be uploaded to Google Photos. Google uses cloud processing to manipulate the images according to your needs. So, to get started, make sure backup to Google Photos is turned on. From there, the steps are easy.
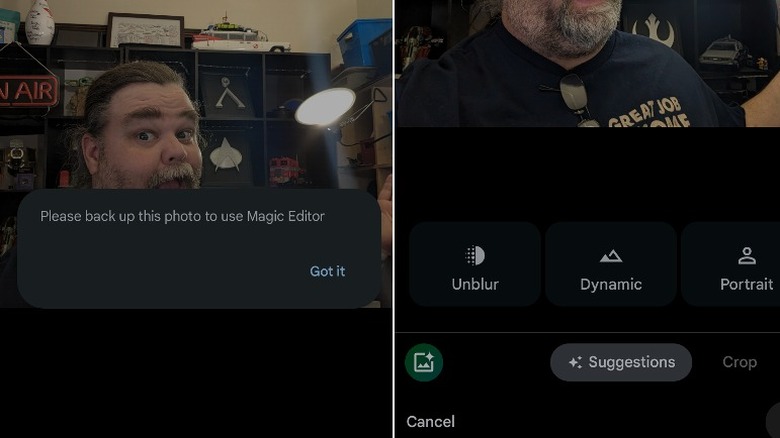
- Open the photo you want to manipulate either in the gallery through the camera app or in the Google Photos app.
- Tap Edit.
- A glowing Magic Editor button will appear on the left side of the toolbar above the cancel button. Tap that button.
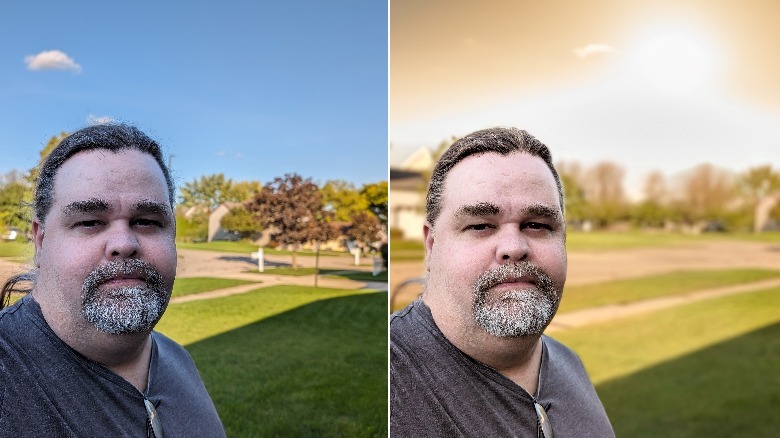
From here, there are two main things you can do. To start, press the wand tool in the middle below the photo. When you press that option, you'll be presented with the choices available for that photo. You can add portrait effects, similar to what you can do with the iPhone 15 Pro.
 Adam Doud/SlashGear
If you want to know what it would look like to take a selfie in front of a nuclear detonation, you can change the sky (if there is a sky visible in the photo) or change the scene into a stylized photo. All of this depends on what is detected in the scene. Sometimes, you'll only get a single option, or the magic wand tool won't be available at all. It largely depends on what's in the scene.
How to move items around in the photo
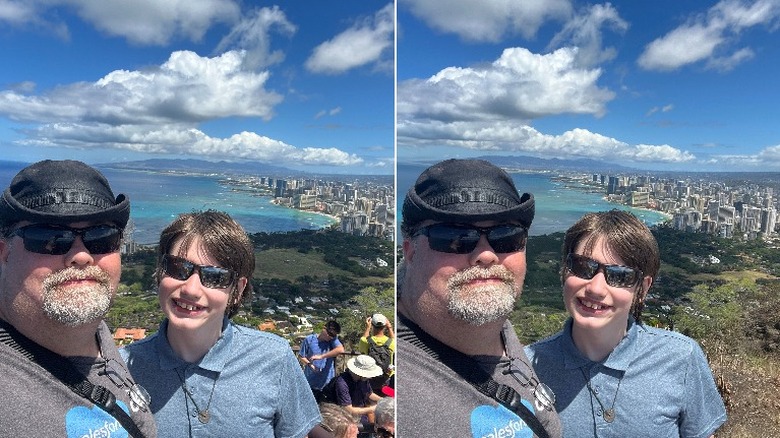
Regardless of what's in the scene, there will be elements that you can select, resize, and move around as you will. To do this, start by tapping or circling an element, like a person or something in the background. Once you select it, you can tap the Erase button to erase it or tap and hold on it to move it around and resize it.
Once the element you tapped blinks, you can drag your finger around to reposition it. You can also use two fingers to pinch or spread out depending on whether you want to make the selected element larger or smaller. When you move or erase the element and tap the checkmark in the bottom right corner, Google will use generative AI to fill in what used to be covered by that element, similar to Magic Eraser.
 Adam Doud/SlashGear
The difference here, and the nice thing about all the tools outlined here, is that Google will give you a few options to pick from. Or you can ask it to generate more if none of the options from the first batch were what you were looking for.
One major downside to this is you're not given the option to input text prompts for what you'd like to see. For example, you can't select a field behind you and ask Google to swap in a castle. But overall, Magic Editor is a really neat tool that only takes a few seconds and can completely transform your image into a preferred memory.