5 iPad Tricks Every Parent Will Be Grateful To Know About

iPads are invaluable if you're a parent, keeping your kids occupied when you've got an important work call, and on long car journeys and flights. iPads have also evolved to become excellent educational tools, with a wide range of age-appropriate learning apps and games available on the App Store. Whether you want your child to learn a new language, improve their math skills, or brush up on their reading, there's probably an app for that. If you have older kids, iPads are useful for homework and research projects as well.
Despite all their advantages, iPads are not without their dangers. Too much screen time can harm a child's development, cutting them off from social interaction and vital outdoor play time. Plus, since they give your child access to the internet, it puts them at risk of being exposed to explicit content, cyberbullying, and online predators. It's never a good idea to let a child use the internet unrestricted, and if you're worried about their online safety, you're not alone.
Most parents can't monitor every moment of their child's iPad usage, which is why Apple has several safety and parental controls. When enabled, these tools let you control your child's screen time, restrict access to web-content and apps, view their location, and prevent purchases without your approval.
Set up Screen Time to enable parental controls
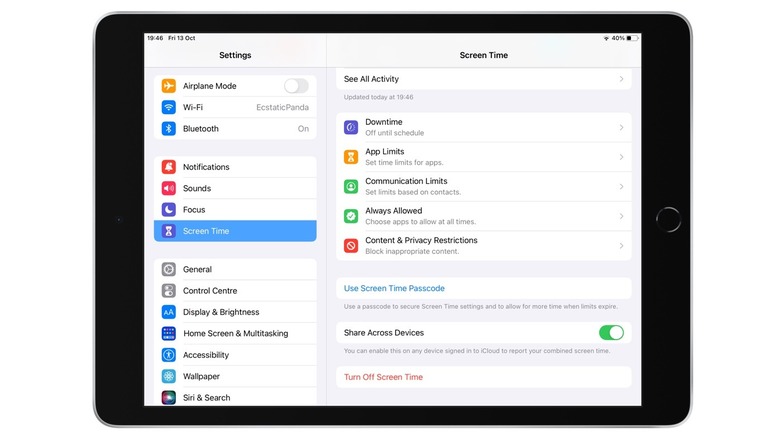
If you haven't already, you should set up parental controls on your child's iPad. To do this, you'll need to enable Screen Time:
-
Open the Settings app.
-
Tap Screen Time.
-
Tap "This is My iPad" or "This is My Child's iPad."
-
If setting up the iPad for a child, follow the onscreen instructions.
-
Enter a Screen Time passcode if prompted. This should be different from the iPad's passcode.
Once Screen Time is set up, you have several options. Under Downtime, you can schedule a daily downtime during which only phone calls and apps you select will be available. If this is enabled, you might also want to check Communication Limits to restrict communication with specific contacts during Downtime.
The App Limits setting lets you set daily screen time limits for all or specific apps. Once the daily limit is reached, your child will no longer be able to use these apps and games until the timer resets at midnight. Under Always allowed, choose the apps and contacts you want to allow access to at all times. For example, if you have a toddler, you might want to allow coloring apps and YouTube Kids, but disable Messages, Safari, and FaceTime.
Content & Privacy Restrictions can also be enabled, giving you granular control over privacy settings. This is also where you can disable iTunes and App Store purchases, restrict web content, set age limits for apps, control gaming, and turn off explicit content.
Use Find My to monitor location
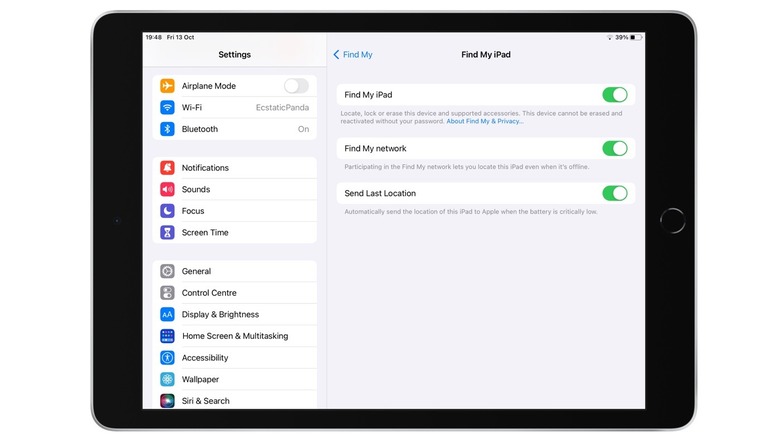
Find My is a vital feature that should be set up on every Apple device you own. If your iPad or iPhone is lost or stolen, Apple's Find My network can help you locate it. When Find My iPad is enabled on your child's iPad, you can view its location on a map, and even keep tabs on your child's whereabouts — provided they have their iPad or other Apple device with them. Here's how to set up Find My:
-
Open the Settings app on the iPad.
-
Tap the name at the top.
-
Tap Find My.
-
Turn on the toggle next to "Share My Location."
-
Tap Find My iPad and turn on the toggles next to "Find My iPad," "Find My network," and "Send Last Location."
When the Find My network is enabled, you'll be able to see the location of the iPad even when it's offline. With Send Last Location, the iPad's location will be updated in the Find My app when the battery is low.
Once Find My is enabled on the iPad, open the Find My app and tap the People tab. Tap Start Sharing Location, add yourself (and other caregivers, if required), and select Share Indefinitely. You can now open the Find My app on your iPhone, iPad, or Mac and view the iPad's location under the People tab.
Enable Family Sharing
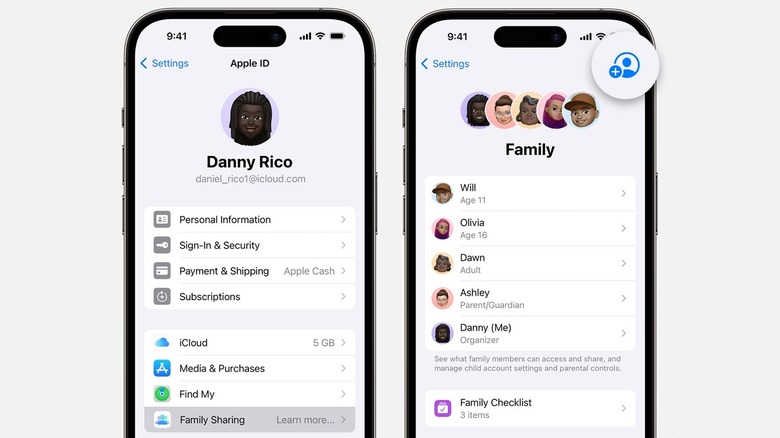
If your child has their own iPad, setting up Family Sharing will give you access to a whole host of controls, including the ability to approve purchases, set time limits and age-appropriate controls with Screen Time, view their location with Find My, and even use Apple Cash Family or Apple Card Family. You'll also be able to share subscriptions, App Store purchases, and iCloud+ storage, if you opt in.
It's worth noting that when you use Family Sharing, each family member will need to have their own Apple ID. As a result, personal information on your Apple device like apps, photos, and messages will remain private. Your Family Group can have up to six members, and requires one adult in the group to set up Family Sharing. Here's how to do it:
-
Open the Settings app on your iPhone or iPad, and tap your name at the top.
-
Tap Family Sharing.
-
Tap Continue.
-
Add members to your group from your contacts, or set up a child's account.
Create an Apple ID for your child
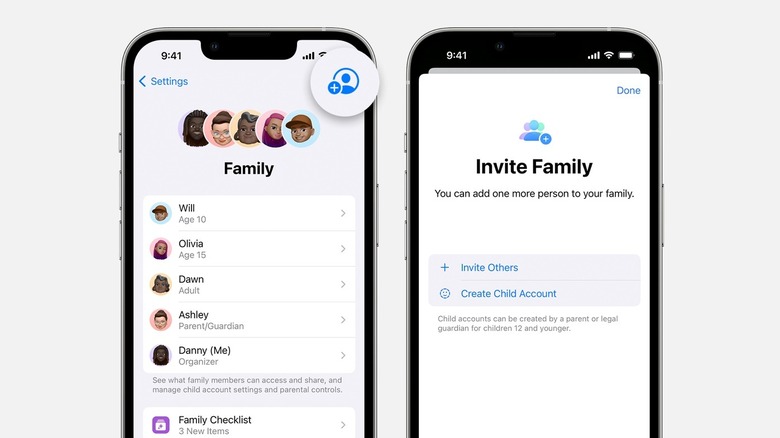
Apple lets you create a separate Apple ID for your child if you're a family organizer. This prevents them from accessing your personal data, while also letting you set up parental controls and content restrictions. Creating a separate Apple ID only makes sense if your child has their own iPad, since an iPad can only be registered to a single Apple ID.
Follow these steps to create a child's Apple account:
-
Open the Settings app on your iPhone or iPad.
-
Tap your name at the top.
-
Tap Family Sharing, and enable it if you haven't already.
-
Tap the "Add Member" button in the top-right corner.
-
Tap "Create Child Account," and then "Continue."
-
Enter your child's name and date of birth.
-
Verify your Apple ID password.
-
Use a phone number or email address to create an Apple ID. If you choose the latter, you'll be prompted to use an existing email address or an auto-generated iCloud email address.
-
Follow the prompts and complete the set up.
If your child is below 13 years of age, they will not be able to create their own Apple ID, requiring a parent or guardian to do this on their behalf.
Set up Ask to Buy to approve or decline purchases
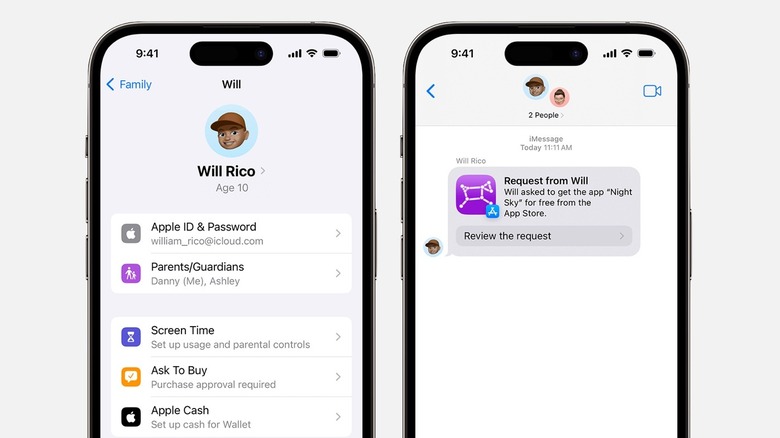
If you already have Family Sharing enabled for your child's iPad, you can set up Ask to Buy to control downloads and purchases. When Ask to Buy is enabled, children will need to send a request to the family organizer if they want to buy an item. If you're the family organizer, you'll receive a notification for the request. The item will only be downloaded if you approve the notification.
Ask to Buy requires you to set up Family Sharing first. The feature is automatically enabled for children under 13 years of age. For older children, follow these steps to enable Ask to Buy:
-
Open the Settings app on your iPhone or iPad.
-
Tap your name at the top.
-
Tap Family Sharing.
-
Tap your child's name, then tap "Ask to Buy."
-
Turn on "Require Purchase Approval."
Once Ask to Buy is set up, you'll receive purchase requests in the Messages app on your Apple device. Tap "Review the request," and then select either Approve or Decline. If you approve a request, you'll need to sign in with your Apple ID to complete the purchase.