How To Make An Old Speaker Smart With A Raspberry Pi
We may receive a commission on purchases made from links.
Quality speakers aren't cheap, but ones that can integrate into your smart home are even more expensive. The Sonos Move 2, for instance, offers much higher-quality audio than a standard Amazon Echo, Google Nest, or Apple HomePod Mini while retaining all of the basic features you would expect in a smart home speaker. Unfortunately, it costs around $200-400 for just one of them. That's a pretty hefty price tag–especially if you already have some perfectly good non-smart speakers lying around. But what if there was a way for you to turn those analog speakers into smart speakers for less than a third of the cost?
You can by using a Raspberry Pi. These tiny, affordable computers have been used in all kinds of incredible DIY projects. People have made everything from handheld gaming devices to smart hydroponics systems using them. There are a few different generations of Raspberry Pi, but the most popular ones available now are the newer Raspberry Pi 3 Model B+ and the Raspberry Pi 4. You can get them for around $50-70 and some innovative makers have even found a way to use them as the brain in their smart devices. Once you've done that, all you have to do is connect it to your speaker of choice, and you'll have your digital assistant blasting your favorite tunes in no time. Here are step-by-step instructions on how to smarten up your old speakers with a Raspberry Pi.
Step 1: Gather the parts you need
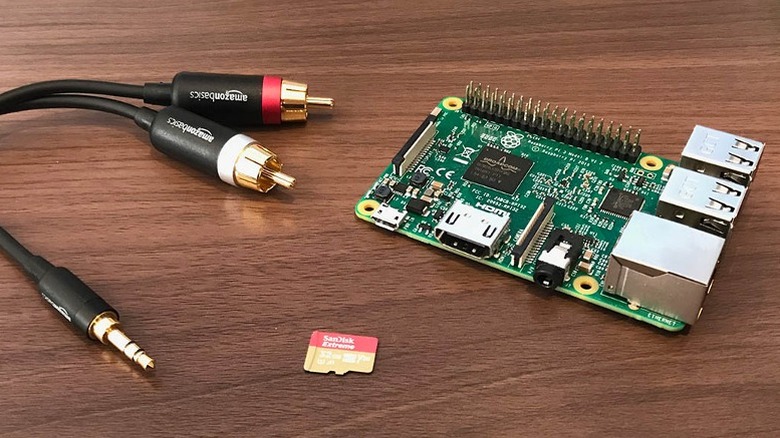
First, you'll need to gather all the parts. The centerpiece of this project is the Raspberry Pi itself. It's recommended that you spring for the 3 B+ or newer. You might also consider getting an enclosure to protect your Raspberry Pi from environmental damage. You can get a case online for fairly cheap, or those with 3D Printers can make their own. You'll also need a power cable, an 8GB microSD card for storage, and some speakers to connect.
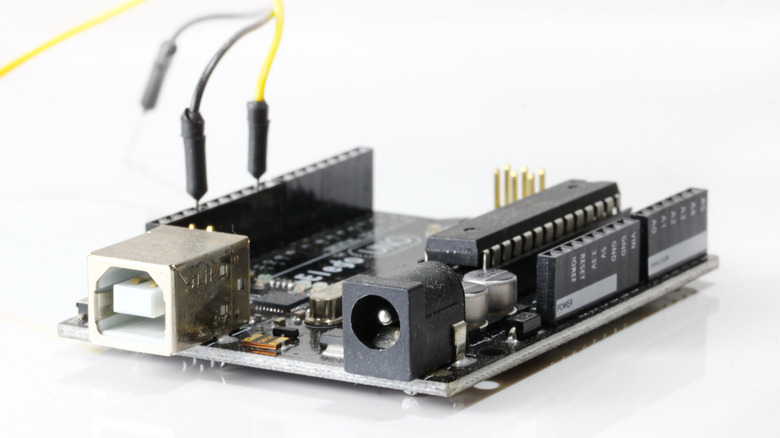
Speaking of connections, you'll also need cables to connect the Raspberry Pi to the speakers. This can be tricky, though. The Raspberry Pi only has a 3.5mm audio output. If your speakers have a 3.5mm input, then great! If not, you can buy a 3.5mm-to-RCA cable or a 3.5mm-to-speaker wire cable in order to make that connection work. These cables are all fairly affordable and will certainly get the job done.
That said, you might consider using an audio receiver or an amplifier DAC as an intermediary between your Raspberry Pi and your speakers if you really want to take this setup to the next level. There is even one made by Raspberry Pi that bypasses the built-in 3.5mm jack and connects directly to the board. Buying one will raise the price of your project a bit, but a decent DAC will improve sound quality and potentially allow you to connect multiple speakers to a single Raspberry Pi for a much fuller sound.
Step 2: Create a balenaSound profile and fleet
Now that you have all the physical components, it's time to set up the software side of things. To do that, you're going to want to use a program called balenaSound. This is what is going to turn your Raspberry Pi into a device that can play music and interface with your smart ecosystem.
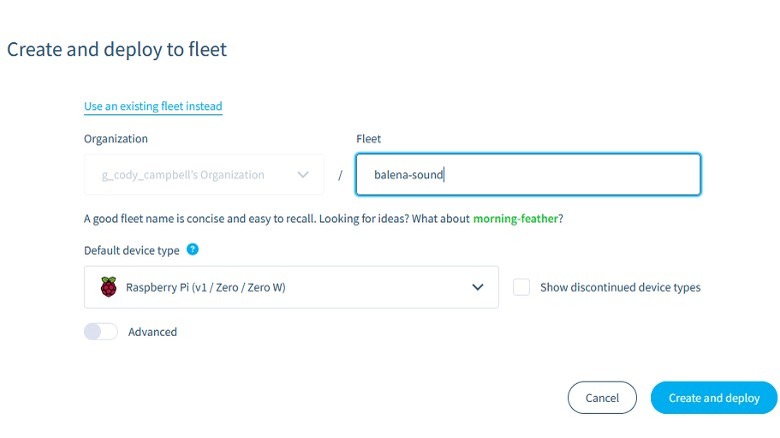
The first thing you're going to want to do is connect your Raspberry Pi to a computer. Then, you'll want to create a Balena profile and fleet. Follow this link to create a profile with Balena and generate a fleet, selecting the Raspberry Pi as the device type before deploying. Once this is done, you can click the '+ Add Device' button and add the connected Raspberry Pi to your fleet. Several dialog options will appear. Leave the OS type, version, and edition on their default settings, but click the WiFi + Ethernet radio button if you want the device to work over WiFi and not require a direct ethernet connection. You will have to type in your network ID and password and then click the button marked 'Flash.' This should be the last step in setting up the Raspberry Pi as part of your fleet.
Step 3: Download balenaSound

Now you have an account and a fleet, which should have all your device and network information, but you still have to actually get the software onto your Raspberry Pi. The first step in this process is to connect your microSD card to your computer and flash the image. You can do this using balenaEtcher or a similar program. Once that's done, eject the microSD and place it back inside your Raspberry Pi. The slot should be located on the underside of the board. Then, turn the Raspberry Pi on and make sure that it's showing as online in the fleet dashboard. If it is showing up properly, this should trigger the little computer to automatically start downloading the balenaSound app.
It might take a few minutes, depending on the speed of your internet connection and the generation of Raspberry Pi that you're using, but once it's done, you should be able to find it on your smart network and use it to start streaming some tunes.
Step 4: Assembly
The next step is to put all the pieces together. Make sure that the location where you want the speaker has easy access to a power outlet. The Raspberry Pi will need to be plugged in, as will any receivers or external DACs you might be using. It also may need to be close to your router if you did not choose to allow it to connect to your network over WiFi.
Place your Raspberry Pi board into your enclosure if you have one. Then, connect it to the AC adapter and plug it into the wall. Next, you'll need to connect the Raspberry Pi to your speakers. Most modern stand-alone speakers use RCA inputs, but some still require you to connect them using speaker wire. Hopefully, you've already figured out what kind of connection your speakers need during Step 1 and purchased the necessary cable to attach it to the Raspberry Pi's 3.5mm output jack. If so, you should be able to connect them directly to your Raspberry Pi. Alternatively, you can connect them to a DAC and connect that to the board using a separate cable.
Step 5: Configure the settings

Assuming you've configured your network settings correctly, you should be able to see your Raspberry Pi on the balenaSound dashboard as soon as the device is fully booted. You can stop here if you want. The Raspberry Pi should now be able to play music via balenaSound. That said, the Balena dashboard is also where you will be able to manage the audio and configure the settings that you want the device to have moving forward. These settings can be used to fine-tune your listening experience.
You can configure these features by using variables. They can change the name by which other devices will recognize your Raspberry Pi, change the output volume at start-up, set which room the speaker is stationed in, adjust latency, and tons of other settings. To do this, you need to find a button on the left side of the fleet dashboard called Variables. Clicking this and then clicking the 'Add a variable' button will allow you to set different variables for your device. You need to type in the name of the variable that you want to adjust in the 'Name' section. A list of the variables and their names is located on the Balena website. Once that's done, you can set whatever changes you want to make in order to have a fully customized listening experience.