How To Insert A Text Box In Google Docs Or Microsoft Word

One of the major applications of a word processing program like Google Docs or Microsoft Word, in comparison to just writing words on a piece of paper, is that they automatically keep your text neat, centered, and properly formatted. You can just keep typing and typing, secure in the knowledge that there won't be a single letter out of step. What if, though, you actually wanted a letter out of step?
If you're using Google Docs or Microsoft Word to create something with a little more visual flair, like a presentation or a brochure, you can't just type the way you normally would. At least, not without making excessive use of the Tab, Space, and Return keys. If you want the freedom to place your writings anywhere on the page, you are going to need a medium that you can use to keep them grounded. You are going to need a text box.
How to insert a text box in Microsoft Word

Since Microsoft Word has had the text box feature for so long, it's managed to effectively streamline the creation process. It just takes a couple of clicks to make a fresh text box.
-
Open a document in Microsoft Word.
-
Switch to the Insert tab on the top taskbar.
-
Click the Text Box button in the toolbar.
-
Select one of the premade text box styles from the list to add it to the document at the cursor's current position.
-
Alternatively, click Draw Text Box to manually draw a rectangle anywhere in the document.
Once you've created your text box, just click on its inside to start writing in it. While you're writing in the box, a Format tab will appear in the top taskbar, which you can use to customize the box's text (font, character size, etc.) independently of the regular document's text. You can also click and hold on the border of the text box to move it elsewhere in the document, as well as on its corners to resize it. When you don't want to edit the text box's contents anymore, just click outside of it to put the cursor back in the document.
How to insert a text box in Google Docs

Compared to Microsoft Word, the younger Google Docs has a slightly more circuitous process for creating a text box. It's still fairly simple, it just takes a bit of menu searching to find the right option.
 Daniel Trock/SlashGear
-
Open a document in Google Docs.
-
Click the Insert button on the top taskbar.
-
Select Drawing.
-
Click New to open the Drawing menu.
-
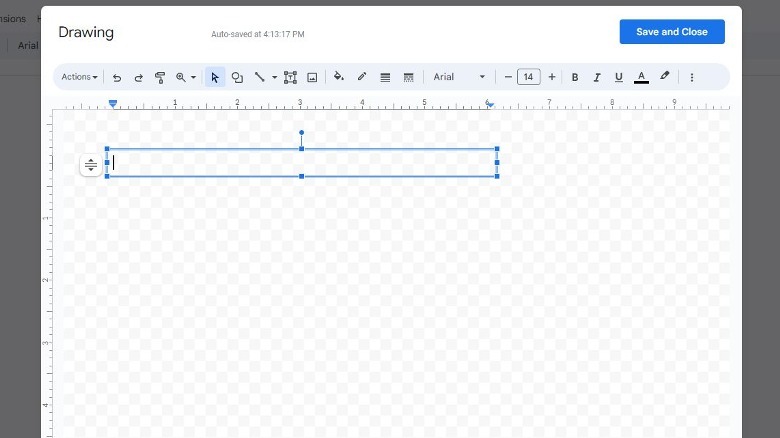
In the Drawing menu toolbar, click the icon of a T in a square to create a text box.
-
Once the text box is created, click the Save and Close button in the top-right to add it to the document.
Once the text box is in the document, it's treated as an image — you can resize the box by clicking and holding on its corners, but the dimensions of the letters within may get warped. If you want to edit the box's contents, double-click on the inside of the box to reopen the Drawing menu. As long as that menu is open, you can add text to the box, as well as use its toolbar to change fonts and formatting.