How To Use The Raspberry Pi Imager
With the incredible versatility of the Raspberry Pi, it's no longer surprising how popular this single-board computer is. It's at the core of tons of cool and weird projects, like the Raspberry Pi-based Waldo finder, International Space Station tracker, and even drive-thru signages.
But it's not only the board's versatility that makes it a go-to choice among hobbyists and professionals alike. Both beginner and advanced learners love how generally easy it is to start developing with Raspberry Pi. It features a user-friendly OS with a setup wizard. There are also tons of guidebooks and official tutorials available, on top of a starter kit that comes complete with everything you'd need to build a basic Raspberry Pi desktop.
However, to further streamline the Raspberry Pi development process, the Raspberry Pi Foundation decided to launch an official imaging tool in 2020 called the Raspberry Pi Imager. We'll go over what this utility software is and how to use it.
What is the Raspberry Pi Imager?
Developed by the Raspberry Pi Foundation, the Raspberry Pi Imager is a desktop program meant to make it easier to install an OS for the Raspberry Pi. Before, users need to go to the Raspberry Pi website (or the download page of another compatible OS) to get the OS file. Then, they need to download and install third-party software like Etcher to write the OS onto their microSD cards.
With Raspberry Pi Imager, however, you can skip downloading an .img file. The program handles the OS download for you, saving you time and effort. You won't need to go scouring the web for other OSes, too, as the imaging tool can download other most commonly used OS options for Raspberry Pi, including Ubuntu, RetroPie, Home Assistant, and OSMC. The Raspberry Pi Imager is available for free for Windows, macOS, Ubuntu, and even the Raspberry Pi OS.
How to use the Raspberry Pi Imager for installing the Raspberry Pi OS
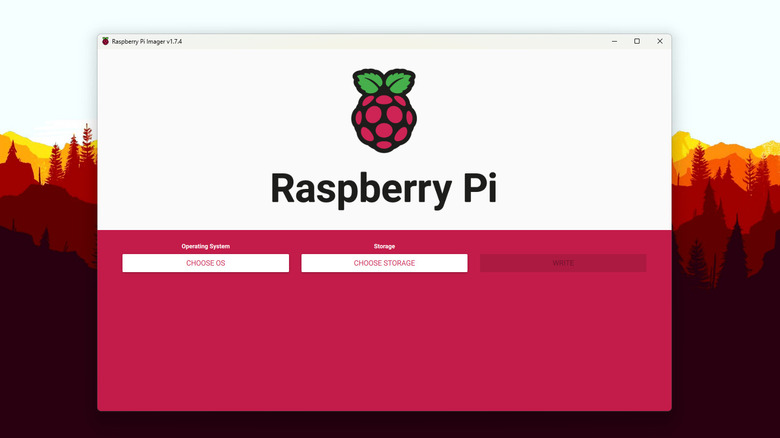
The Raspberry Pi Imager is generally intuitive and beginner friendly. Here's how to use it for installing the official Raspberry Pi OS for your single-board computer:
- Go to the Raspberry Pi Imager download page.
- Download and install it on your computer.
- Connect your microSD card to your computer.
- Launch the app.
- Click Choose OS.
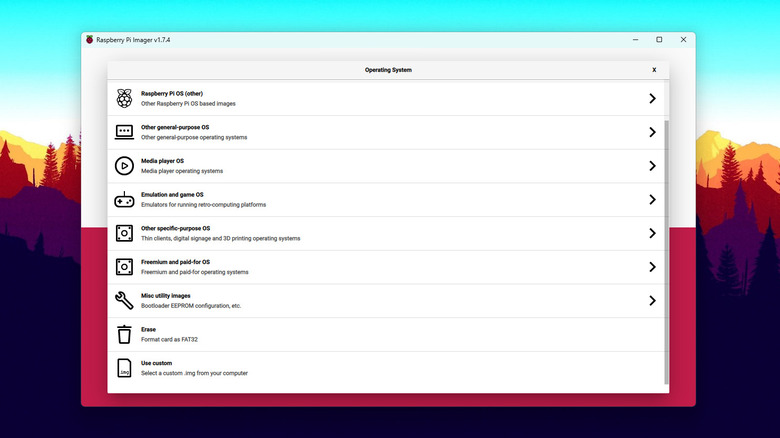
- In the OS window, select your preferred OS.
- If you're new to Raspberry Pi or want to use it for general purposes, choose Raspberry Pi OS. This is the most up-to-date version of the official OS for RPis. It's a desktop version, so you get a graphical user interface and all recommended apps.
- If you want a minimal version of the Raspberry Pi OS, click on Raspberry Pi OS (other) and select Raspberry Pi OS Lite. This comes with no desktop environment and boots directly to a command line. If you want to configure your Raspberry Pi OS before installing it to your card, press the gear icon in the bottom right corner of the window. Here, you can set a hostname, enable SSH, and connect the RPi to Wi-Fi, among other things. Hit Save to save your settings.
- Click on Choose Storage and select your microSD from the list.
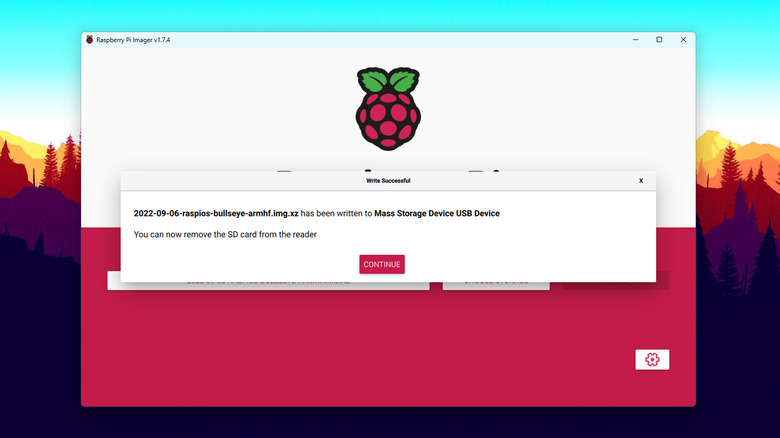
- Click on Write to proceed with the installation.
- Select Yes to proceed.
Wait for the process to finish. You will see a notification pop-up whether the installation was successful or not.
How to use the Raspberry Pi Imager for installing another OS
If you don't want to use the official Raspberry Pi operating system, follow these steps to use the Raspberry Pi Imager for installing another OS:
- Connect your microSD card to your computer.
- Launch the Raspberry Pi Imager.
- Click on Choose OS.
- In the OS window, select the OS of your choice.
- To still use your Raspberry Pi as a computer, click on Other general-purpose OS and select your OS.
- To turn your Raspberry Pi into a media player, click on Media player OS and choose your OS from the list.
- To use your Raspberry Pi for gaming, click on Emulation and game OS and pick your desired OS.
- To use your Raspberry Pi for other specific purposes like home automation and 3D printing, go to Other specific-purpose OS to choose your OS.
- If you're using a custom OS you've downloaded online or made yourself, click on Use custom and upload your .img file.
- Go to Choose Storage and click on your microSD from the list.
- Select Write to proceed with the installation.
- Click on Yes to confirm.
After the installation, you will also get a pop-up notifying you of the status of the installation.
How to use the Raspberry Pi Imager for formatting a microSD card
Apart from writing the operating system to your microSD card, you can also use the Raspberry Pi Imager to format the card as FAT32. This is particularly helpful for cases when you have an NTFS or exFAT card or simply want to erase the contents of the microSD card before writing a new operating system or after an OS installation fails. Here's how to use the Raspberry Pi Imager for formatting:
- Insert the microSD card into your computer.
- Launch the app.
- Click on Choose OS.
- Scroll to the bottom of the list and select Erase.
- Click on Choose Storage.
- Select the microSD card.
- Click on Write.
- In the warning pop-up, select Yes to proceed with the formatting.
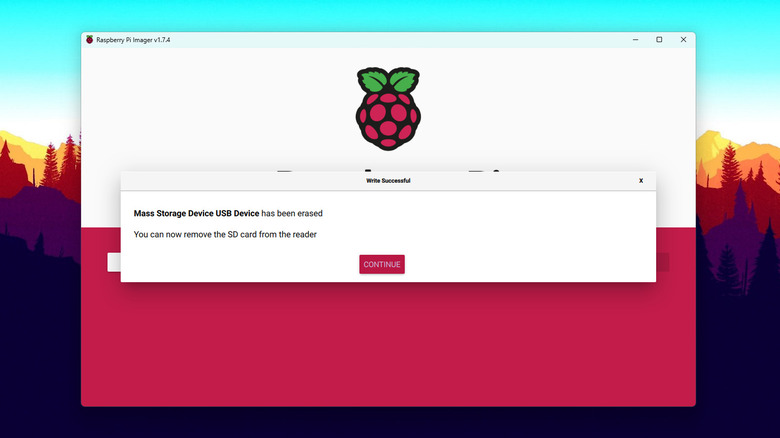
Once that's done, you will get a notification informing you whether the formatting process was successful or not. Click on the Continue button to exit.