Settings On Your Nintendo Switch That Are Ruining Your Experience
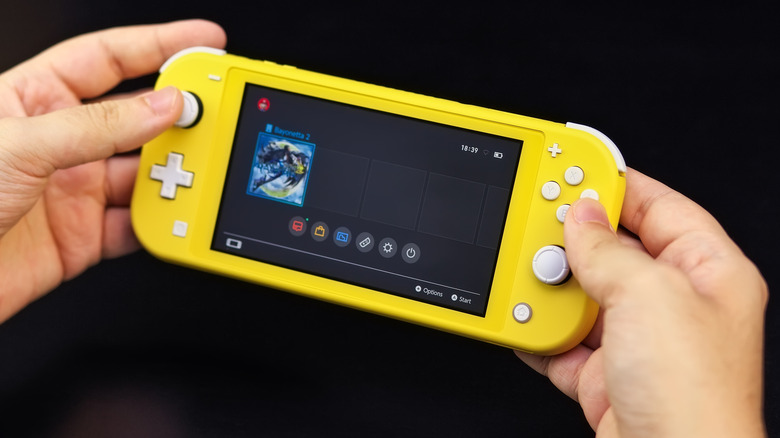
Nearly a decade after its launch (and after the launch of Nintendo's follow-up console), the Nintendo Switch is still a great console for young and grown gamers alike. There's no denying that the Switch has hit a sweet spot between a handheld and a full-fledged console. However, that doesn't mean there aren't a few hiccups. Aside from the widely reported joystick drift, there are a few things about the Switch that need some fine-tuning. However, not all of the problems are hardware related. There are many quirks about the user interface that hinder one's enjoyment of the console.
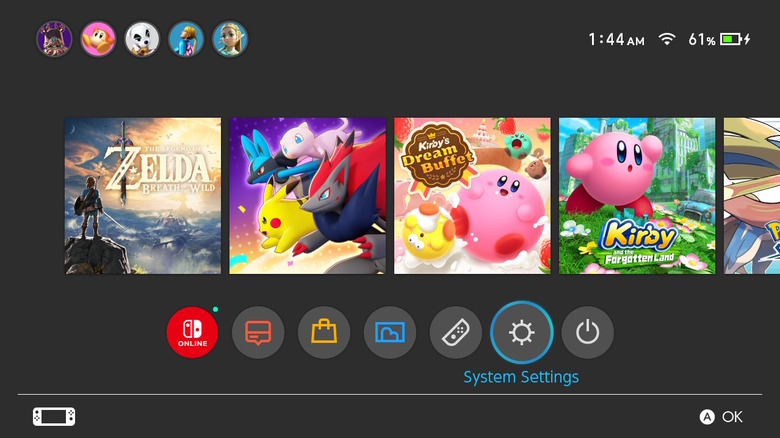
Luckily, many of these issues can be fixed in the settings themselves. There are many parts of the Switch interface that can be adjusted or outright disabled by toggling a few buttons. Here are some of the settings on your Nintendo Switch that are ruining your experience, and how to fix them. This includes everything from jumping into games faster to finally using Bluetooth headphones with your Switch.
Default Airplane Mode Settings
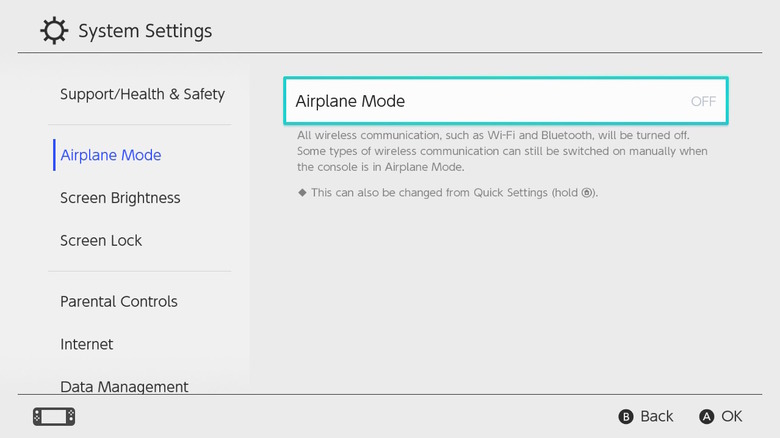
Airplane Mode on mobile devices instantly turns off all wireless communications. That includes Wi-Fi, Bluetooth, NFC, and cellular connections if your device has it. However, of all of these, it's the last that is the most important while flying on an airplane. Bluetooth in particular isn't important to disconnect while you're on a plane, and many airlines offer in-flight Wi-Fi.
However, Airplane Mode still disables all of these settings, at least by default. That being said, you can actually go into the settings menu and tweak the Airplane Mode settings to disable certain features while keeping others active.
To do this, follow these steps:
-
Go to Settings then Airplane Mode.
-
Toggle Airplane Mode on, and you should see options for Bluetooth, Wi-Fi, and NFC come up individually.
-
Select which options you want to keep on.
You'll have to toggle these each time, but it's only a few button presses. While this is good for air travel, turning on Airplane Mode for any extended amount of time you don't need these features will extend your battery life. You can also access Airplane Mode by long pressing the Home button.
Light Mode
Dark Mode is all the rage right now, and there's a reason people love it. Dark Mode is easier on the eyes, especially if you spend a lot of time staring at your screen in dark or dimly lit rooms. However, the default Light Mode can be a serious eyesore, especially if you're coming out of a game and into the bright white menu screen.
You can save yourself from some serious headaches by just flipping your Switch to Dark Mode as well. Just open Settings and scroll down to the Themes option. There are only two themes: Basic White and Basic Black. Select Basic Black to get a much more pleasant Dark Mode experience. It even has a nice mint green accent color. This is a system-wide change, so you'll see this in the setting menu, news section, and more. The only exception is the Nintendo eShop.
Lock Console
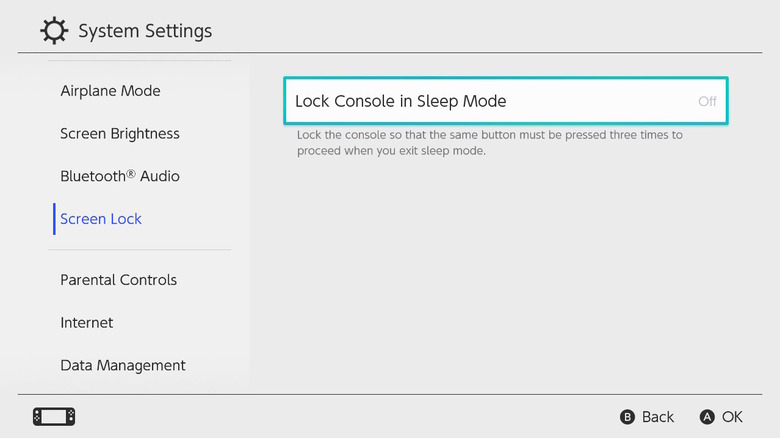
Lock Console seems like a good idea on paper. Essentially, once your device goes into Sleep Mode, you have to tap the same button three times to wake it up. This prevents you from accidentally waking up the console while it sits in your bag and draining the battery unnecessarily. The actual result is actually just annoying and repetitive. It seems like a fringe use case scenario, especially if you have the Switch set to Auto-Sleep after a short period anyway.
It doesn't have to be like this, though. Just head to Settings, then Screen Lock and toggle the setting off. Now instead of tapping the Power button and then another button three times, you just simply have to tap Power and then the A button once. It's much more sensible, and it's one less hoop to jump through to get into the game. If security is a concern for you, it's probably better to set up a passcode on your Switch anyway.
Turn on Match TV Power State
The Match TV Power State option is 100% necessary if you play a lot with your Switch docked. Essentially, TV Power State syncs your Switch with your television. When you power the TV on, the Switch will automatically turn on. When you power the TV down, the Switch will turn off with it. It's one of those settings that seems like it should be on by default — but isn't. This doesn't work with every TV model, but it should work with a great many of them.
To turn this feature on, go to Settings, TV Settings, then Match TV Power State. It goes without saying that this feature isn't available on the Nintendo Switch Lite since you cannot connect it to an external display. This feature will also stop your Switch from staying on needlessly while the TV is off. It's more convenient for users who primarily use the TV for playing the Switch. If you plan on doing anything else on the TV, make sure your Switch isn't also still sticking on at the same time — multiple inputs make for a potential mess, to be sure.
Friends notifications
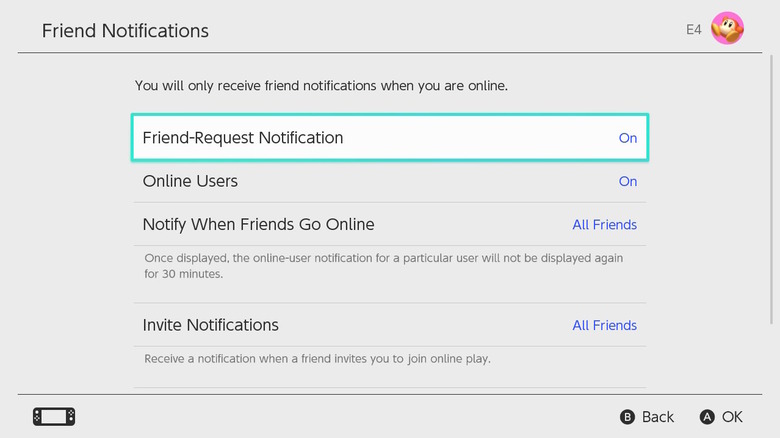
We all love having friends to play with, but we also don't want to know what they are doing every single time they log on. By default, the Switch will inform you every time one of your friends logs on or logs off. This can get annoying very quickly, especially if you have a lot of friends.
To get these notifications under control, head to Settings, then Friend Settings. It will then ask you which user you want to adjust settings for. In the next menu, you can toggle on settings for Friend Request notifications, when users come online, and game invite notifications. You can tune these settings so that you are only notified when close friends come online, or no one. If you're annoyed by all the notifications you get from friends, these adjustments should be a top priority for you. It's also good for parents if they don't want their kids to play online with strangers.
User selection
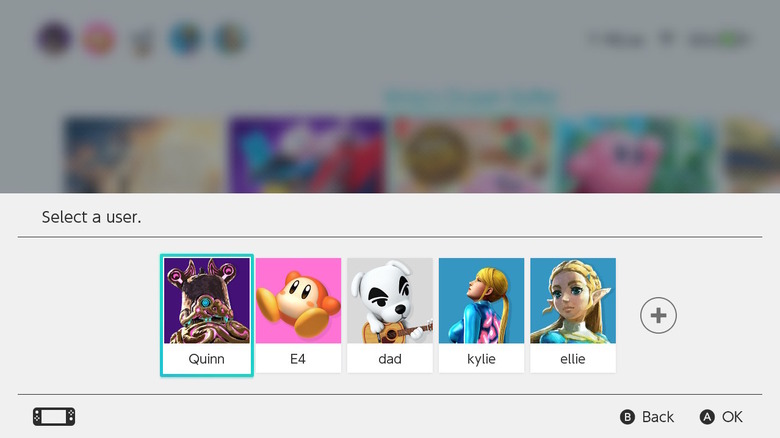
The Nintendo Switch is designed with multiple users in mind, allowing each person in the household to have their own custom profile. As such, when you go to select a game, you need to select which user will be playing. That might be fine for families, but it can be annoying if you're the only person using it. It's especially annoying on the Switch Lite since that console is geared more toward single users.
If you're the only one using your Switch, you can actually toggle user selection off so you can jump right into the game. To do so, go to Settings, Users, and Skip User Selection. This option only appears if the console only has one profile. It may seem like a little thing, but it's one less button to press and a few seconds shaved off to get you in the game. There is no reason not to do it.
Bluetooth Audio
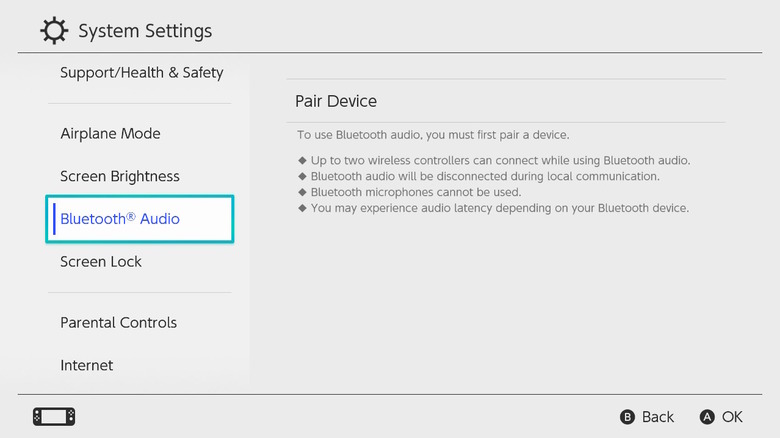
When the Nintendo Switch first launched, you could not pair Bluetooth headphones to the device. This was annoying especially considering you could pair Bluetooth controllers. However, last year Nintendo finally added support for Bluetooth audio to the original Switch, Switch Lite, and Switch OLED. You can even connect a Bluetooth speaker if you want a bigger sound experience in handheld mode.
To enable Bluetooth audio, set your Bluetooth earbuds or headphones into pairing mode. Then go to Settings then Pair. Wait for your device's name to show up then select it. You can also head to Settings then System to lower the max headphone volume and mute the audio if the headphones become disconnected. Those are important options to change so you don't harm your ears or accidentally blast your Switch at full volume while riding the boss.
The Switch can only connect to one Bluetooth audio device at a time, but it can remember up to ten.
Data storage and System Memory options
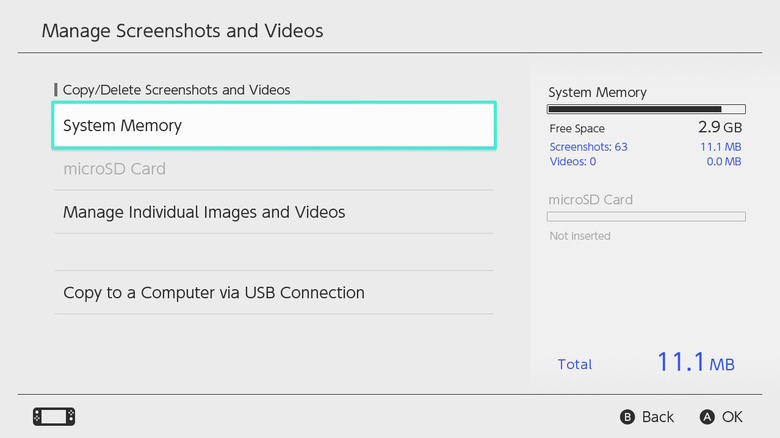
One of the biggest flaws of the Switch is the abysmally small internal storage. A microSD is all but necessary to enjoy more than a handful of games at a time. This is doubly true if you find yourself taking a lot of screenshots or screen recordings. Even if you have a large microSD card, new games, save files, and screenshots may still be saved on the internal storage.
To manage this, head to Settings then Data Management. On the first screen, you can manually move data between the System and your microSD card. Make sure all your games are on the SD card so your internal memory is reserved for system software. You can also hit Quick Archive to free up space fast.
Head down to Manage Screenshots and Videos to make sure everything is saved on the SD card as well. You can also connect the Switch to a computer to move the files over to your PC.