12 Best Uses For Old Computer Keyboards
We may receive a commission on purchases made from links.
You probably don't think about your computer keyboard very often. That's unusual, considering how much time we spend with our fingers on the keys. It's almost as if keyboards have become so ubiquitous that they're little more than interactive scenery; used and then forgotten.
There's a reasonable chance that on any given day, you carry out more communication with others through the interface of a keyboard than through any other means. Through a complex combination of keystrokes, we jam out tweets, send emails, create and respond to posts, and compose novels or poetry. So many words wouldn't be possible — or at least as convenient — without the humble keyboard.
Given our close relationship, it's only fitting that your keyboard should receive the respect it deserves even when you no longer need it. No trash heap or thrift store shelf is good enough for the device that got you through the Tumblr years. It needs something better, a way to memorialize the good times and the bad, or at least one last project before you part ways forever. Keyboards, however, don't lend themselves easily to secondary uses. So, if you want a second life for your trusty keyboard, you might have to break out the craft supplies.
Jewelry
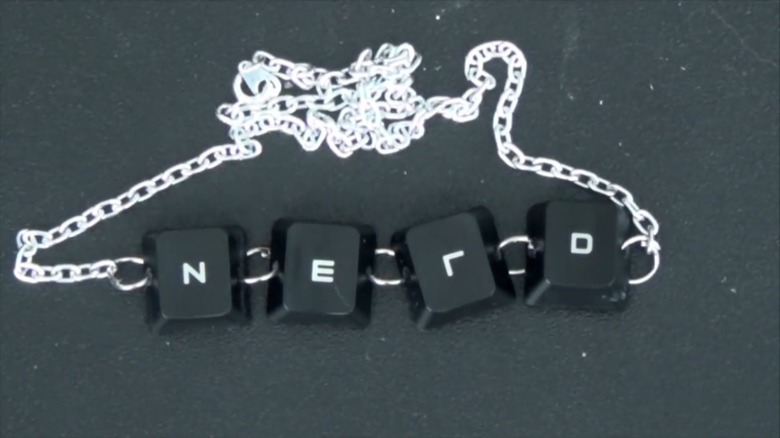
While keyboards facilitate the magic of translating subtle finger movements into recognizable communications, they're relatively simple devices. A majority of the keyboard's construction is comprised of plastic that is easily separated into bits for reuse.
Once disassembled, the clever jewelry maker is left with dozens of free-floating pieces just waiting to be transformed into your next fashion accessory. Charm jewelry has a long and storied history, dating back to more than 2,000 years ago (via History Daily). While the practice is old, it remains a popular form of adornment today.
Many of the first accessories any of us ever owned or created were of little lettered beads on a string, spelling out our own names or the names of our friends. Using an old keyboard, you can recreate that pseudo retro feel with the keys from your very own keyboard. It might not be fashionable, but it's certainly sentimental. Most modern keyboard keys can be easily pried loose from their housing with a flathead screwdriver or a butter knife. Once they're loose, you can mount them a ring housing or an earring back and you're ready for a moderately fancy dinner at a reasonably priced establishment.
Purse
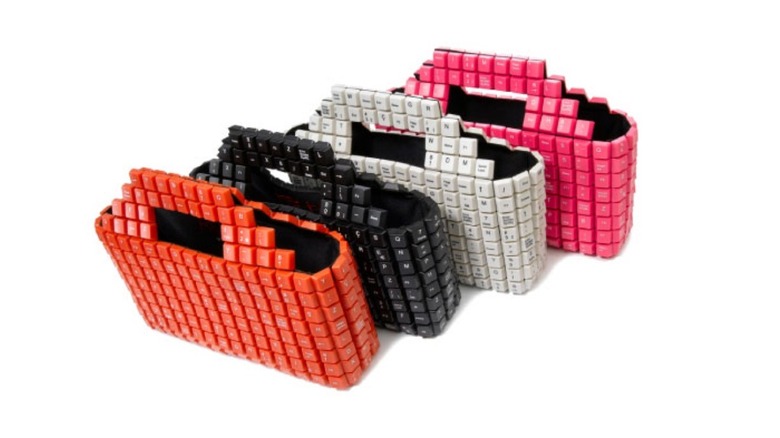
Despite our best efforts, most of us can't help but slowly accumulate more and more stuff. Eventually, we all reach a point where there are too many critical items to carry. You've got your phone, your wallet, your keys, lip balm, emergency medications, a snack in case you get hungry later, that thing you're supposed to return — you get the idea. There are too many things to comfortably carry in your hands and/or pockets. It's time to get a bag.
You probably already have a collection of backpacks, briefcases, totes, and other bags. You might even have a bag specially designed for holding your keyboard, laptop, or tablet. Now it's time to put the shoe on the other foot with a bag made out of an old keyboard, perfectly suited for carrying just about anything else.
Various designers have made an attempt at the perfect recycled keyboard bag. There's the sleek fluidity of Joao Sabino's Keybag, as presented by Trendhunter, or there's this grungier but probably more comfortable shoulder strap bag. Either of those could serve as inspiration for your very own creation.
Once again, you'll need to remove each individual key and attach it to a flexible fabric. This project requires at least a passing familiarity with a needle and thread, but a purse is a pretty simple shape. We believe in you.
Wallet

For those of you who carry wallets instead of purses, you'll have to look further beneath the keyboard's surface for a solution. Of course, if you really wanted to, you could remove the keys and attach them to fabric to craft a matching purse and wallet pair, but no one wants keyboard keys jabbing through the fabric of their back pocket. There's a better solution to your keyboard wallet dreams.
First, inspect your desired keyboard to identify the types of screws holding it together. If you've got a PC keyboard it's likely it uses common Phillip's head screws, but you may need a specific wrench to get inside. Once you've got the right tools you can remove all of the screws to get to the keyboard's interior. Next, you'll remove the circuit board — there may be some additional screws holding it in place. Then, remove the circuit sheets. Be careful with them as they make up the majority of the wallet.
Next, you'll cut out eight squares in two different sizes. The sizes of the squares are limited only by the desired size of the final wallet as well as the size of your circuit sheets. The folks at Howcast recommend cutting six 3-inch by 4-inch squares and two 3-by-3 squares. Finally, you'll use adhesive tape to bind the pieces together into a functioning wallet. For best results, check out the video tutorial from Howcast.
Reskin it
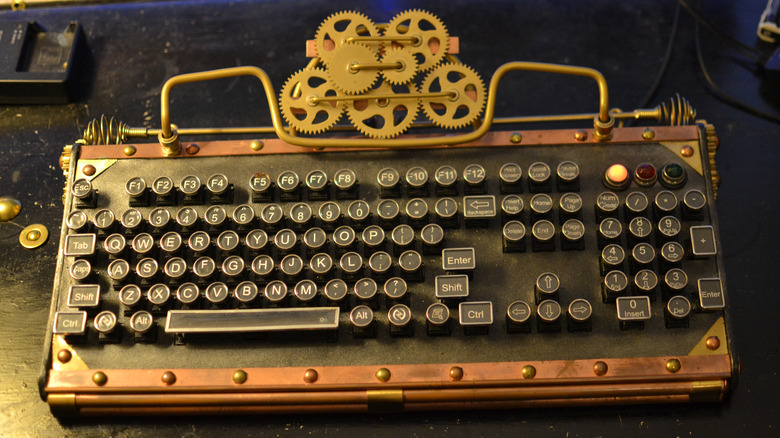
Sometimes your keyboard isn't actually toast, it just needs a new coat of paint. If your keyboard still has some good years left in it but the sight of it is driving you wild, it might be time for a makeover. The folks at the Steampunk Workshop have a complex but satisfying suggestion to transform your workaday mundane keyboard into one which harkens to a more stylized reality.
According to Steampunk Workshop, this project is well-suited for significantly older keyboards, the kind you might have used on the family computer in the '90s. If you're working with something else, this project might need some modifications. It's also worth noting that converting your old keyboard into a steampunk mashup of art and function requires some specialized tools and skills. This project first tears your keyboard down so you can make it new again, by making it look even older.
Steampunk Workshop notes that you'll need to remove each individual key while leaving the rest of the keyboard intact, cut a custom frame and decorations out of brass, as well as cut and punch fabric in the precise configuration of your keyboard. The crux of the project, however, hinges on replacing all of your old keys with new ones. They can be ordered online or taken from a vintage typewriter. For complete instructions, check out the step-by-step guide.
Buttons or cufflinks
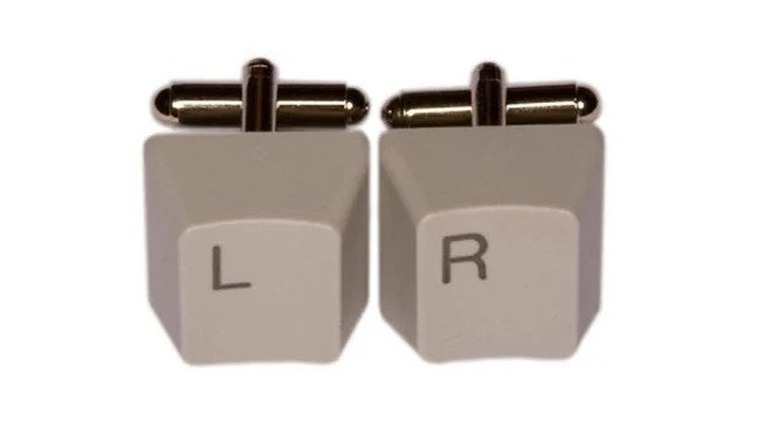
Maybe you want to wear your love of keyboards on your sleeve, but earrings and charm bracelets are just a little too ostentatious for your taste. Enter the subtler and more stylish buttons and cufflinks. Not only is this a more discreet way of keeping your old keyboard close, but it's also among the easiest projects we have for you.
You'll only need a few supplies, at least one of which you already have at hand. There aren't any scissors or saws, and you won't be using any power tools. All you need is your old keyboard, an adhesive like epoxy, and the base of a cufflink or button, both of which you can find at your local craft store or online.
Before you get started, however, take a moment to inspect your keyboard. Consider the wide array of buttons, each with its own special function. Now choose your favorites. Those are the keys you want to carefully remove. If you're making cufflinks, you'll need at least two keys. If you're making buttons, the sky's the limit.
Now take out a flathead screwdriver — the only tool you're going to need — and pop the keys you've chosen off of the keyboard frame. Once you've got them all liberated, generously apply adhesive to the back side of each key and jam the cufflink or button base right in there. Wait for it to cure and you're ready to attach them to your favorite threads.
Clock
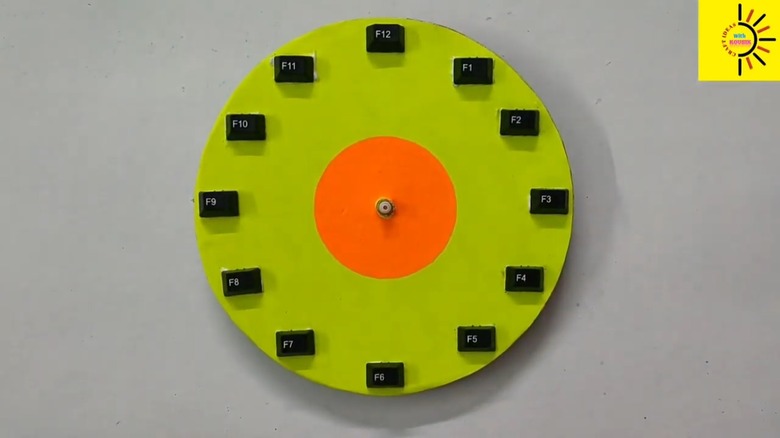
What better way to celebrate the time you and your keyboard spent together than to use its pieces to tell time? Admittedly, most of the keyboard will still end up in the trash bin, but you'll at least be able to keep a piece — or several pieces — close to you in your custom-made clock.
Much like the cufflinks and button project, you'll begin by carefully removing keys. This time, however, your choices are limited by their intended function. You're looking to fill the 12-hour slots on the clock with keys. Your instinct might be to go straight to the Numpad or the number keys above the top row of letters, but there's a snag. Even with both sets of numbers, you're short on the number "1." Instead, we recommend using the function keys. They very conveniently run from 1 to 12 already.
Once you've collected your keys, you'll want to cut out a circle from whatever backing material you want to use. It could be wood, metal, or anything sturdy enough to support the rest of the clock. Attach the function keys, each 30 degrees apart, to denote each of the hours and mount a clock mechanism in the middle. If all of that sounds like too much work, you could stop at removing the keys and attach them to an existing clock that you already own.
Keyboard Rubik's cube

Rubik's cubes are one of the most famous toys ever created. Invented in 1974 by Hungarian designer Erno Rubik (via National Museum of Play), the toy has since gone on to sell nearly half a billion units. It's reasonable to assume that most of us have toyed with a Rubik's cube at least a few times. Now you can make your own custom cube using pieces from your old keyboard.
For this project, you're actually going to need at least two keyboards, possibly three. It all depends on if you have a Numpad or not. In total, you want six sets of numbers: one set from the Numpad, one from above the top row of letters, and the function keys. Pulling those from two keyboards will give you the six sets you need. Although, if you've only got one keyboard to work with, you could strategically choose letters and symbols to fill in the remaining sides.
Next, you'll prepare the cube by removing the colored stickers from each of the squares and cleaning the surfaces. Before you affix the keyboard keys to the cube, take a moment to inspect them and trim away any excess plastic bits so they lie flat. Remove each of the squares from the cube and glue the keys to their surface, then let dry. Finally, reassemble your cube. Now you've got a puzzle cube that uses numbers instead of colors. For full instructions, check out this tutorial from Instructables.
Learn circuitry

If you've opened up your keyboard for one of the other projects and found yourself fascinated by the sprawling lines of the circuit sheets, this might be the solution for you. After you've taken the sheets out of the keyboard but before you commit to cutting them up into a wallet, you might want to consider learning circuitry.
The circuit sheets give you a novel window into the way circuits work by presenting them in a transparent and flexible material you can turn over in your hands and inspect. Generally, the keyboard's circuit sheets work by completing or breaking a circuit each time a key is pressed (via Easy Tech Junkie). By sensing which circuit was modified, the keyboard can tell which key was pressed and transmit that information to your computer, translating finger motions into letters, numbers, and symbols.
The circuit sheets are also compatible with dry-erase markers, allowing you to mark up the circuit sheet with the corresponding characters or trace individual circuit paths to see where they go. There's often no better way to understand how something works than to look at its guts. The circuit sheets serve as a figurative X-ray, allowing you to see your keyboard's bones. Then, if you want to cut them up and make a wallet, that's up to you.
Desktop organizer
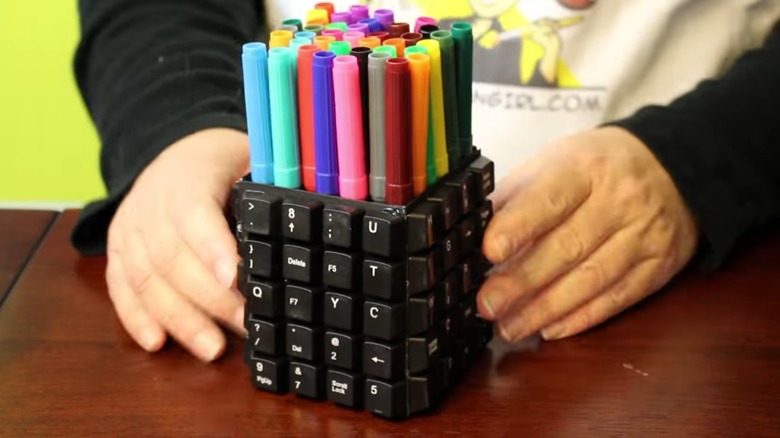
Even if your keyboard no longer works, that doesn't mean it needs to be banished from your desk for all time. Using an old keyboard, some cardboard, adhesive, and a few common tools, you can craft an open-topped cube for holding your pens, pencils, and other small items. This is a perfect keyboard craft project to do with kids.
As explained by Geeky McFangirl on YouTube, you'll first need to remove all of the keys from your keyboard using a flathead screwdriver. In actuality, you only need 80 for your desktop organizer, and there are just over a hundred keys on a standard keyboard, so you won't need to remove all of them. Once you have your 80 keys, use wire cutters or a utility knife to trim away any excess plastic so they lie flat.
Trace out a simple pattern with four sides and a bottom onto a piece of cardboard. Fold the sides up and tape them together, then paint the surface and interior whatever color you prefer. Finally, use a glue gun to attach the keys to each of the four sides. It takes about 20 keys per side in a 5-by-4 grid. Let the glue dry and fill your new organizer with all of your desktop knickknacks.
Make magnets or pushpins
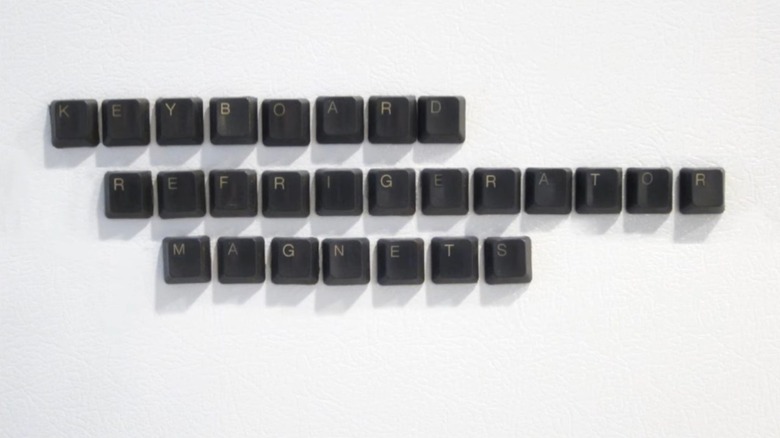
You've probably never realized, and there's no reason you would have, that keyboard keys are the perfect size for fridge magnets or pushpins — you just need a way to make them stick. All you'll need is your old keyboard and a whole bunch of small magnets or a box of pushpins.
Break out your trusty flathead screwdriver and start prying keys loose. Once again, you don't have to remove all of them. Take a moment to plan before you get started and decide which keys you want. Once you have the desired keys, apply some hot clue or other adhesive and jam your magnets or pushpins inside each key. Then let it dry (via Naturally Savvy).
Job done! Now you've got a more modern spin on the relatively common word fridge magnets. You can use your key magnets to spell out anything you want on your fridge — as long as it doesn't have any repeating letters, of course. You can also use them to pin notes, artwork from your kids, and coupons you'll never use. Just like any other magnet or pushpin.
Pixel art
So far, we've largely presented simple craft projects utilizing one component or another from your old keyboard to make something useful or aesthetically pleasing. With a couple of exceptions, most of these options can be achieved with common household supplies and basic skills. However, there is a hard mode option for computer keyboard upcycling.
If you want to push your old keyboard and your artistic ability to greater heights, take some inspiration from artist Erik Jensen and make some pixel art using old keyboard keys. Jensen uses tens of thousands of keys, each individually painted, to craft stunning recreations of famous works of art like da Vinci's Mona Lisa or Van Gogh's Starry Night (via Insider).
Most of us aren't trained artists and don't have hundreds of keyboards at our disposal, so we'll need to start smaller. You'll want to do a little planning before you get started. Luckily, there are countless pixel art templates available online for just about any character or image you can imagine. Look for something with 100 pixels or less, since that's about what you have to work with.
Once you've chosen your image, pry the keys loose using your screwdriver or butter knife and paint them the necessary colors. Then plant them down in order using glue and a flat surface. Bonus points if you hide a secret message in the keys of your new work of art.
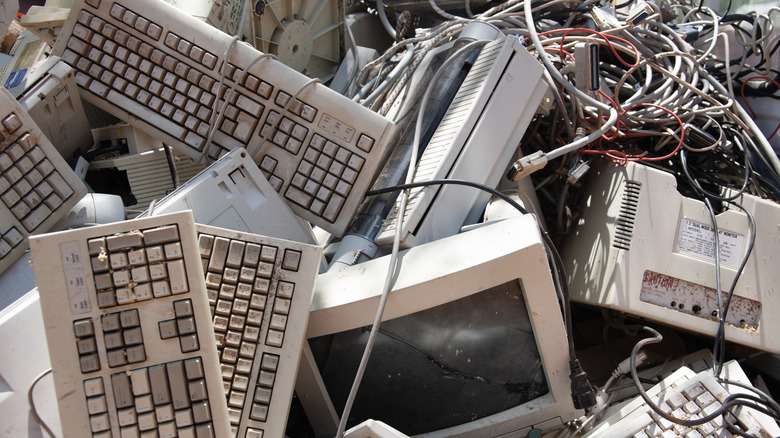
Recycle it

When all else fails, you might just have to get rid of your old keyboard after all. Even if you've decided to take up one of the above projects, you're likely going to be left with pieces of the old keyboard left behind and they need to be handled responsibly.
Electronics are unlike other household garbage in that they often contain materials which are both valuable and potentially dangerous. As a result, most places have dedicated electronics recycling programs you can utilize to get rid of your electronic waste. Keyboards aren't quite as nefarious to throw away as other more complex electronics, but they do still have some worrying components. In particular, many keyboards are coated with flame retardant chemicals that protect you from fires but can leech into the ground when chucked into a landfill (via Mech Keybs).
Check your local government for the best ways to recycle your old tech. You can also check the resources available from the EPA or the governing body in your part of the world. And, as always, if your keyboard still works but you no longer want or need it, thrift stores or charities are great ways to hand off your old tech to someone who can use it. The best way to recycle a keyboard is to let it keep being a keyboard.